Creating a manual credit note
Manual Credits can be used to add Marketing contributions, partial refunds, or to write off small amounts of debt - typically bank fees - although please note bank fees can be written off using an 'adjustment' in the Receipts screen.
Please refer to your Finance team to confirm when manual credits can be used in your organisation.
Manual credits once created can be used in the Receipt or Payment screen to cross allocate against other Invoices.
Not all staff will have system permission to create a manual credit. If you require access please contact your Systems Administrator.
In general manual credits should not be used to reverse finance that has been generated by an Enrolment. To reverse finance generated by an Enrolment, please use the Enrolment screen to cancel Bookings which will automatically reverse finance (and will also cancel Bookings and Placements as needed).
Notes
Not all services are set up for manual crediting. if the service code you need is not available from the drop down list, please contact your Systems Administrator.
When posted the manual credit will create finance records and spread the income according to the start and end dates assigned.
You cannot part create a manual credit, there is no temporary save option, once it is completed and saved the credit is posted.
Before starting the credit you will need to gather the below information.
Course, accommodation, transfer and sundry service codes.
The total price for each of the above.
Any agent, student or company name if required.
Any commission or discount percent to apply to an agent.
The posting/reference date of the credit.
The date spread start and end if you are applying a credit to resolve an issue with a booking and cannot do it through the enrolment screen.
Typical credit notes for Bank Fee write offs will use a 'Bank Fee' Service. It is important the correct 'Service' is used for the finance to be posted correctly in the right finance nominals for finance. Please check with your Finance Department if you are unsure.
Step-by-step guide
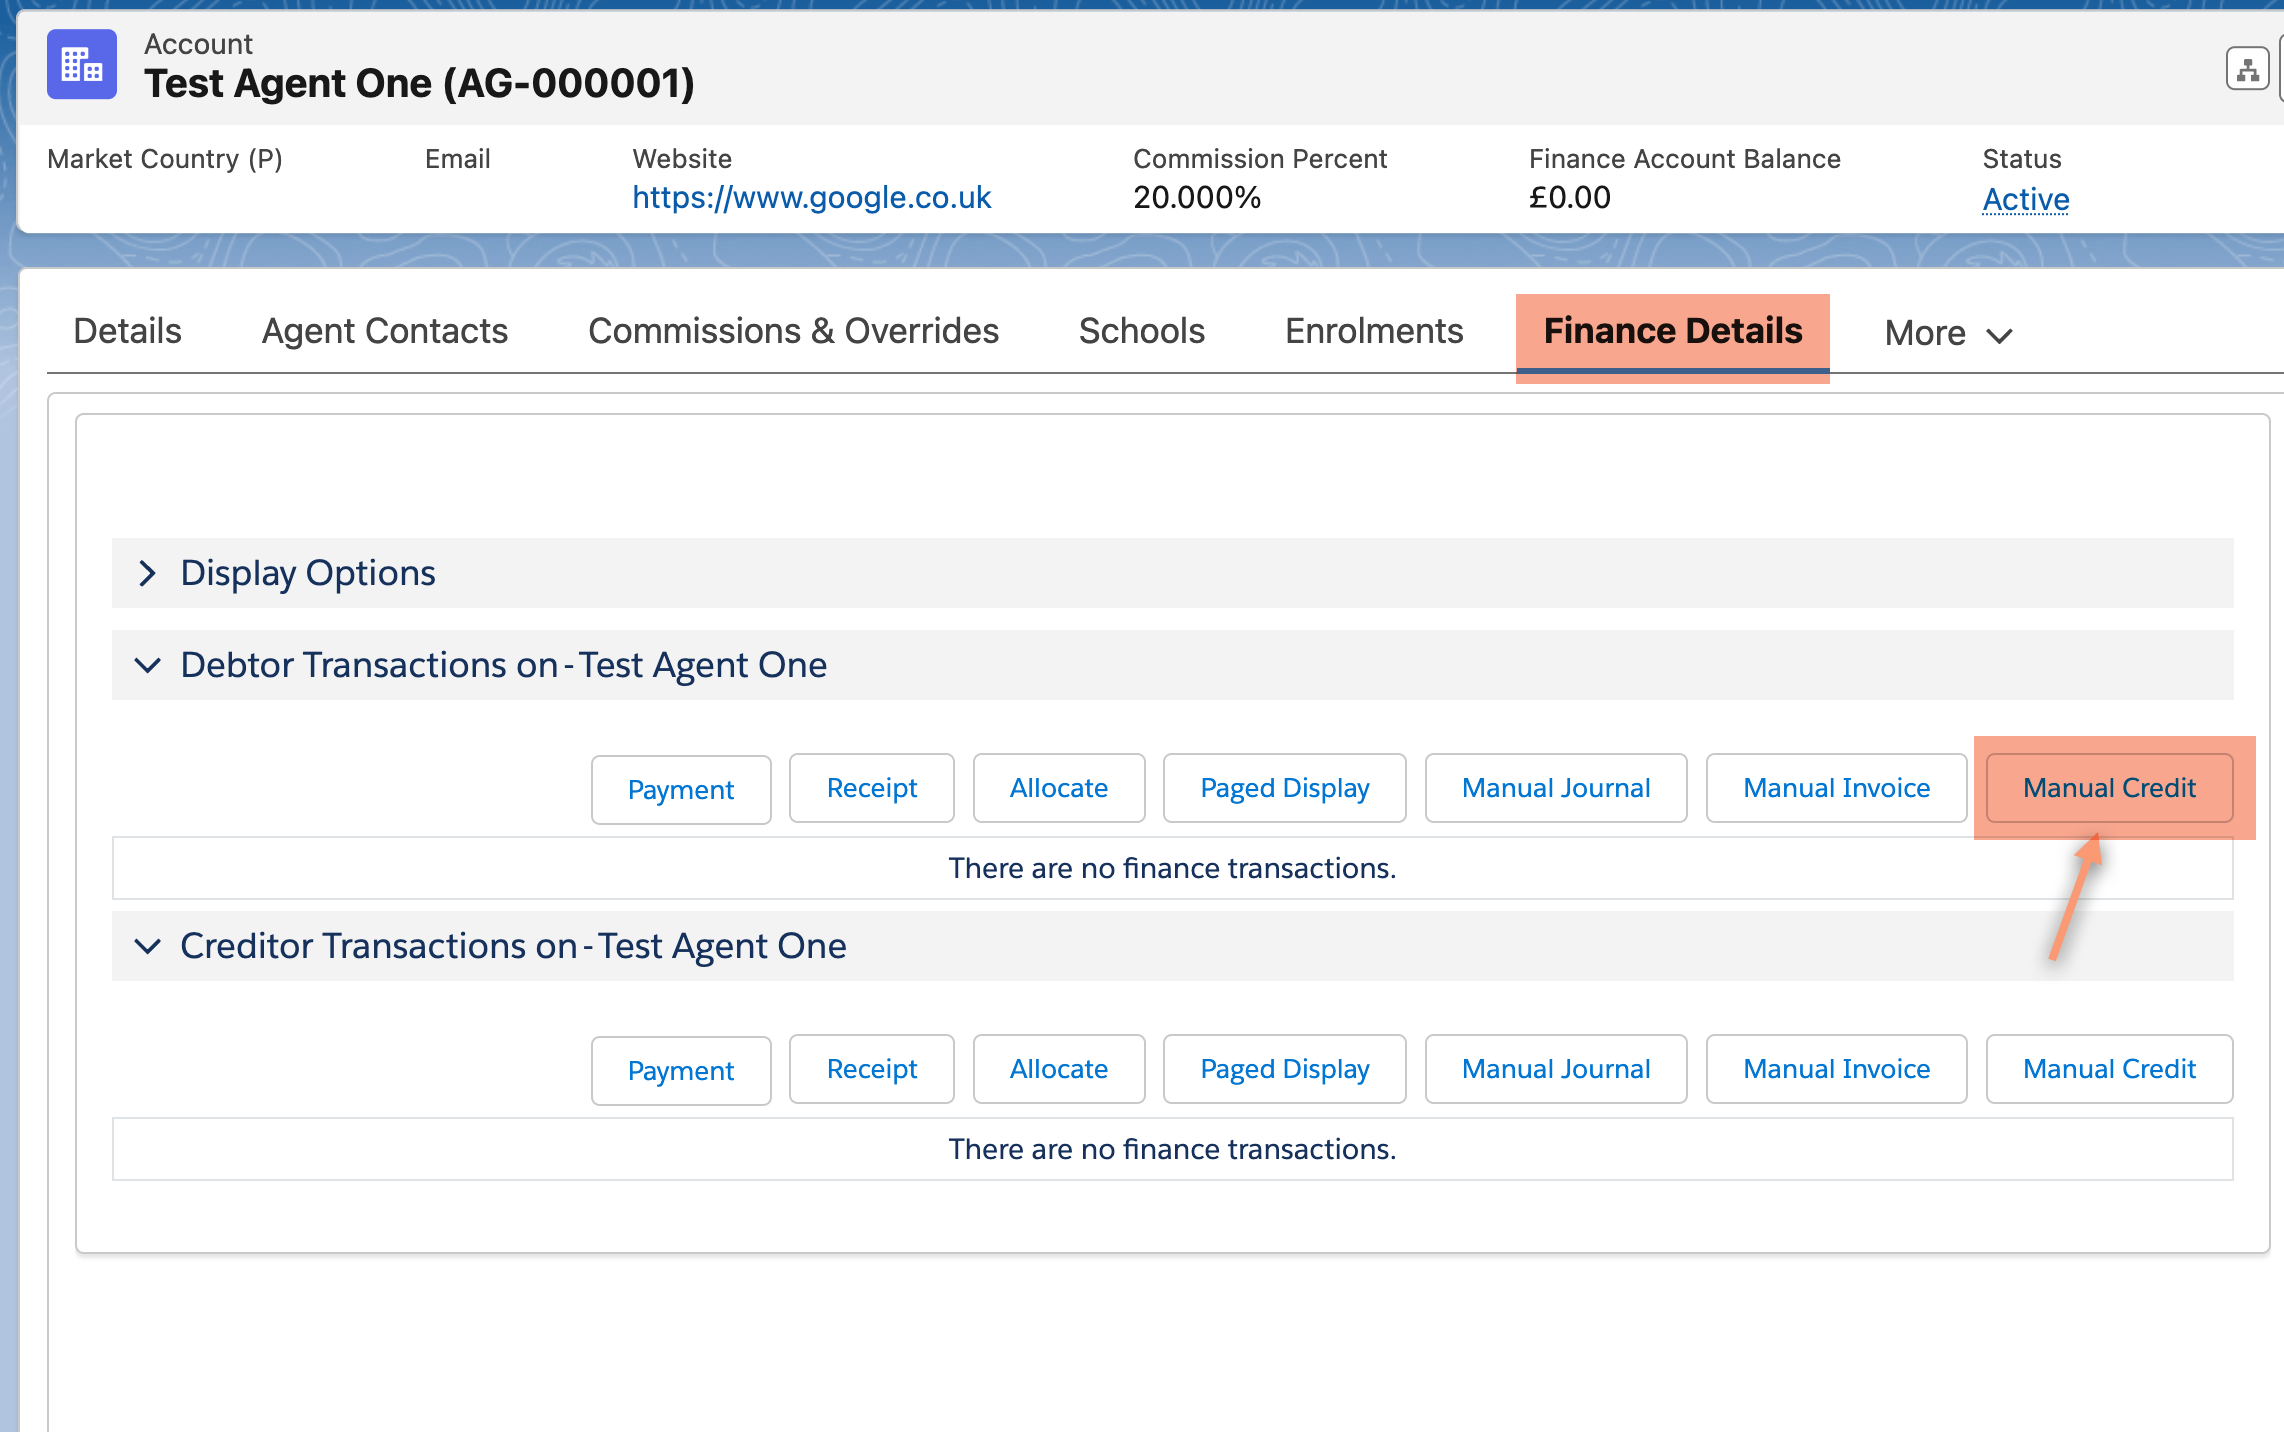
To create the credit open the student, agent or company record you wish to assign the credit to.
Click on ‘View finance’
Click on ‘Manual Credit’.
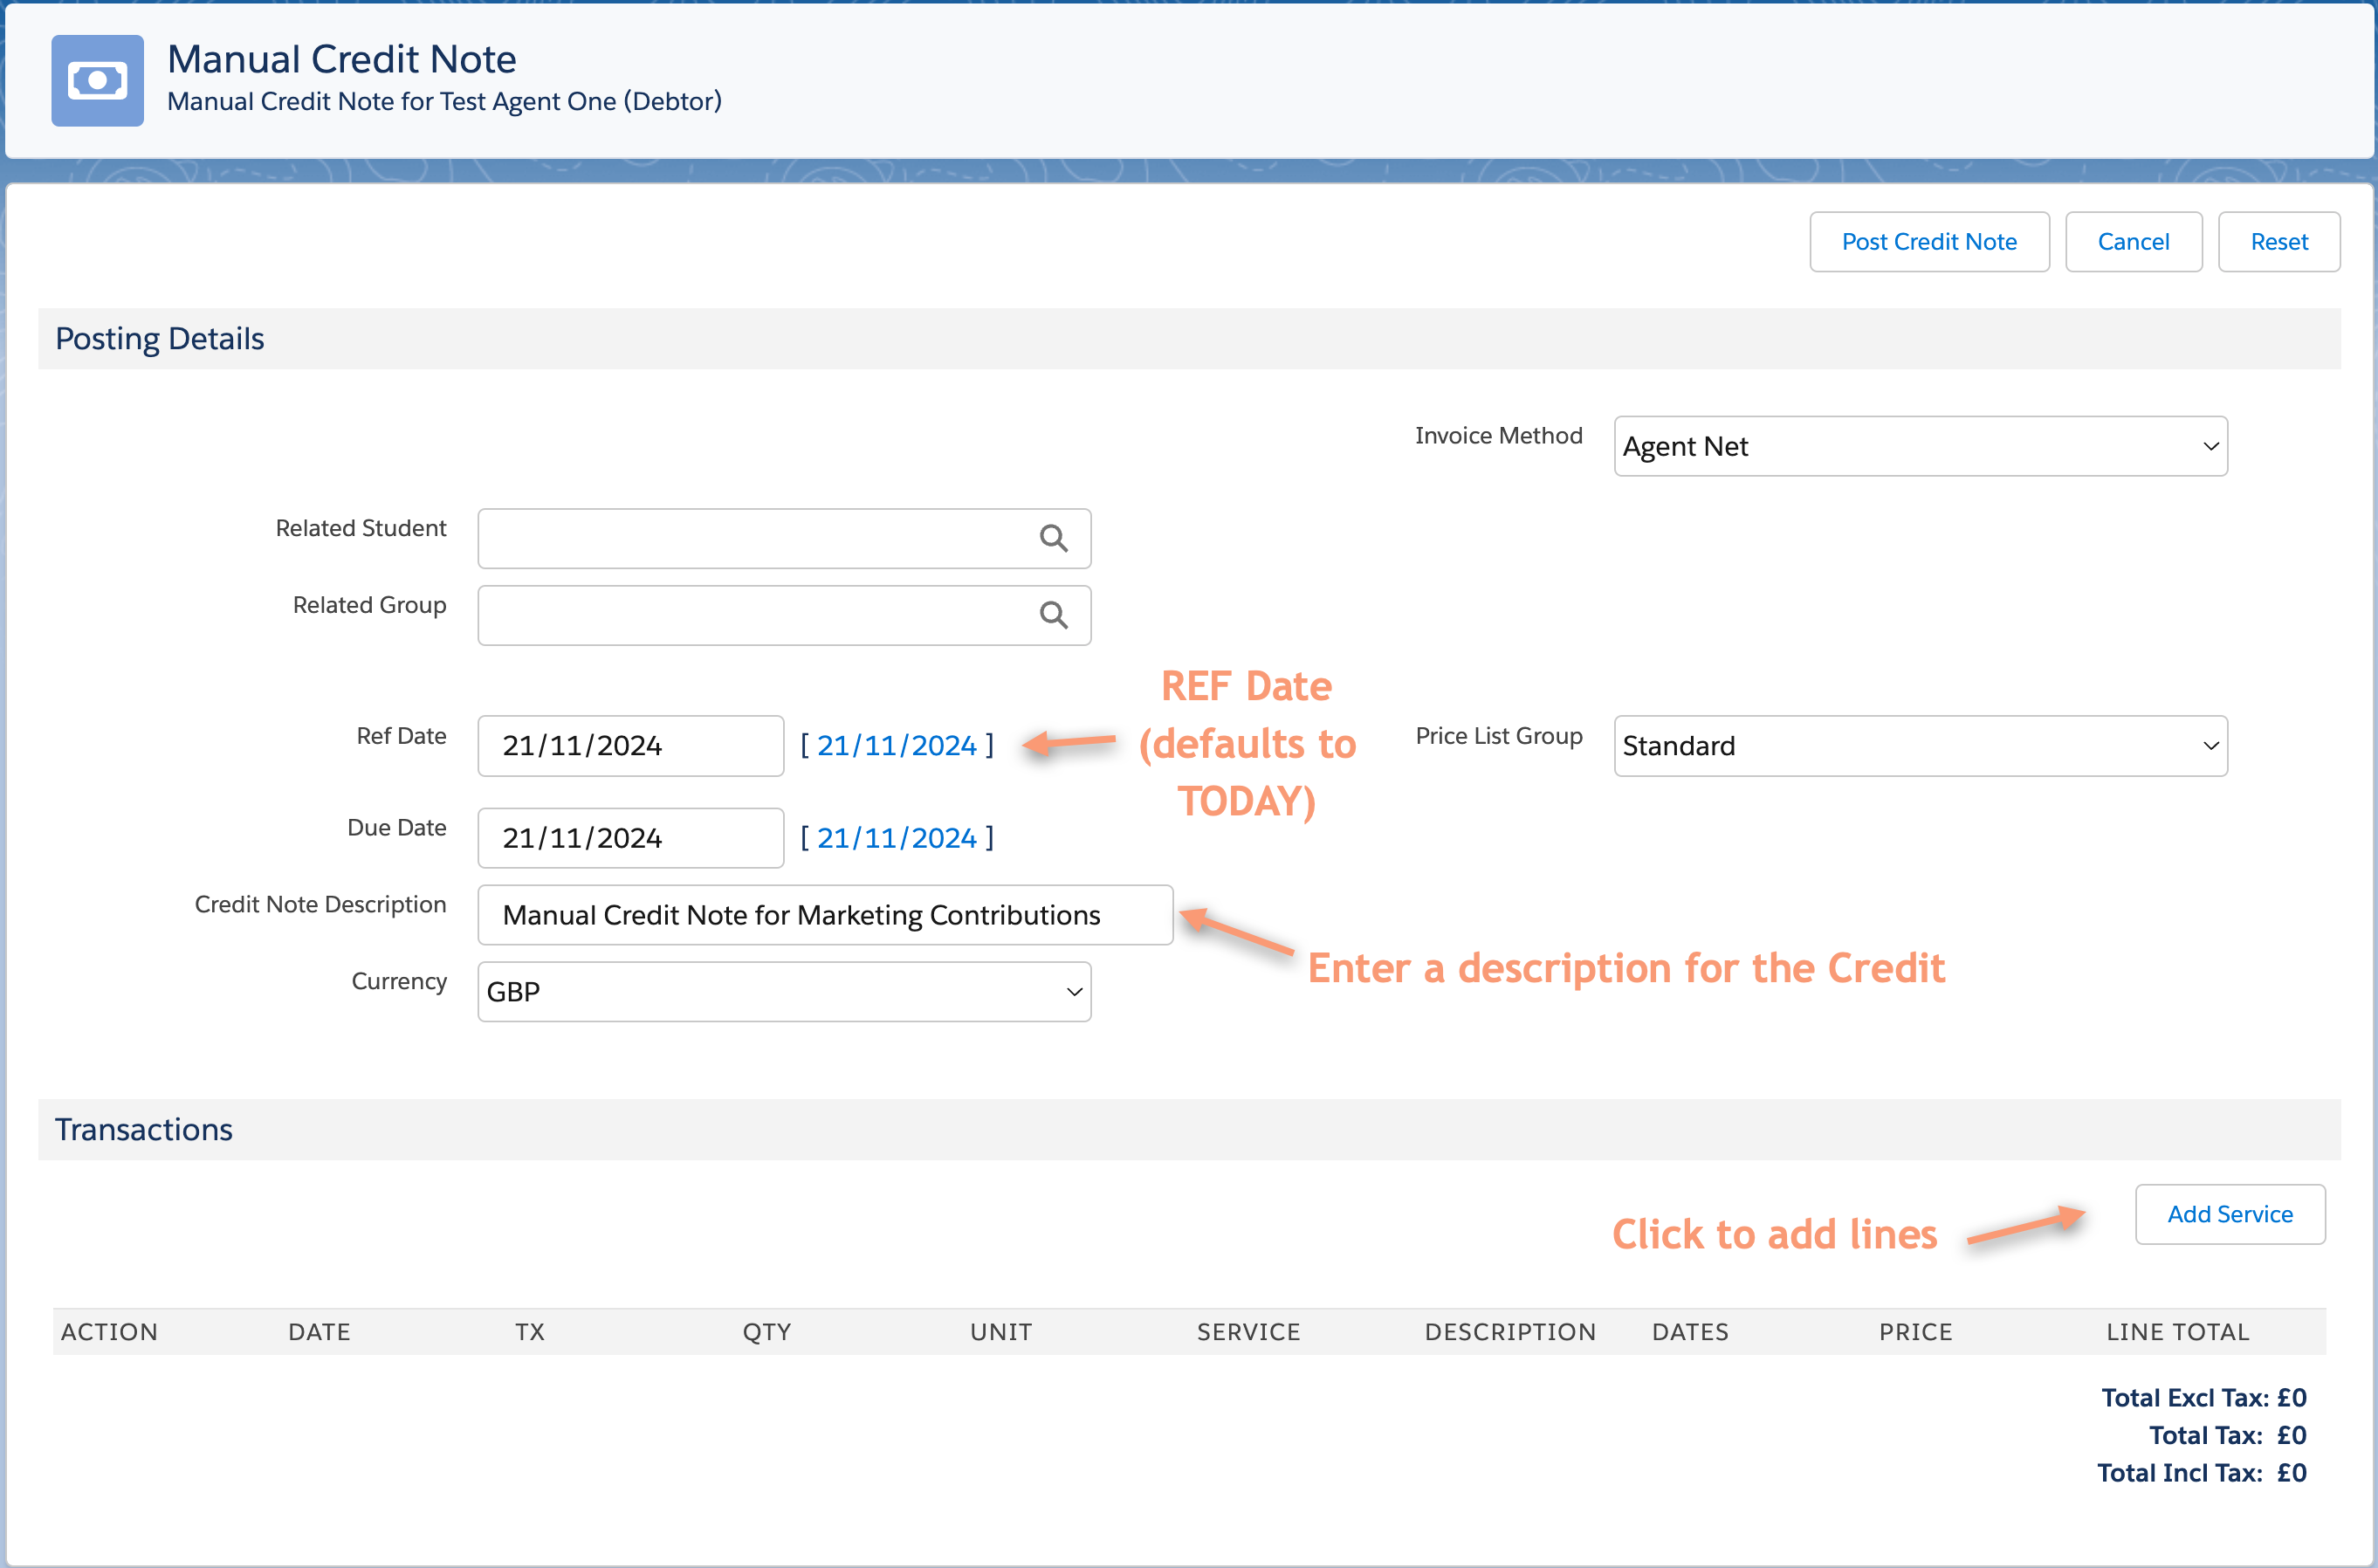
There are two steps to this process
Create the Credit ‘header’.
If there is a related agent, student or company that will be impacted by this change, add their details
Enter the posting date, generally the date of creating the credit. Tip – Clicking on ‘today’s’ date which is shown next to the enter date window will put today’s date into the box.
Enter the ‘due date’ this is used in the Aged Debt reporting
Enter in a meaningful description for the credit. For example ‘Credit for a booking for Phil’s company 2016 group made in error’
Create the credit note line items.
Each item that needs to be credited needs to be detailed here.
NOTE
It is VERY important to note that the start and end dates are critical in how the income is date spread in Schoolworks. When a booking is put on in the normal manner through the student account and enrolment process the start and end date entered for courses, or calculated for accommodation and transfers is used to spread the income for that course across the full range of dates. This process needs to be replicated here to ensure the invoiced amount is removed from the correct period.
Click on ‘Add Service’.
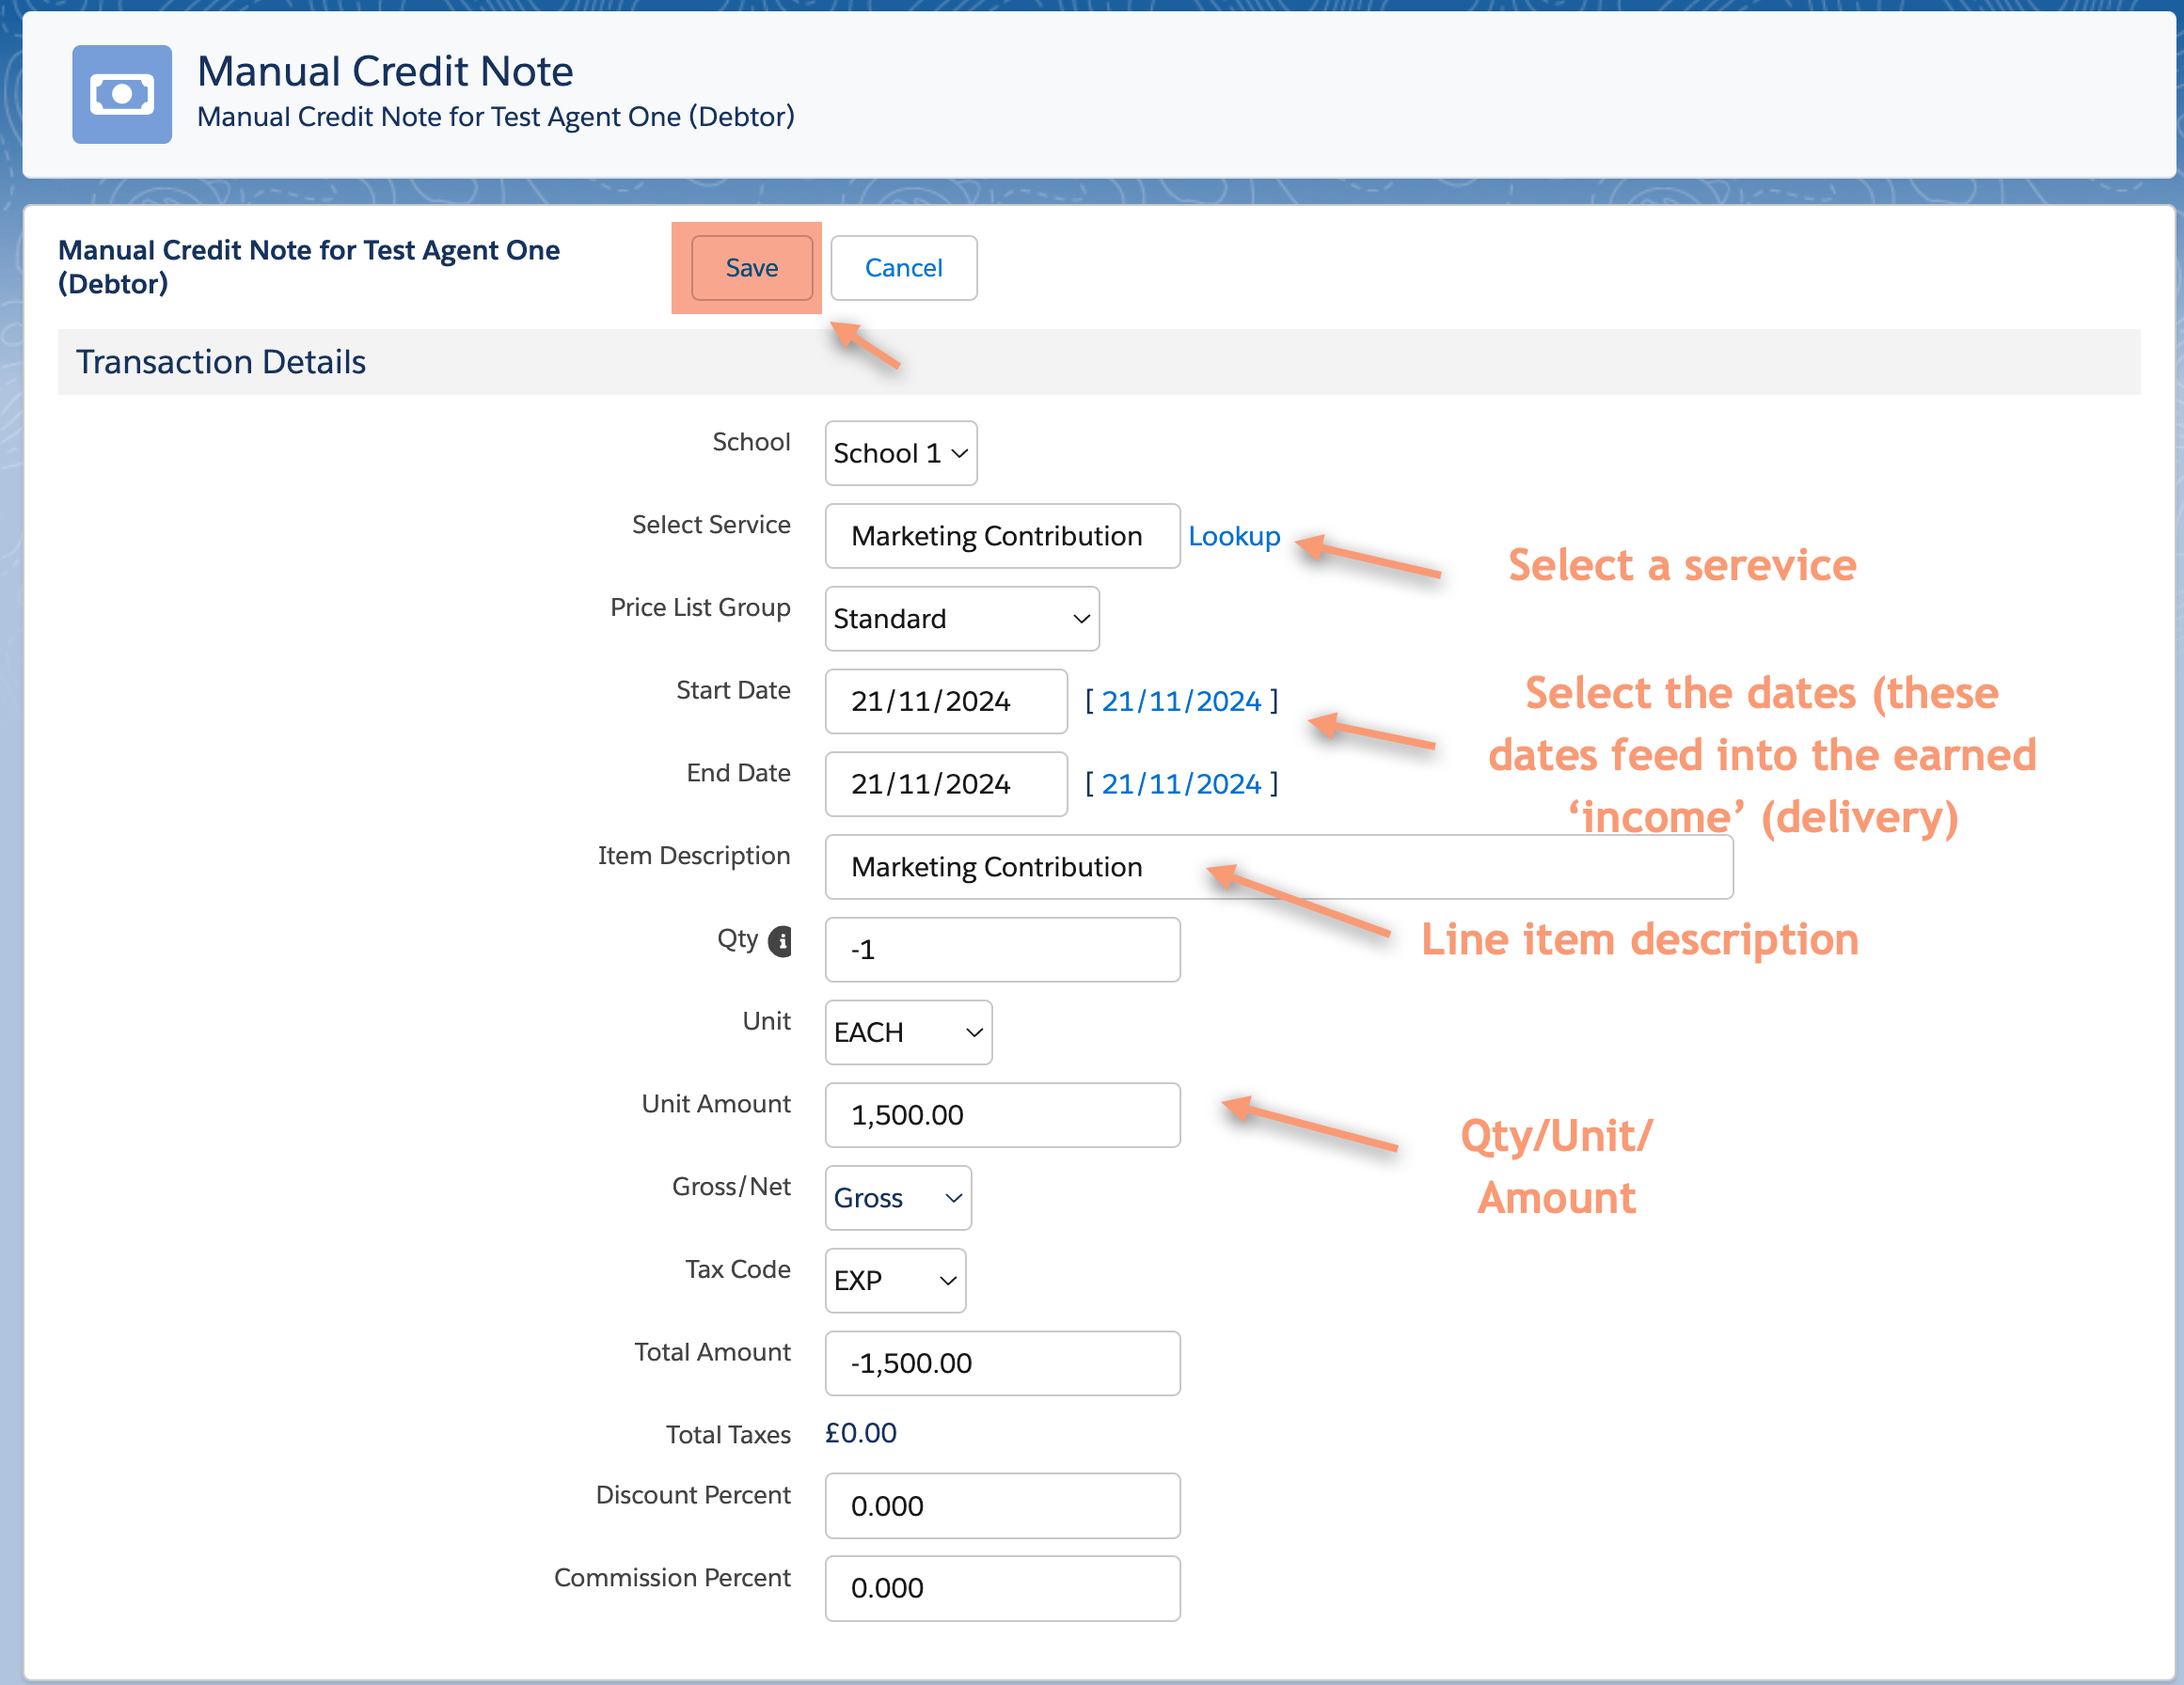
Select the service – it is recommended this is completed in the same order as a normal booking (For example; course followed by accommodation, arrival transfer, departure transfer and then sundry items)
Enter the start and end dates. (For transfers the start and end date will be the same as the transfer only happens on one day. Add arrival and departure transfers individually).
Enter a description – this will be the line that appears on the invoice. So make it meaningful. For instance, ‘Phil invoice error’.
Enter the quantity.
Enter the unit of sale. (Usually set to QTY (each) in the manual credit process.
Enter the unit amount as a positive. This will calculate the total amount and display it in the total amount box – double check the calculated amount it is a negative.
If you need to do an agent commission, enter the percentage here.
The other boxes can remain as they are.
Please see an example below.


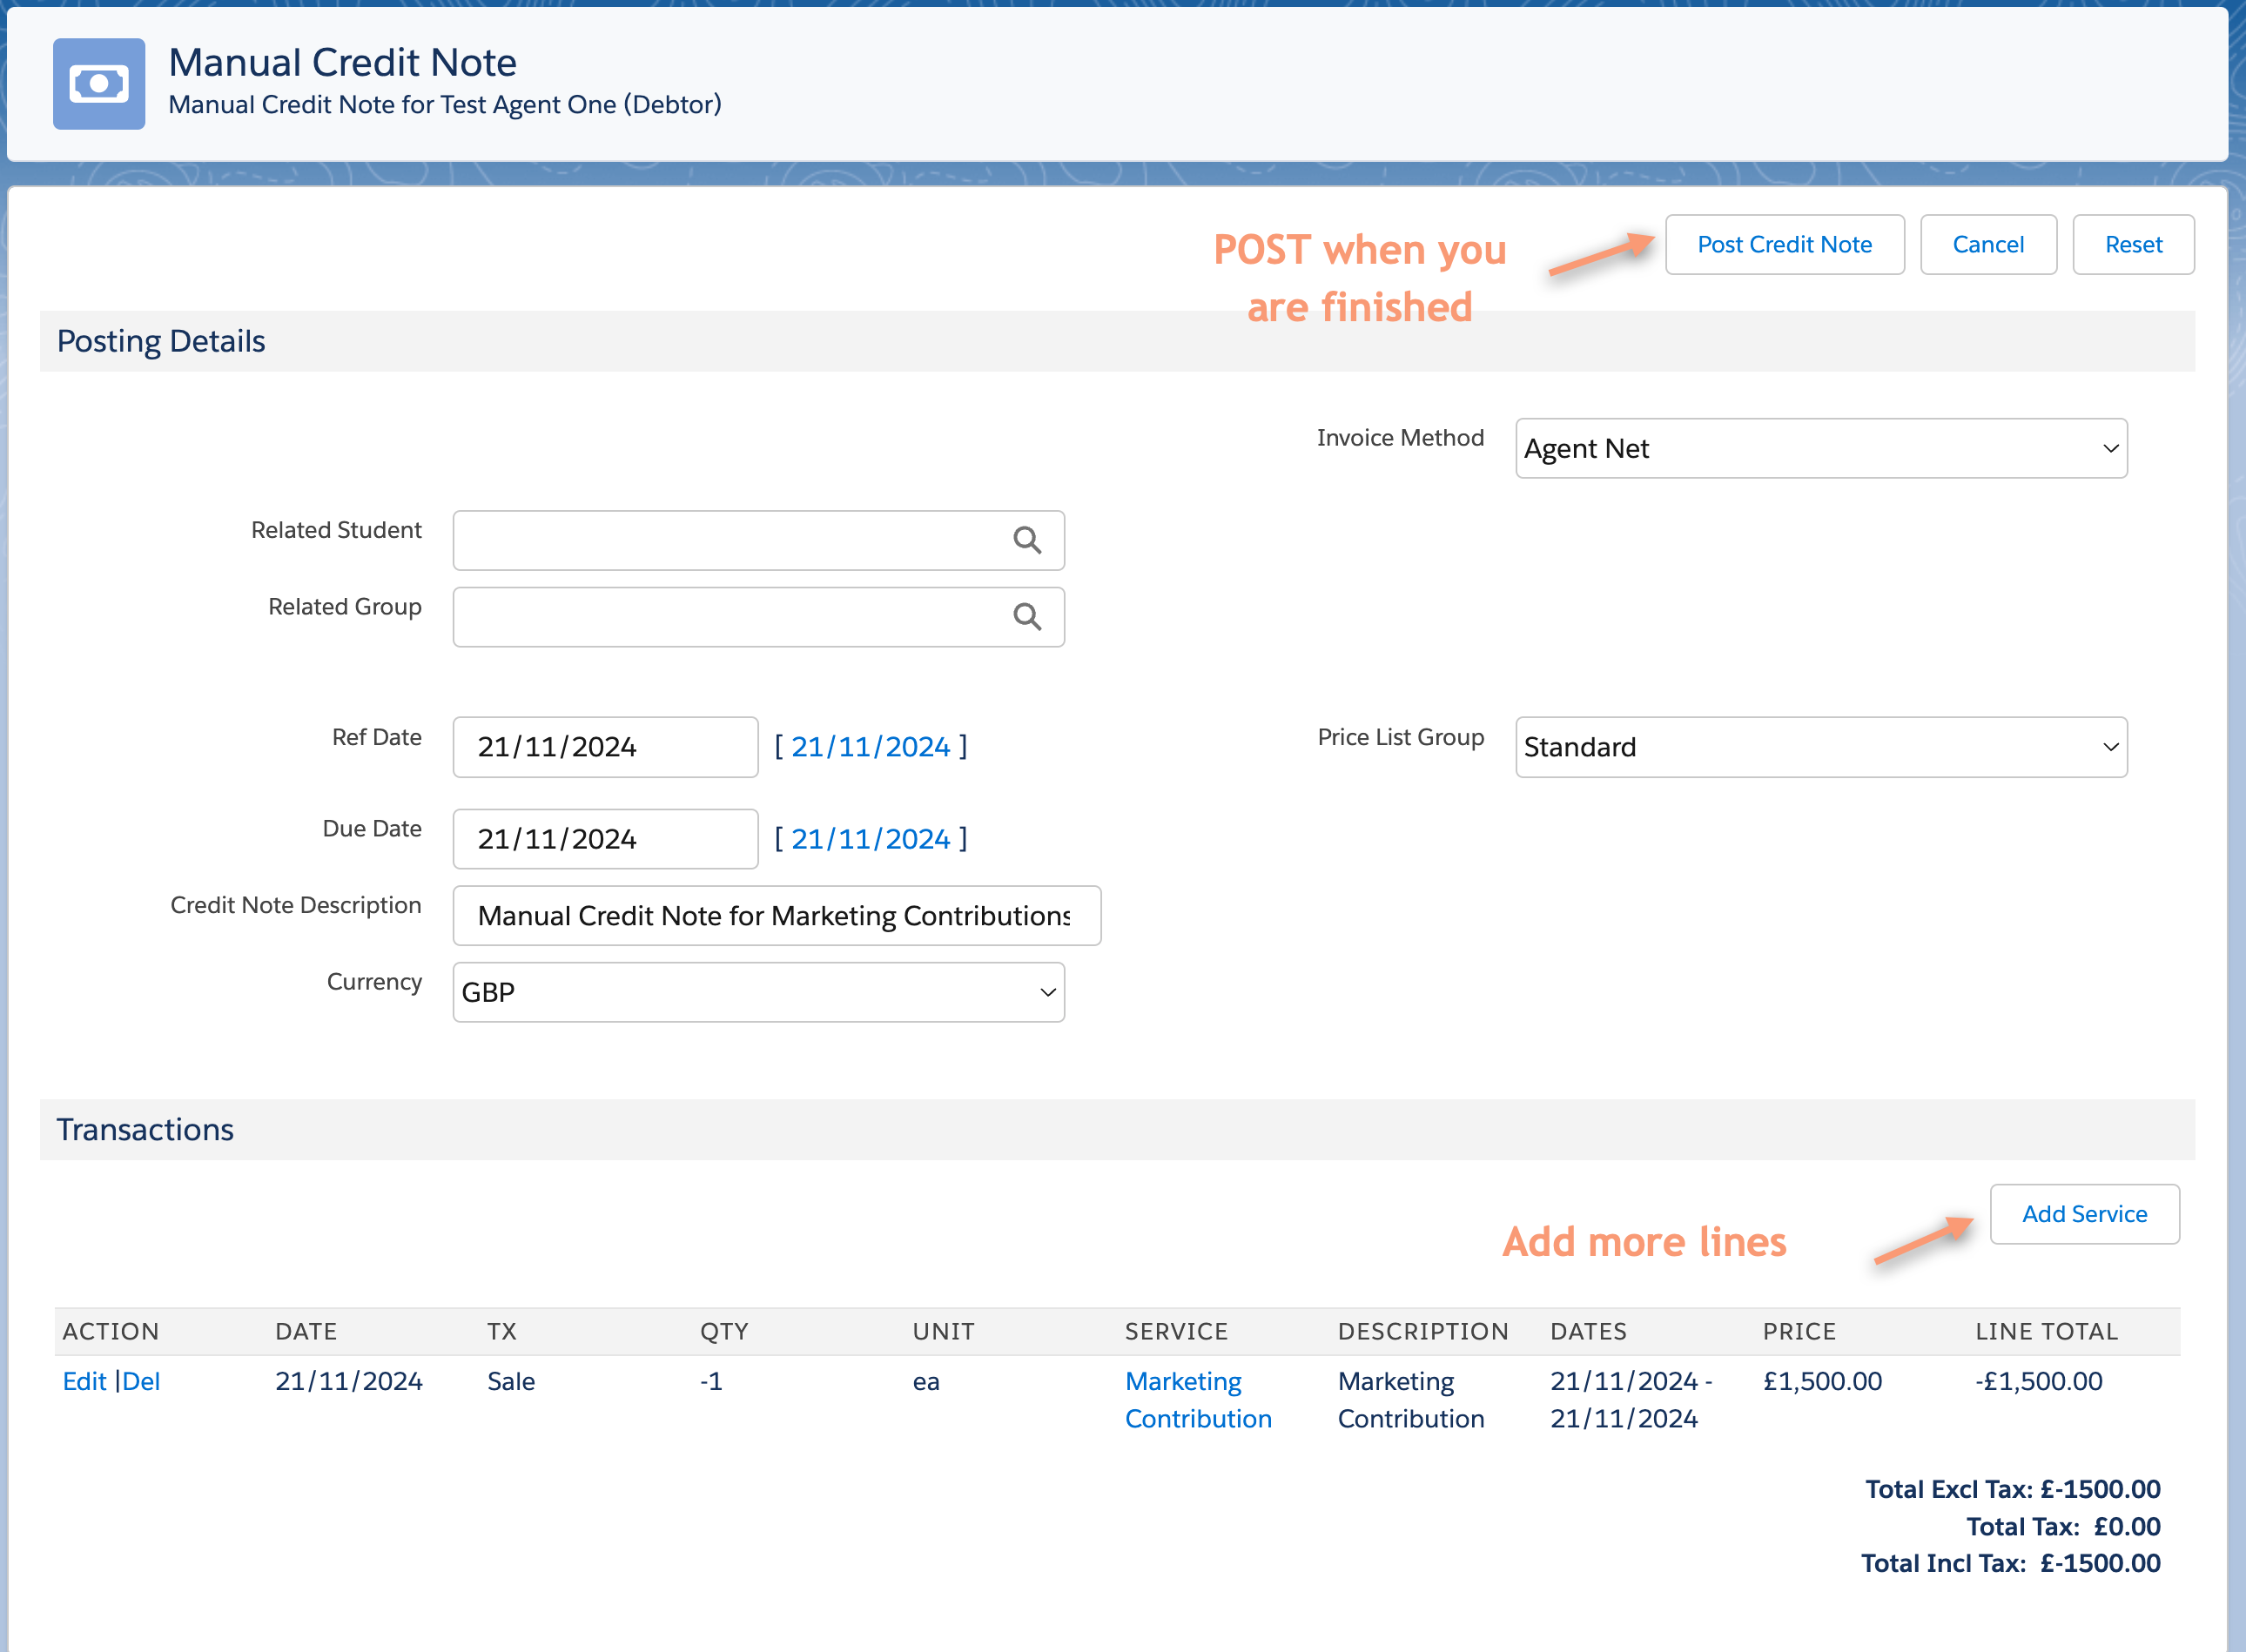
When finished, click on ‘Save’. This will return you to the header page and display the line totals as they accumulate. Double check the amount is a negative.


Repeat the above for the other services.
Once you have completed all the transaction lines, and have checked the amounts and dates are correct, click on ‘Post credit note’.