Tarjama CleverSo Help for Linguists 2025
Linguist Functionalities
Receiving and accepting project invitation
Once the PM sends invitations to a new project, all invited linguists receive an email from CleverSo with a direct link to the project:
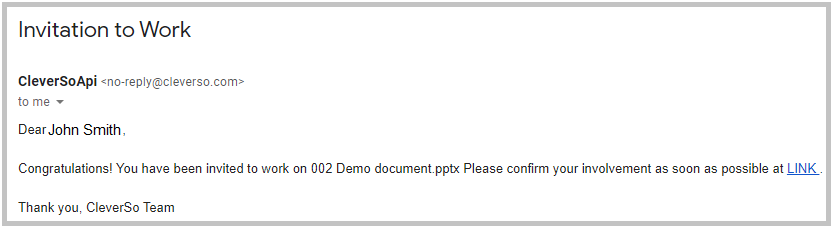
Upon clicking the link, linguists will have a certain time period (2 Days) to accept/reject the invitation, so that if needed, the PM can invite alternative linguists.
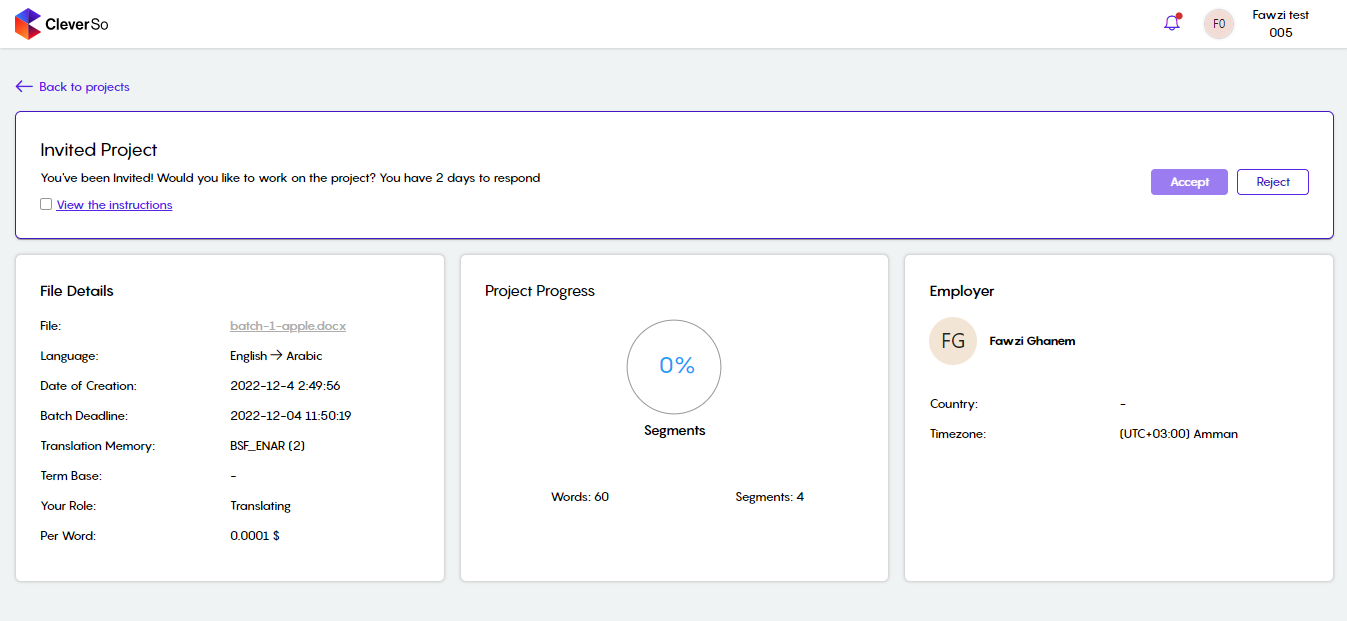
Sometimes the PM adds instructions to abide by while working on a project. In such a case, the linguist needs to view and accept these instructions:
The instruction could be viewed and accepted using the View the instruction checkbox:

Linguists can recheck these instructions anytime via the document tab in the workspace.
Once the invitation is accepted, linguists will be able to start the project instantly:
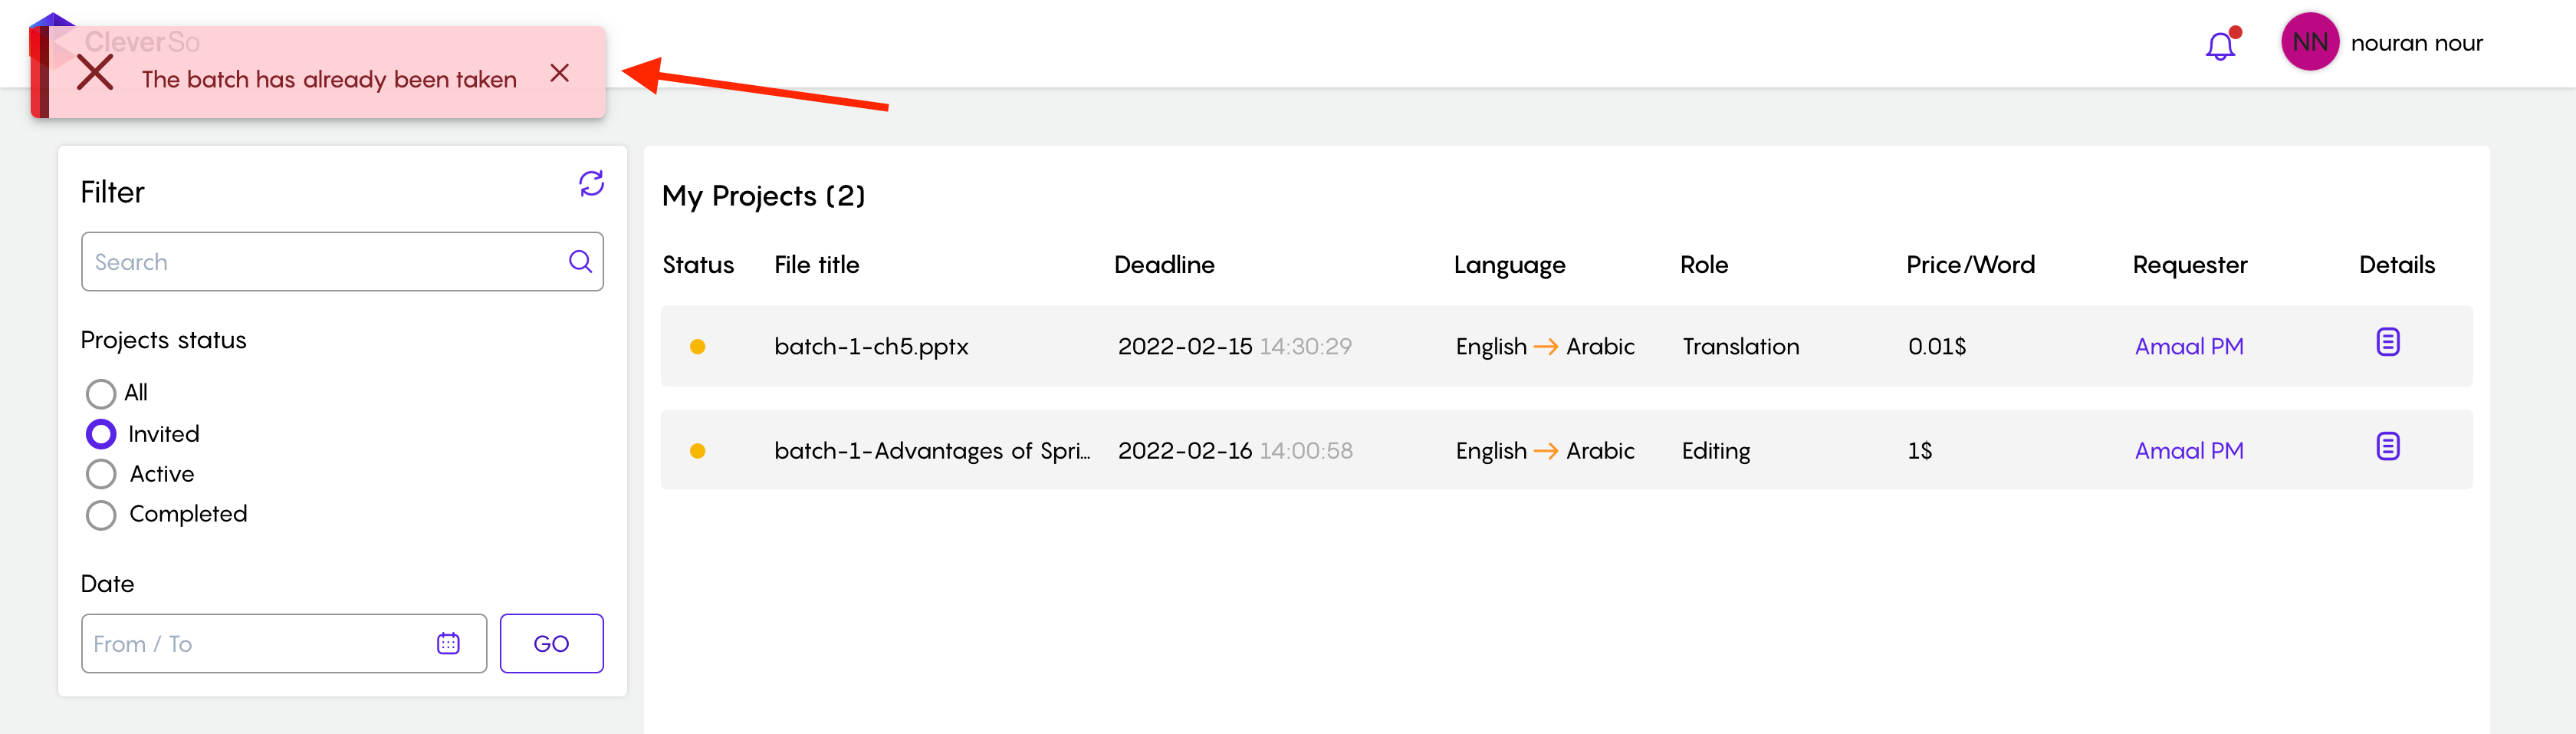
In case the batch was already accepted by another linguist, linguists will no longer be able to navigate to the project's details page:
My Projects
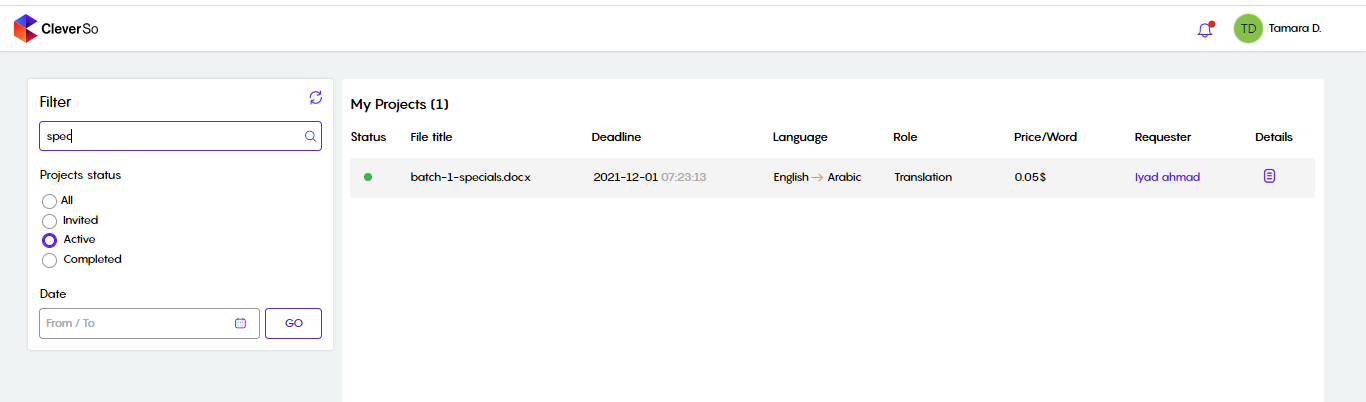
In my projects screen, you will be able to view and browse all of your projects.
Using filters on the left side of the screen, you can search for a certain project by inserting its name:
Hover the mouse over a project to see its full name:

You can as well filter your projects as per their statuses:
All
Selecting the “All” filter will list all of your projects, regardless of their status:
Invited:
Selecting the “Invited” filter will list all of the projects you have been invited to work on. These projects are pending your acceptance or rejection. Should a project be accepted, its status will become Active, and it will be moved to the Active projects list:
Active:
Selecting the “Active” filter will list all of the projects you have accepted. At this point, you can work on these projects: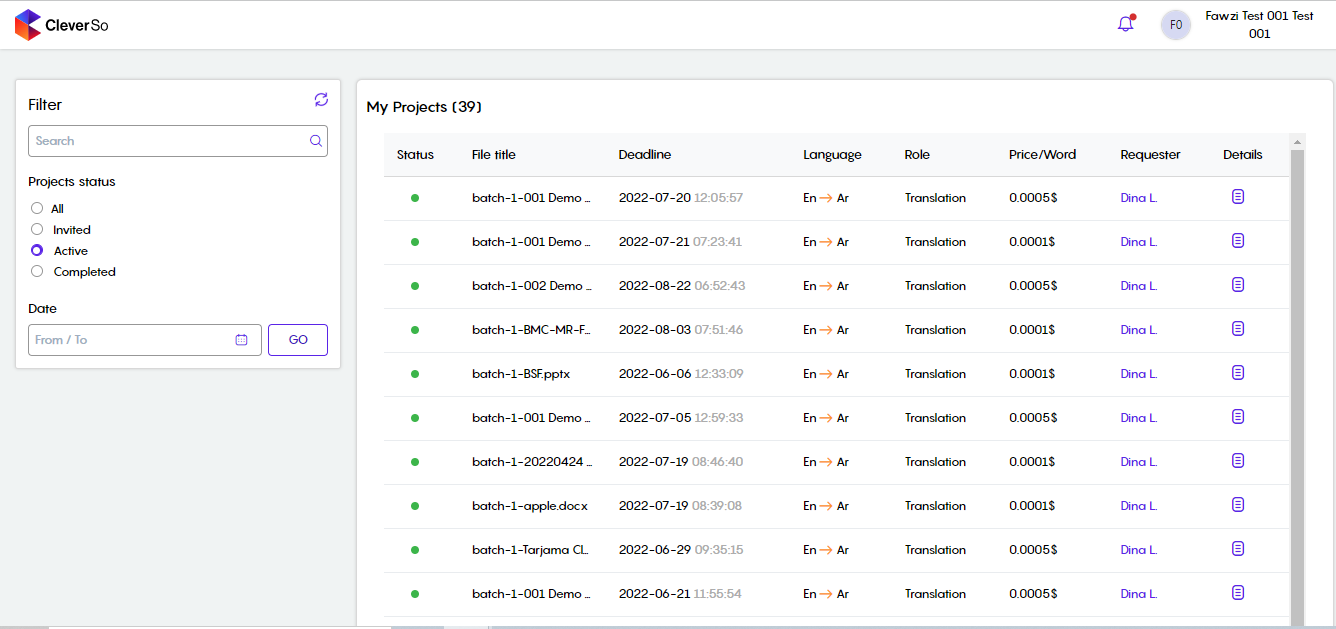
Completed
Once you complete a project, by clicking the complete button in the workspace, its status will become Completed, and it will be moved to the “Completed” projects list: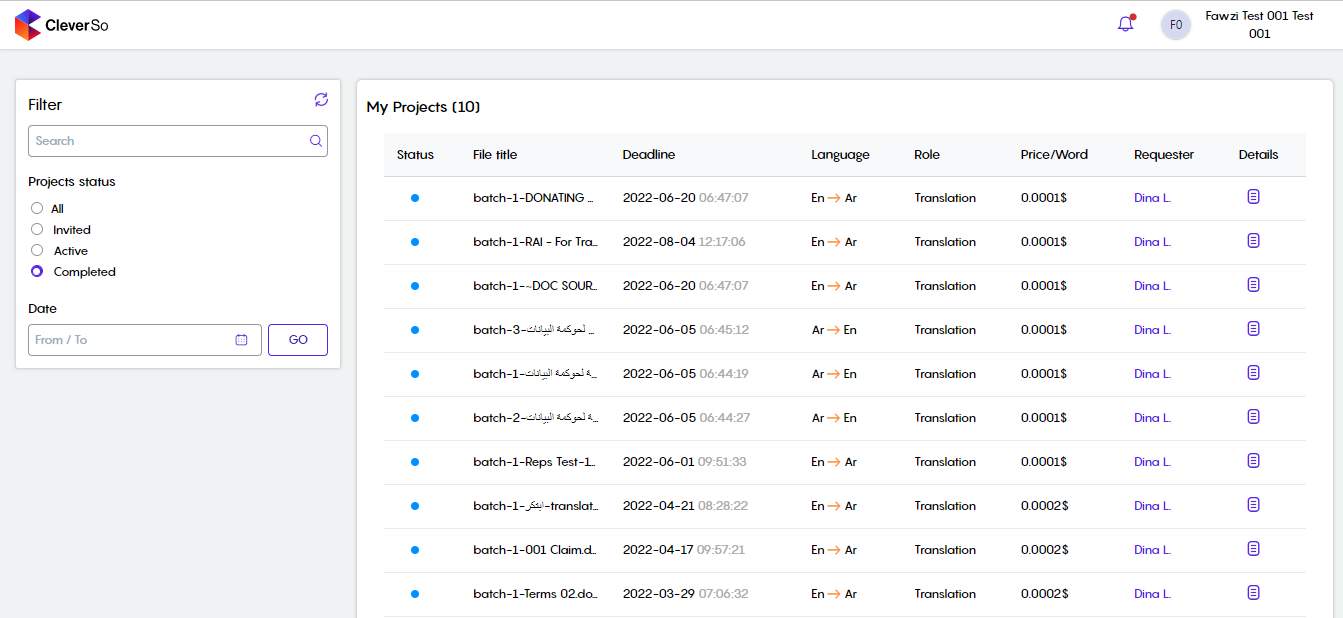
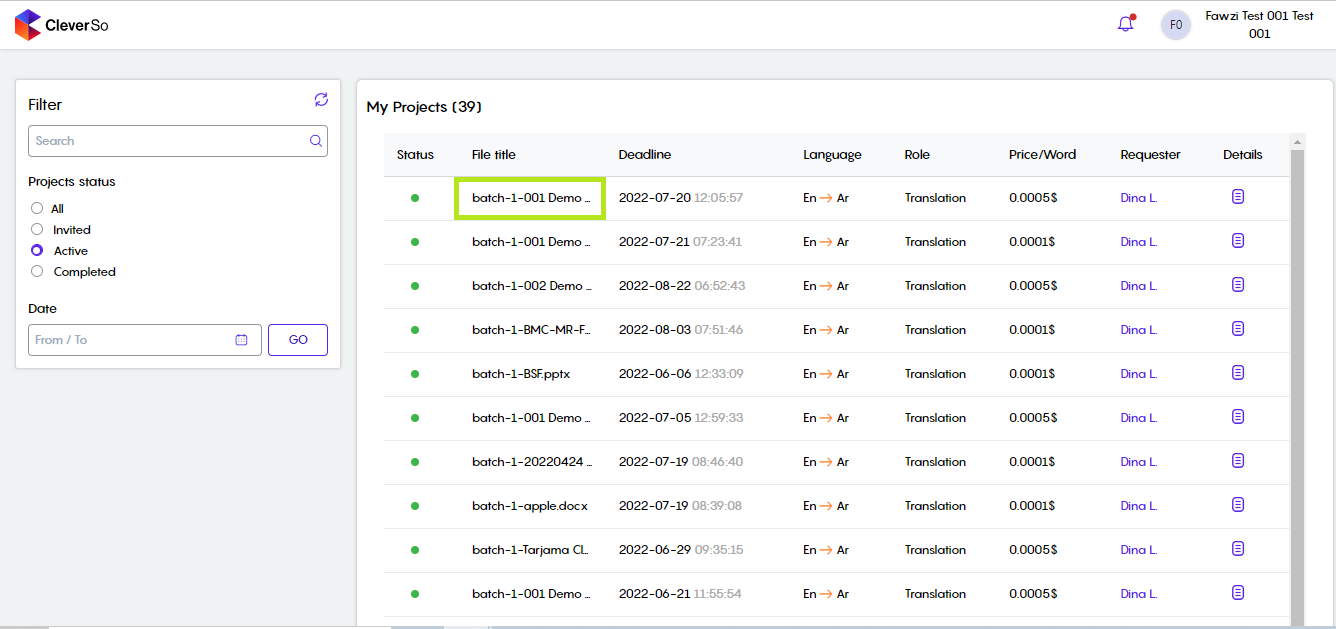
To start working on an active project, a project you accepted, click on the project name to go to the workspace:
Refer to the below recording:
Workspace
The new workspace gives you more control and flexibility while working on your project:
Workspace Menus

Edit
In the edit menu, there are multiple actions you can perform which help you in the process of translation: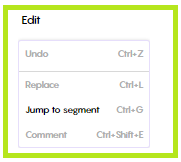
Undo an action
Any action performed in the workspace can be undone.Replace a word or a sentence in the target language
You have the ability to use the replacement for a certain segment or for all segments.Jump to a segment
You can jump to a segment using one of the options we have.Add a comment to a segment
You can add a comment to a segment so that your teammates or the project manager can see it.
Text
In the text menu, you have the ability to control the text in the workspace to make it easier for you in the process: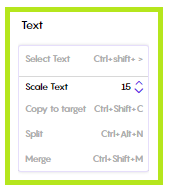
Select text
This option will highlight the target text of the active segment.Scale text
You can manage the text size in the workspace to fit you right.Copy to target
This option will copy the source text in the active segment to the target segment.Split
You can split the segment by using this option.Merge
You can merge the selected segment with the following one using this option.
Changing how a document is segmented by splitting and merging segments may affect the matches produced from translation memory, because the segmentation in the translation memory may become different to the segmentation in the document.
Windows
In this menu you can control each and every window in the workspace: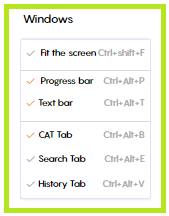
Fit the screen
This option will show or hide all windows and will only keep the source and target, and text bar.Progress bar
This option will show or hide the progress bar.Text bar
This option will show or hide the text bar.All tab
This option will show or hide the “All” tab in the action window.TM tab
This option will show or hide the “TM” tab in the action window.TB tab
This option will show or hide the “TB” tab in the action window.MT tab
This option will show or hide the “MT” tab in the action window.
Documents
In this menu, you will be able to view the original file in the previewer, and download the file original/translated file:
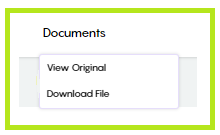
Selecting the download file option, a new window will pop up:
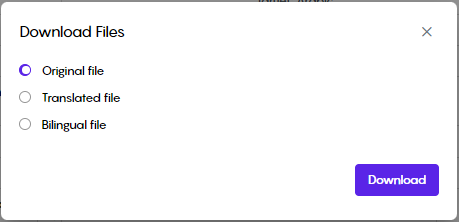
From this window, you will be able to download the original (source) file
You will also be able to download the translated (target) file:
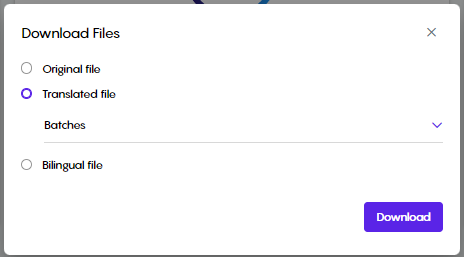
Moreover, you will be able to download a specific batch that is assigned to you. This could be done by clicking the batches dropdown list and selecting the batch in question.
You can also download a bilingual file, including the source against the target.
To download the translated file or batch, you need to click the Download button. The file will be automatically generated, for the 1st downloading attempt, and then downloaded.
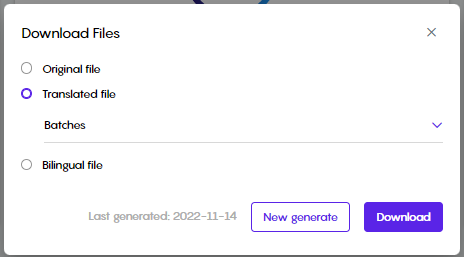
For later downloading attempts, a Generate button will be seen next to the Download button. YOu will need to Generate the file in order to update it with the latest edits:
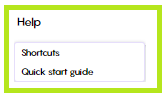
Help
In this menu, you will find all the shortcuts to the functions and the User Manual:
Refer to the below recording:
File Preview
Previewing files is now possible for all users on CleverSo. Once they navigate to the workspace, they will be able to preview the file by expanding the Preview source file panel below the segments:
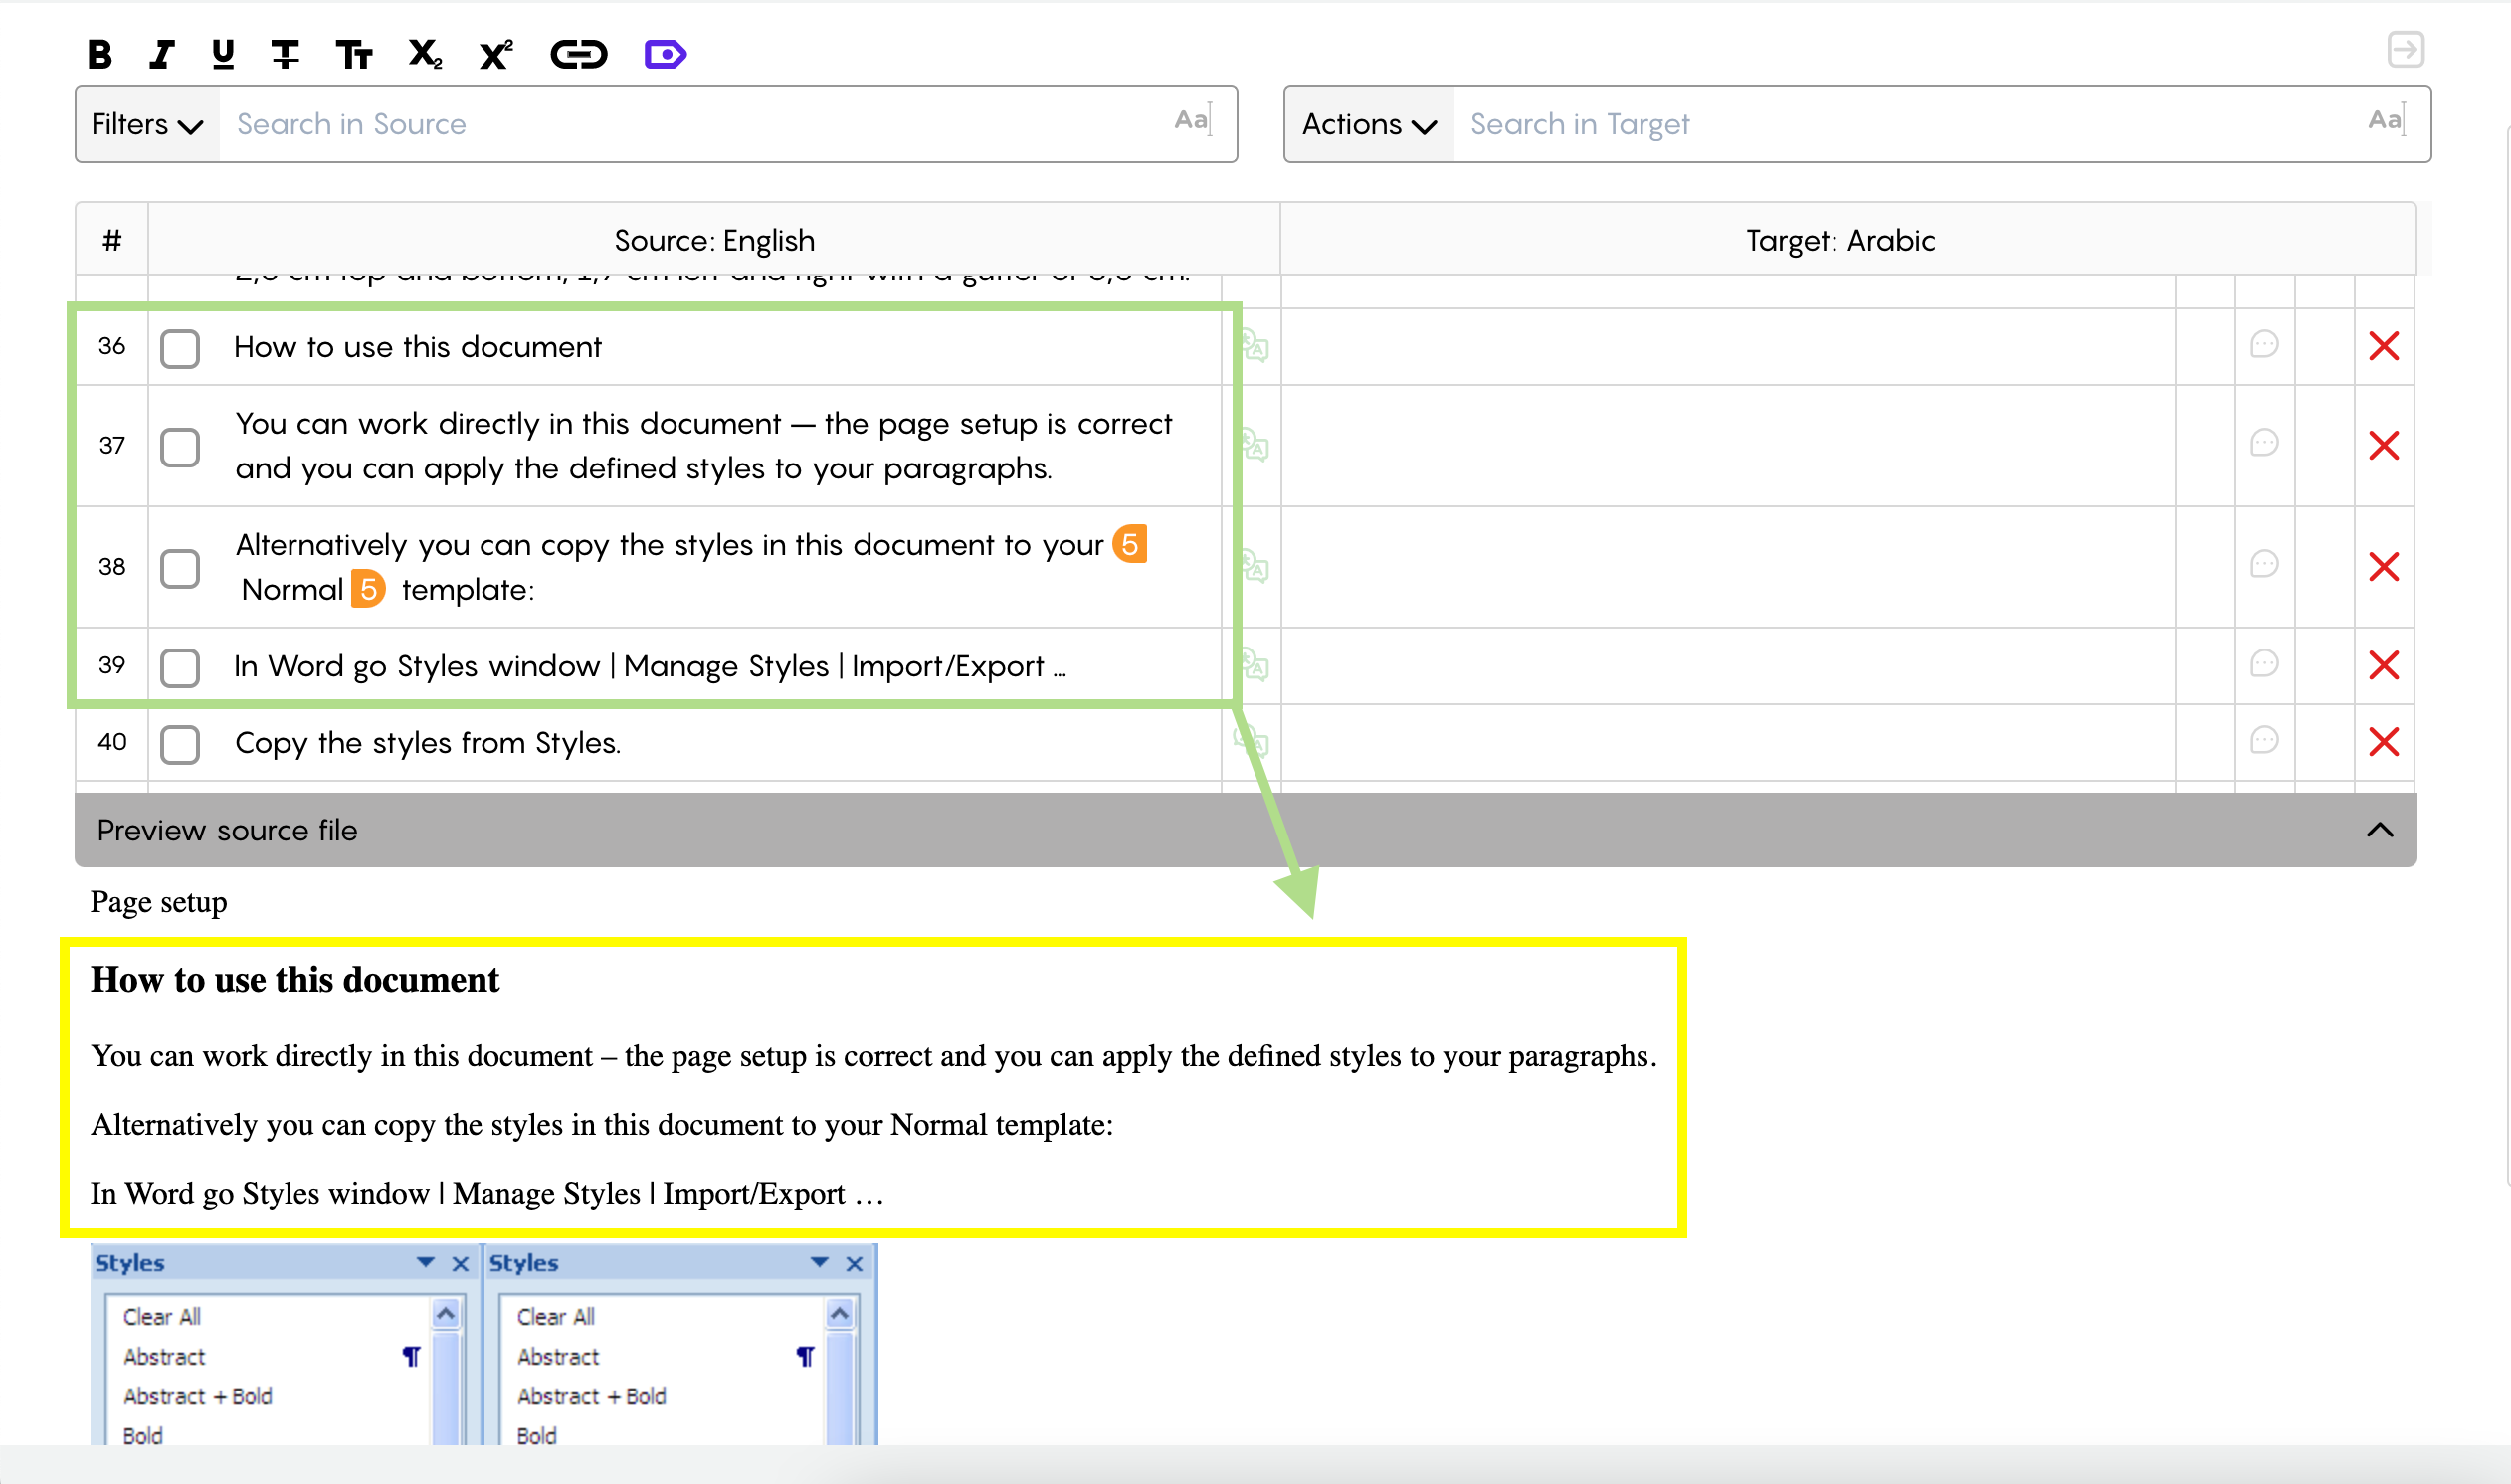
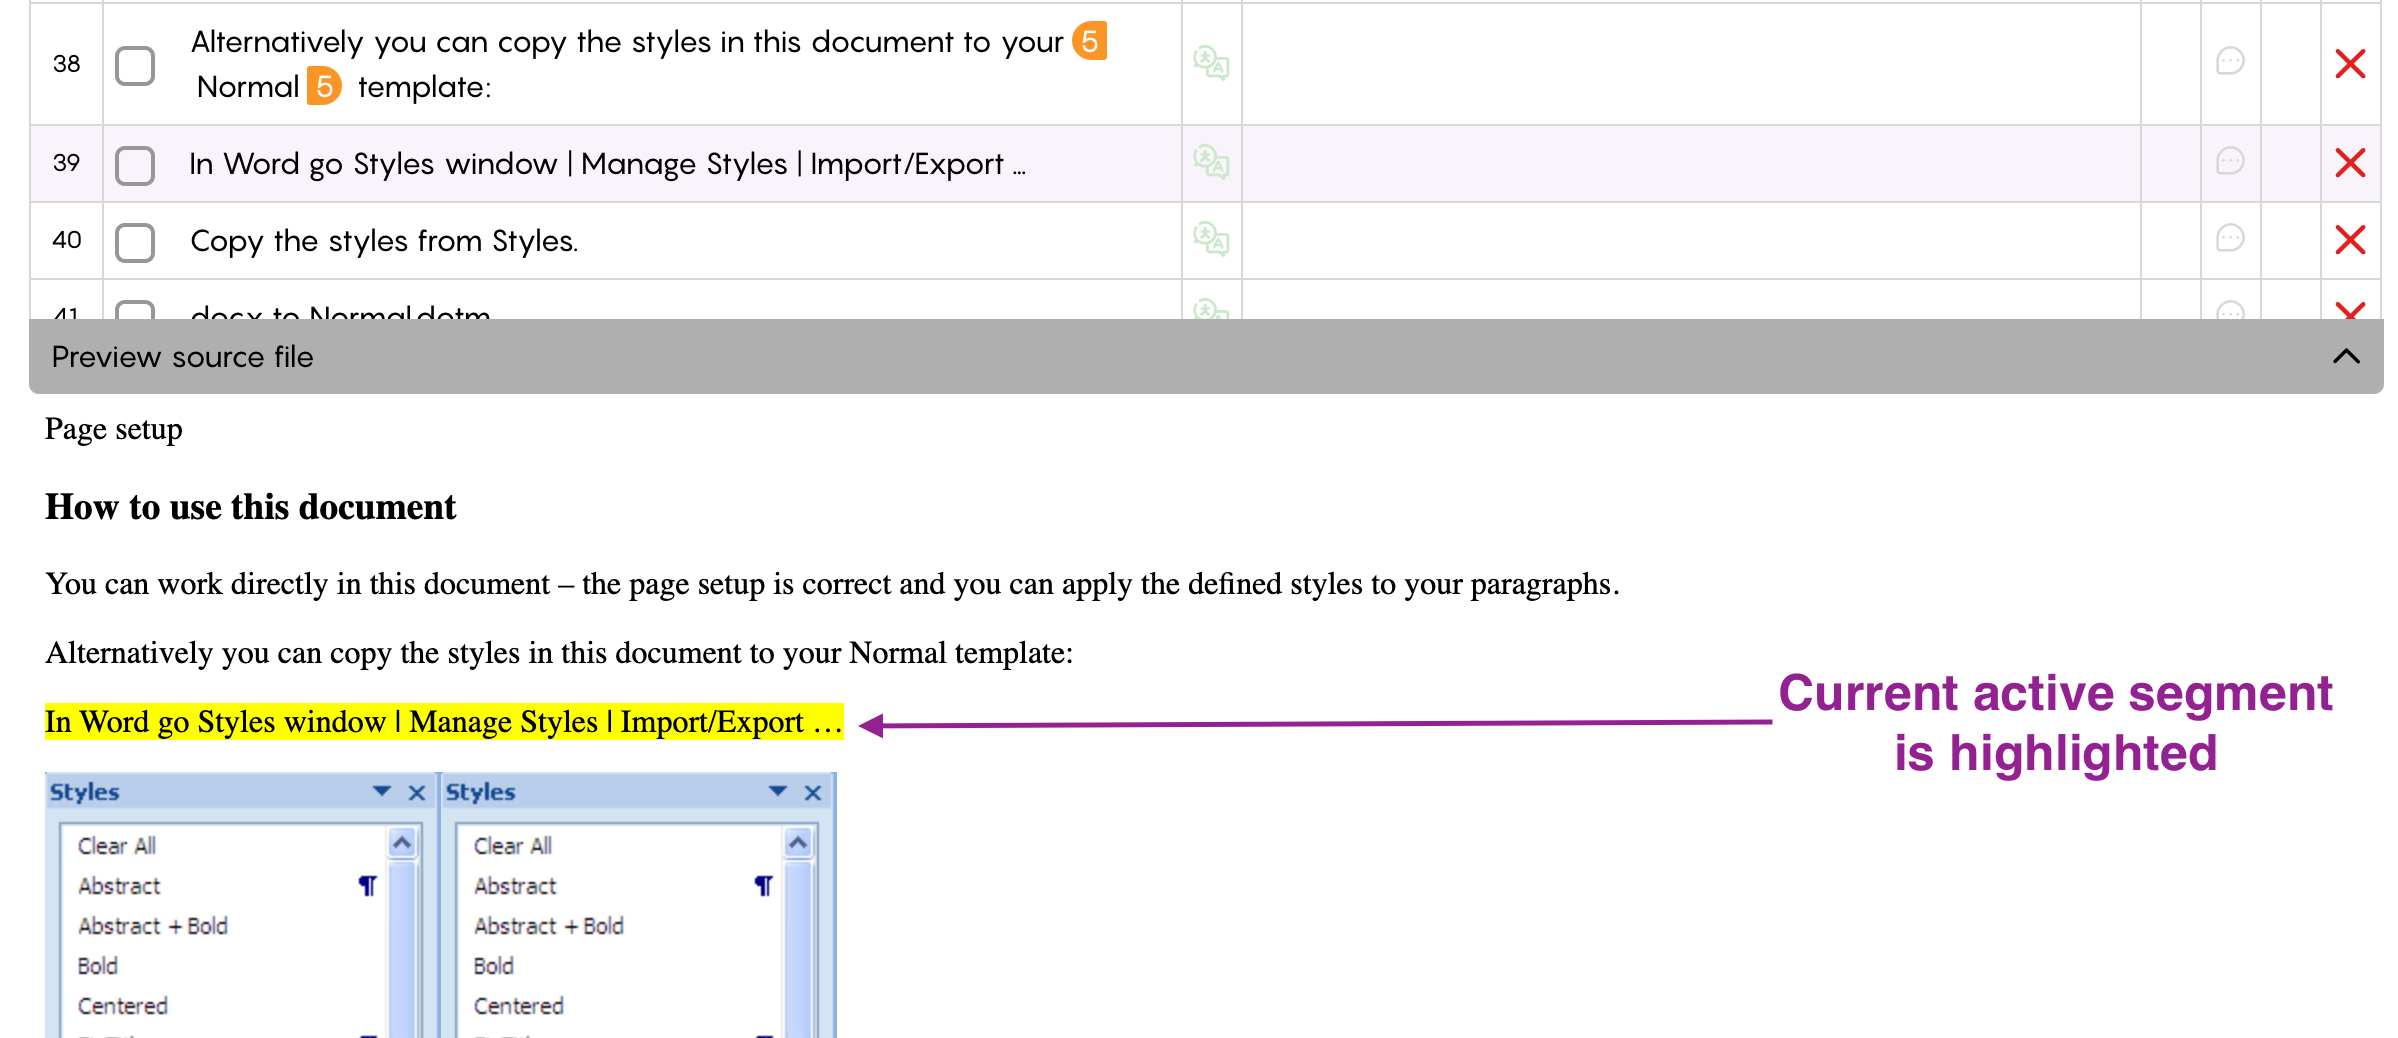
Clicking any segment in the workspace will highlight the corresponding text in the preview panel. Moreover, clicking any segment in the preview panel will automatically activate the corresponding segment in the workspace:
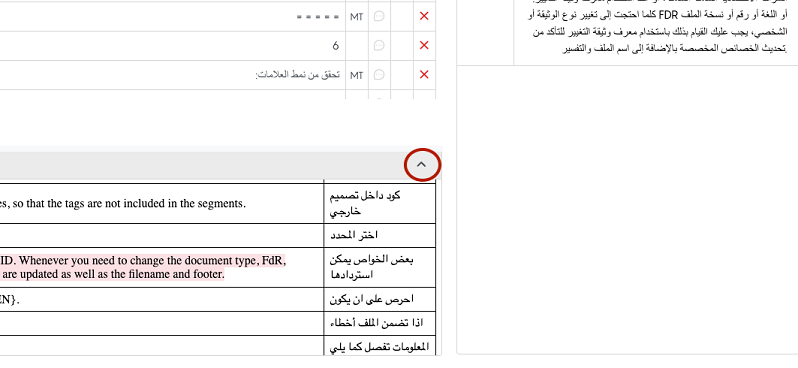
The preview panel is resizable. Users could change the previewer size by clicking and dragging it from the top:
The previewer could be hidden/minimized by clicking the minimize button:
Refer to the below recording:
Side Panel
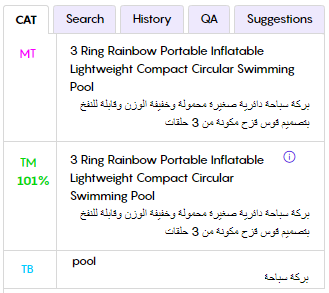
The side panel includes 5 tabs- CAT, Search, History, QA, and Suggestions.
CAT Tab
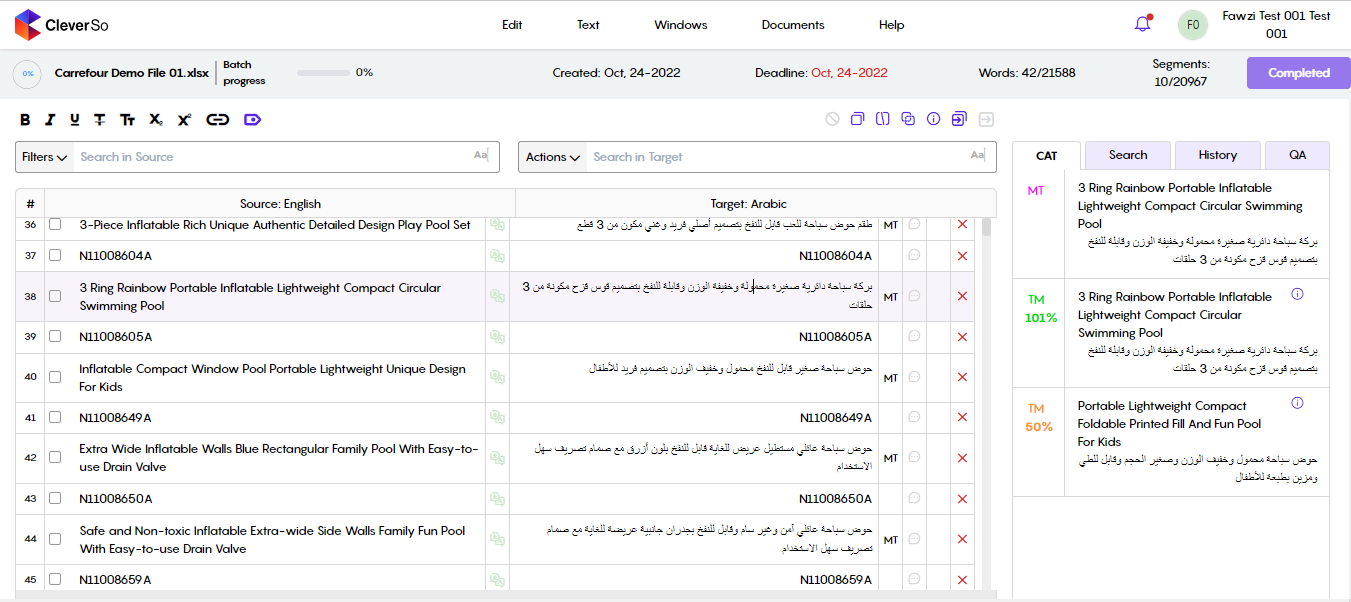
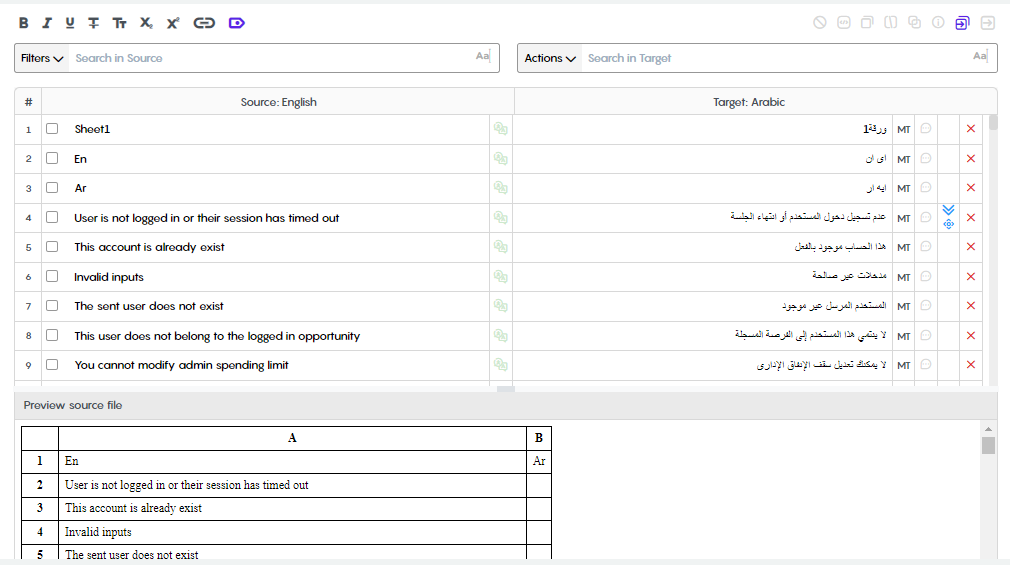
The “CAT” tab displays the source text alongside matches from translation memory, machine translation, and termbase:
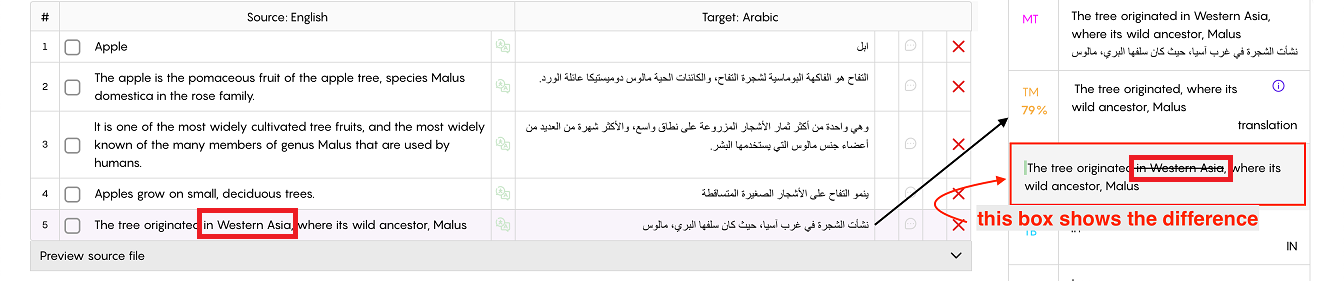
Once a TM match with a percentage below 100% is clicked, there will be a kind of indicator showing linguists the difference between the clicked TM match and the corresponding source segment. The difference will be displayed in the CAT tab below the matches:
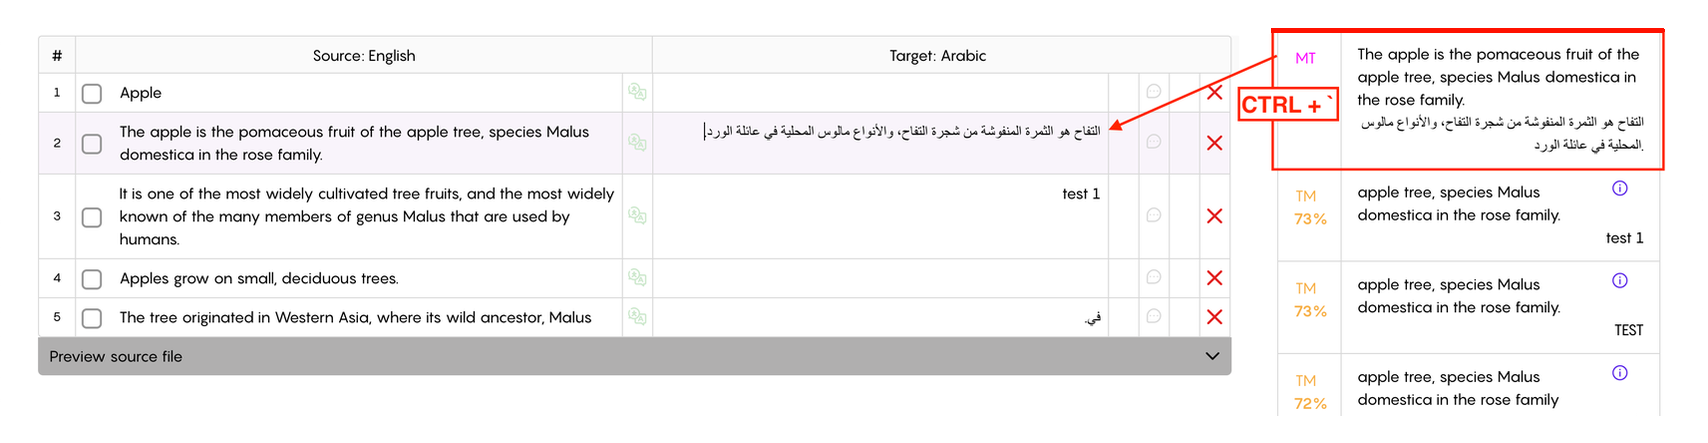
To insert an MT, TM, or TB match, the linguist needs to double-click that match. Alternatively, the linguist can use the below shortcuts:
To insert MT → CTRL + `
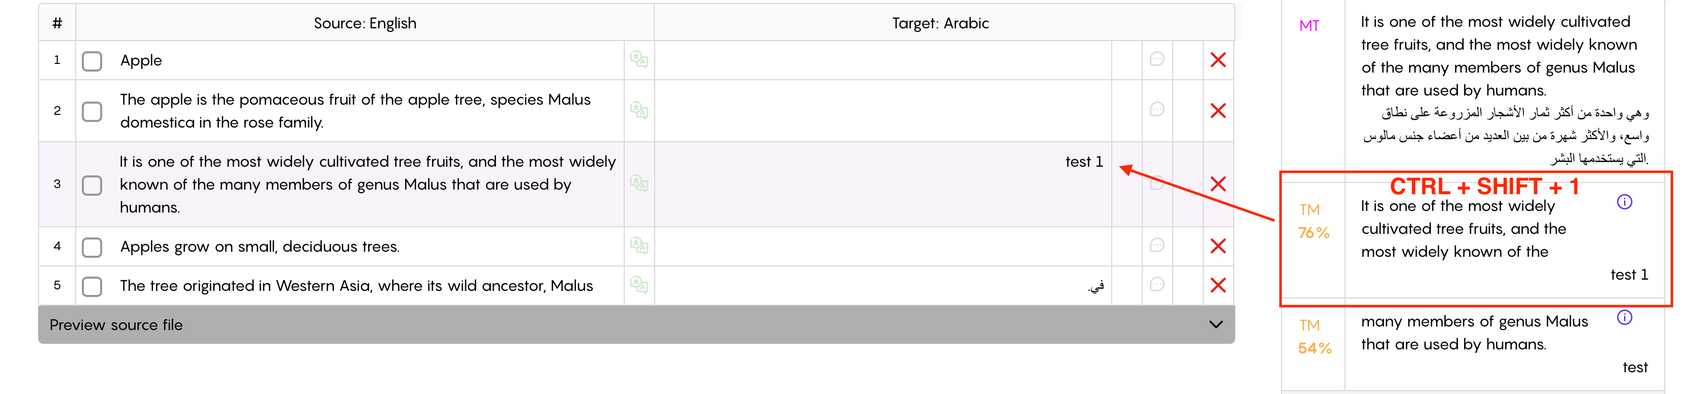
To insert TM suggestions → CTRL + SHIFT + Number of the TM match (From 1 to 5) so the user can insert the first five suggestions of TM without mouse clicking:
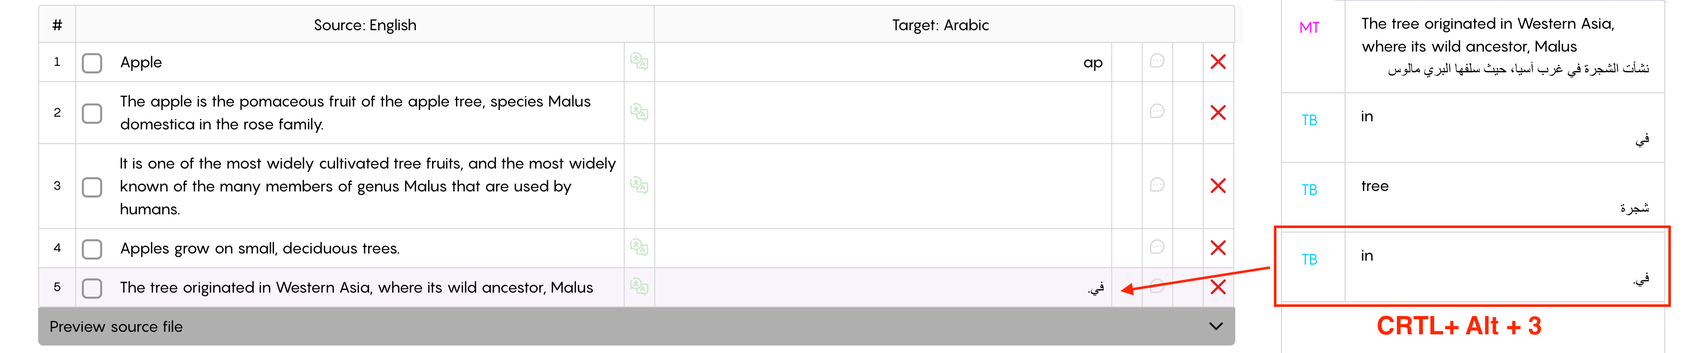
To insert TB suggestions → CRTL + Alt + Number of the TB match (From 1 to 5) so the user can insert the first five suggestions of TB without mouse clicking:
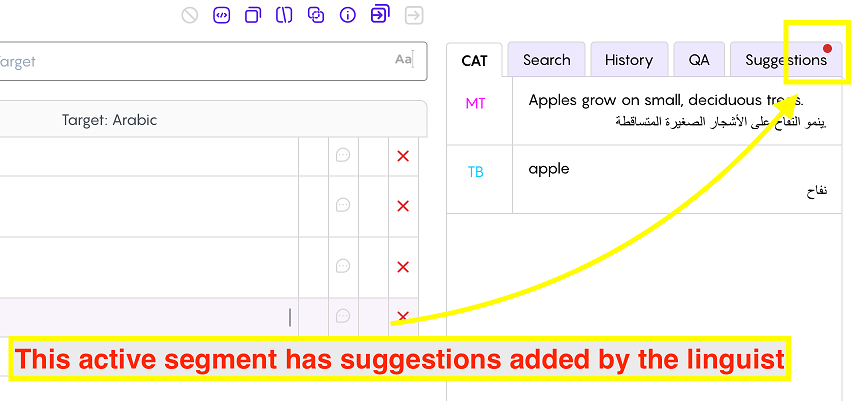
When activating a segment, a red dot will appear on the suggestions tab if a suggestion has previously been made to that segment:
Linguists can tell whether the match is coming from the TM or the MT in the workspace by the indicator next to the segment:
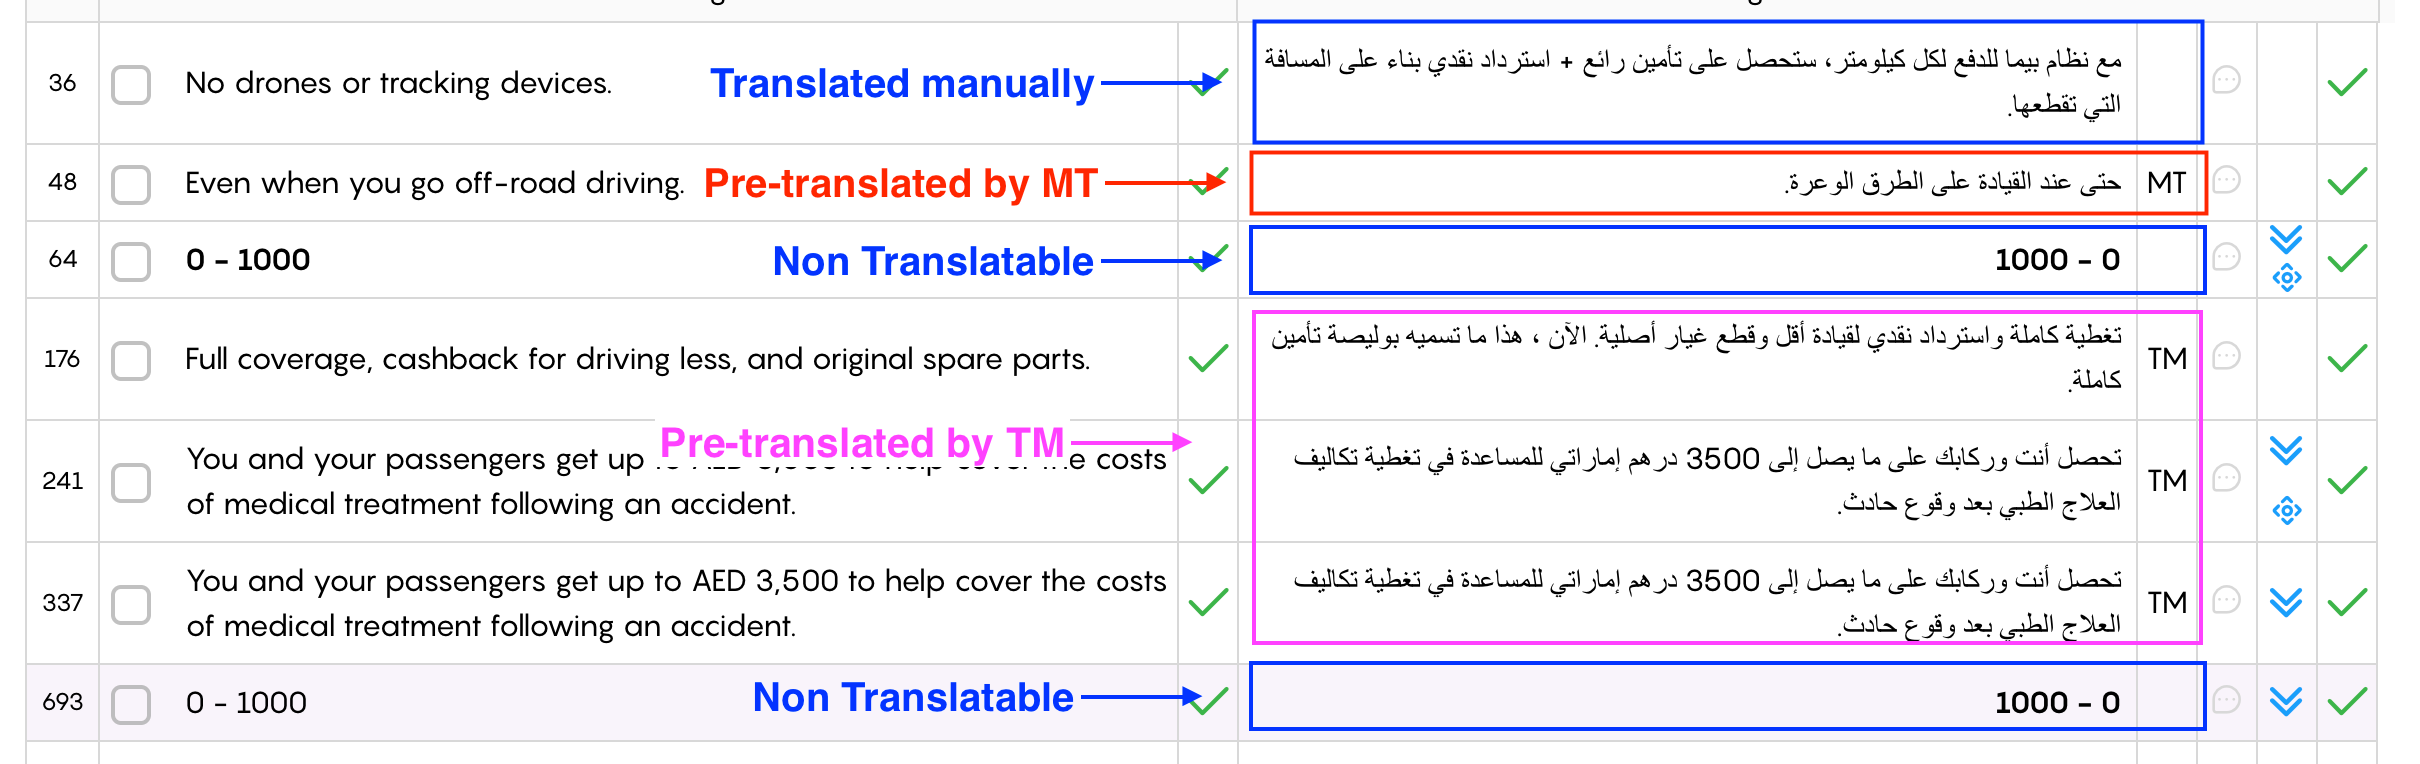
When the project is MT Pre-translated or TM Pre-translated, segments translated using MT will have the initials MT on the right side of the target segment, and the initials TM on segments that were translated using TM.
Non-translatable words, such as Numbers, Codes, URLs, Dates, Symbols, Punctuations, Abbreviations, Time, Foreign language (different from the source), Emails …etc. will have that column cell empty. Moreover, if the linguist translated the segment manually, or by double-clicking MT or TM suggestions, the cell will be empty.
Refer to the below recording:
Search Tab
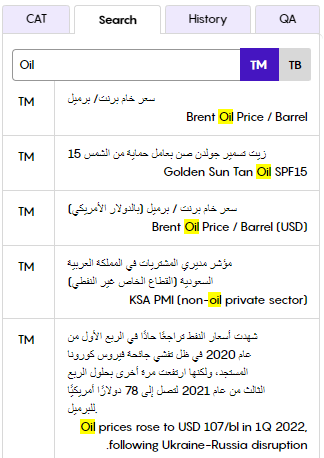
In the “Search” tab, users can type in keywords in the search field, and choose to search either within the TM Translation Memory or TB termbase:
Alternatively, users are able to use a shortcut to search the TM/TB after highlighting a text either in the source or the target segments:
Alt+B: To search for the highlighted text in the TB
Alt+M: To search for the highlighted text in the TM
When users search the TM or TB of a project in the workspace, the searched text will be highlighted whether it was on the source or on target:
Refer to the below recording:
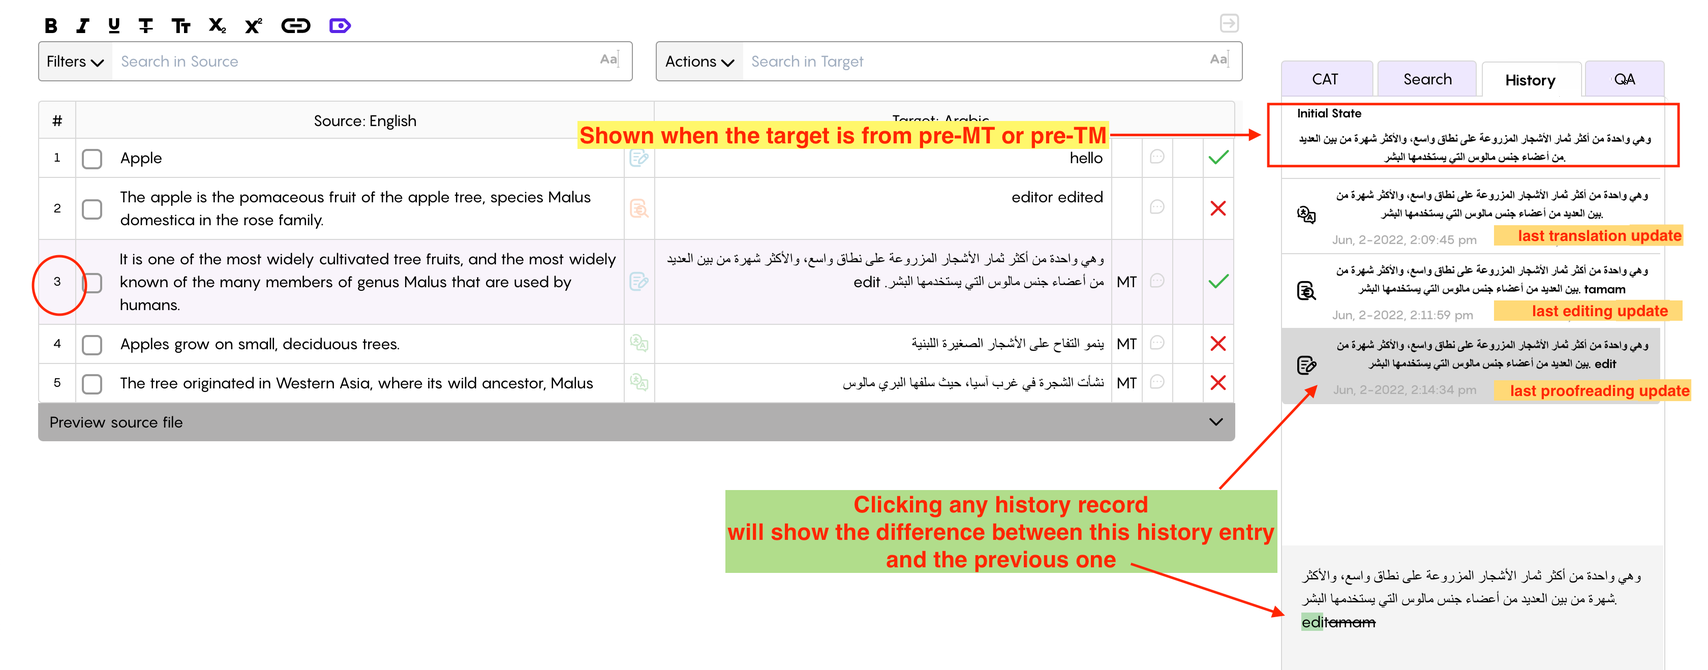
History Tab
In the History tab, users are able to see the latest edits of each stage in the history tab. Moreover, an initial stage will be displayed in case the segment was pre-translated using TM or MT. Other than that, only the latest update done by each linguist of each stage will be displayed in the right panel under the history tab. In addition to that, the below space will be displaying the difference between stages updates once any entry is clicked (the clicked entry will be compared with the previous update):
If the segment was a 100% TM pre-translated
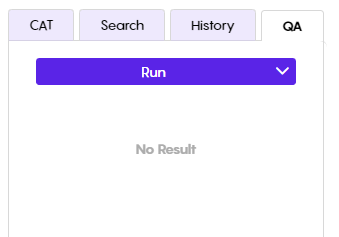
QA Tab
In the QA tab, linguists can run a QA check as per their desired criteria:
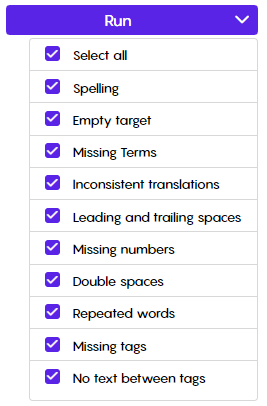
Linguists can select from a list including multiple potential errors:
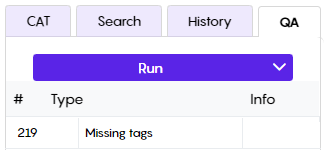
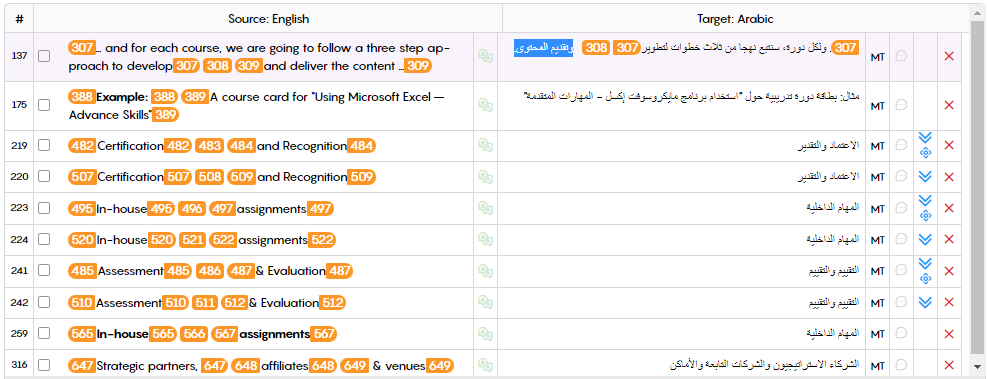
Clicking Run QA will initiate the check, and the errors will be displayed as per the criteria selected:
For e.g. in the screenshot below, the QA check returned a note regarding missing Tags in segment #219:
Should the linguist push their last segment, a notification will appear reminding them to run the QA checks.
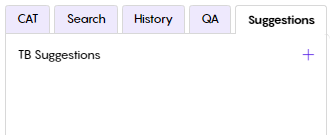
Suggestions Tab
If there was a termbase linked to the project, only then would the Suggestions tab be accessible.
In the Suggestions tab, linguists can suggest a term translation to be added to the termbase:
Clicking the + button, after activating a certain segment, 2 text fields will show up, prompting the linguist to add the source term and its translation in the target text field:
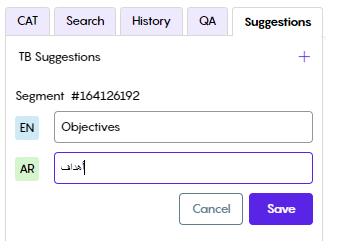
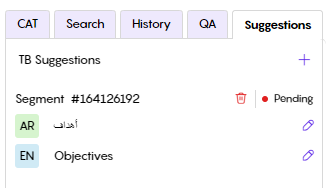
Clicking the save button, the TB suggestion will be sent to the QAs to be approved. Should the QA approve the suggested term, it will be saved to the TB, else, it will be ignored:
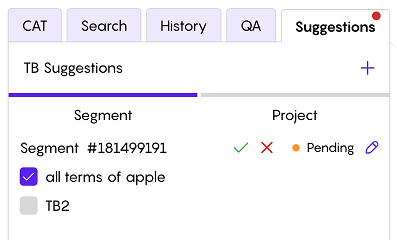
You can propose terms if your linguistic role was Editor or Proofreader. You can also accept or reject translator suggestions. Furthermore, accepting these suggestions gives you the option of selecting which Termbase they will be added to:
Refer to the below recording:
Search Bars
The search bars provide results from the source or the target text.
The search in the source is placed right above the source text segments, while the search in target is placed above the target text segments:

Refer to the below recording:
Filters
In the filters dropdown list, you will be able to:
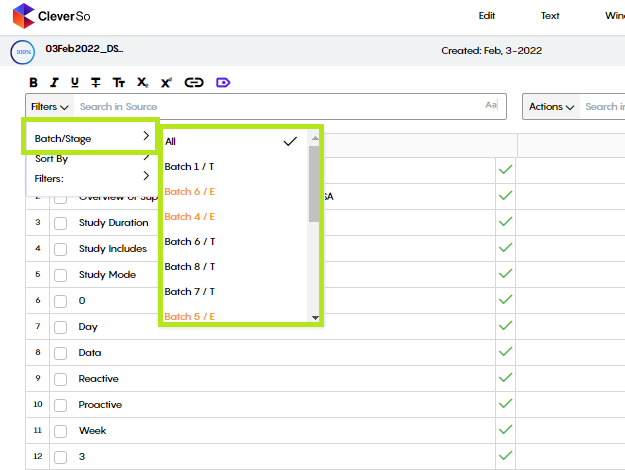
Select the batch and the stage:
Exactly as the name indicates, you can choose the batch as per batch number and batch stage. T stands for Translation, E stands for Editing, and P stands for Proofreading:
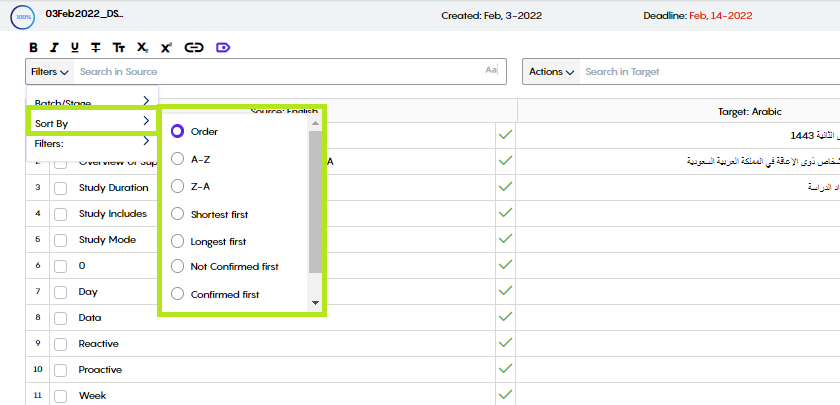
Sort Segments:
You can sort segments based on different options:
Order: The default text flow of the original file
A-Z: Sorts segments alphabetically from A to Z
Z-A: Sorts segments alphabetically from Z to A
Shortest first: Sorts segments as per their length/word count from shortest to longest
Largest first: Sorts segments as per their length/word count from longest to shortest
Not confirmed first: Brings the unconfirmed segments up to the top of the workspace
Confirmed first: Brings the confirmed segments up to the top of the workspace
Empty first: Brings the empty segments up to the top of the workspace
Empty first: Brings the empty segments up to the top of the workspace
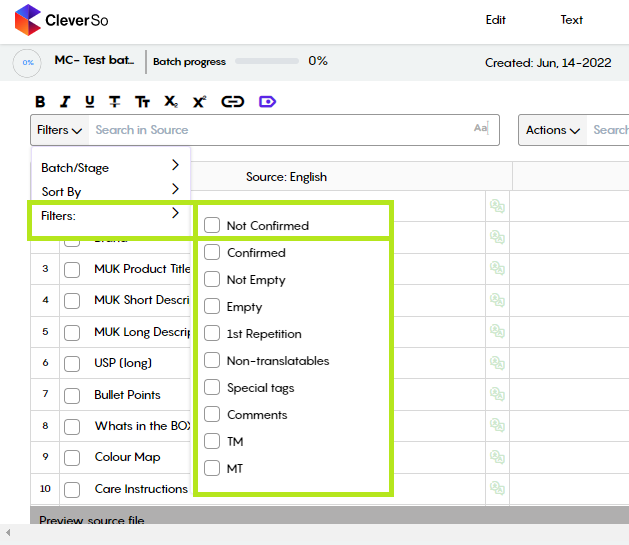
Filters: Filtering is a feature used for limiting the view of data to only that which is required to complete the task.
You can filter segments based on different options:
Not confirmed: Filters unconfirmed segments to be the only segments to show in the workspace
Confirmed: Filters confirmed segments to be the only segments to show in the workspace
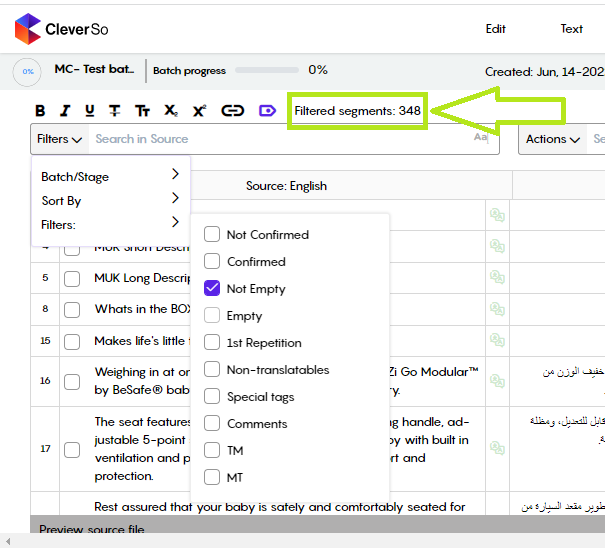
Not Empty: Filters non-empty segments to be the only segments to show in the workspace
Empty: Filters empty segments to be the only segments to show in the workspace
1st Repetition: Filters base repetition segments to be the only segments to show in the workspace
Non-translatable words: Filters non-translatable segments to be the only segments to show in the workspace
Special Tags: Filters segments with special tags to be the only segments to show in the workspace
Comments: Filters segments with comments to be the only segments to show in the workspace
TM: Filters segments pre-translated using the Translation Memory to be the only segments to show in the workspace
MT: Filters segments pre-translated using the Machine Translation to be the only segments to show in the workspace
Applying any of these filters, only the segments meeting the filtering condition will be displayed. In addition to that, the number of filtered segments will be displayed as well:
Refer to the below recording:
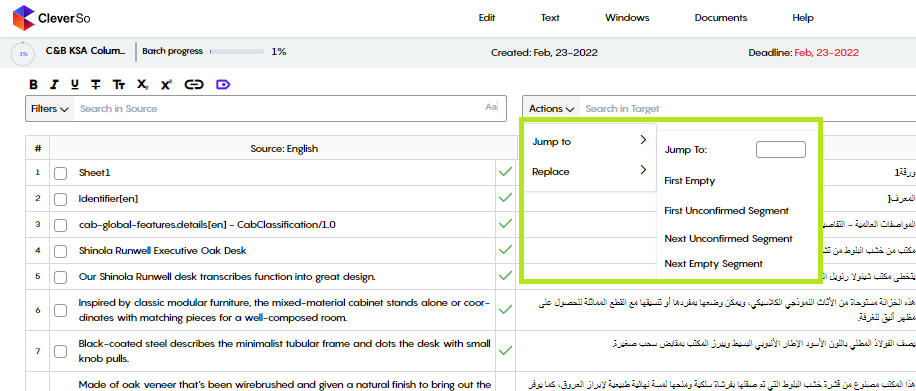
Jump to
The Jump to feature allows you to jump to a specific segment when you are working on a project.
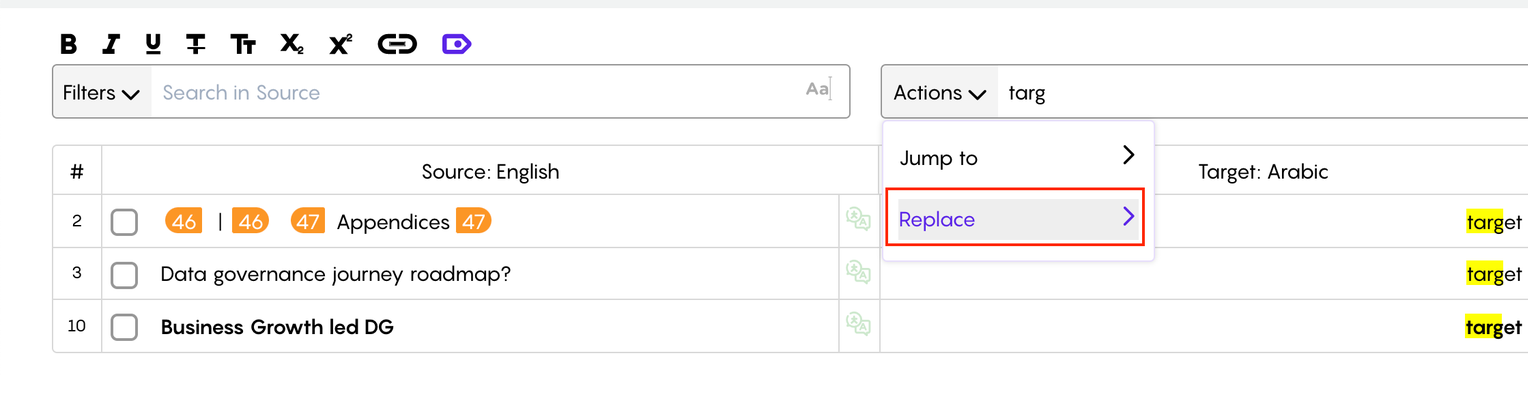
Replace
Replace allows you to replace a word or a sentence in the target text in a specific segment or in all segments.
Replacing unconfirmed segments has no conditions.
On the other hand, linguists will be able to replace segments they have pushed unless the next stage assignee has activated (clicked on) these segments.
Replace can be accessed by clicking “Actions” then “Replace”:
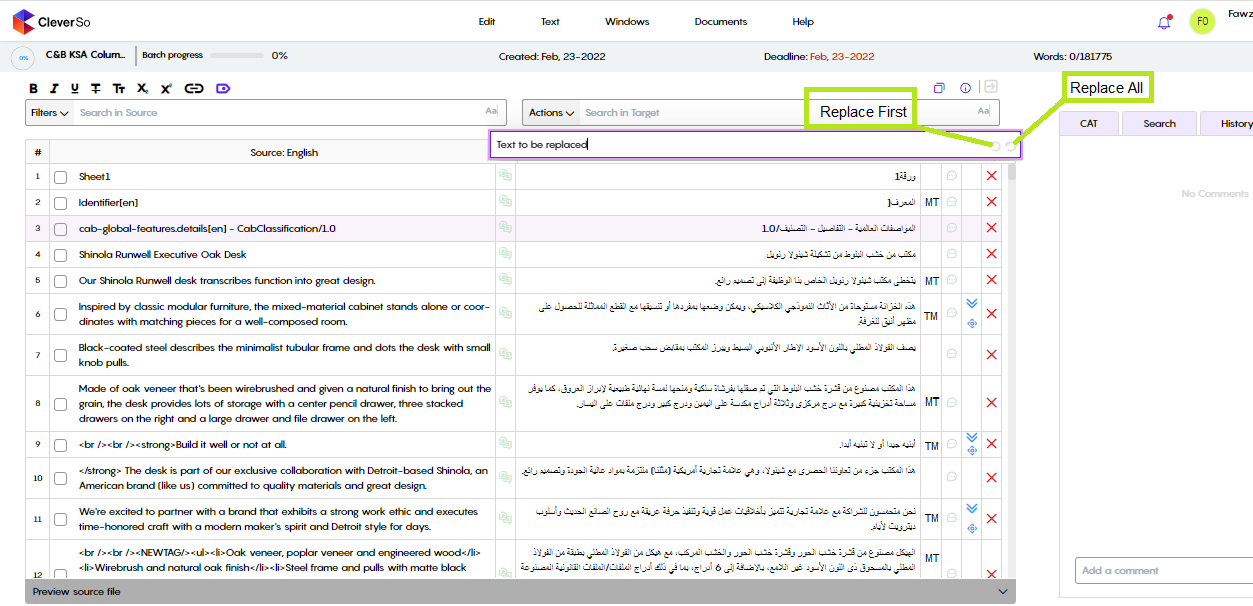
To replace a word/text:
Insert the word/text you want to replace in the “Replace with” field.
Choose if you want to replace the first segment that appears, or replace all segments including that word/text.
Replacing English text in the workspace is case sensitive. Meaning, users are able to search and replace the exact matching text in target segments as per the text’s case-sensitivity.
Filters Shortcuts
Notes
For mac devices, the shortcut will be (command + shift + fn + [f1, f2, f3, etc..]).
For Windows/Linux the shortcut will be [shift +alt + [f1, f2, f3, etc..]).
If the keyboard has the FN key means it needs to be used with the shortcuts when using them.
The Shortcuts:
Unconfirmed segments Shift+ ALT + F1
Confirmed Shift+ ALT + F2
Not Empty Shift + ALT + F3
Empty Shift + ALT + F4
1st repetition Shift + ALT + F5
Non-translatables Shift + ALT + F6
Specials tags Shift + ALT + F7
Comments Shift + ALT + F8
TM source of translation Shift + ALT + F9
MT source of translation Shift + ALT + F10
Segments
Segmentation is the process used to divide the source text into smaller fragments of text, called Segments. The retrieval of previously translated text from a translation memory is improved as a result.
Merging and Splitting Segments
Segmentation rules are based on a set of fixed rules which do not always segment in a way that makes sense. Therefore, it may be necessary to merge or split a segment to correct the segmentation.
Changing how a document is segmented by splitting and merging segments may affect the matches produced from translation memory because the segmentation in the translation memory may become different from the segmentation in the document.
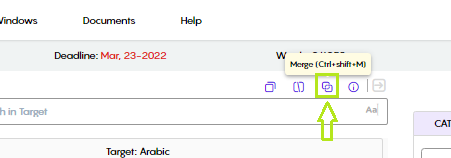
Merging
To merge segments:
Make sure the segment you want to merge is active by clicking on it.
Click on the merging icon or use the shortcut (Ctrl+Shift+M) and the segment you selected will merge with the next one.
Before Merging:

After Merging:

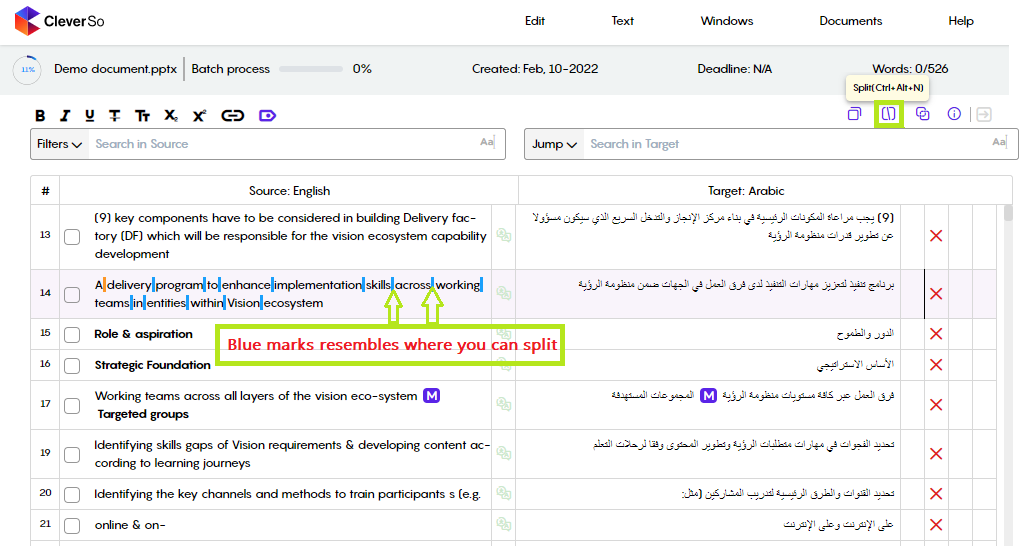
Splitting
To split a segment into more than one segment:
Activate the segment you want to split by clicking on it.
Click on the splitting icon or use the shortcut (Ctrl+Shift+N). This will activate the splitting function and will show you the places where you can split the segment in the source text.
Click on the blue mark where you want to split and the segment will be separated at the specified mark.
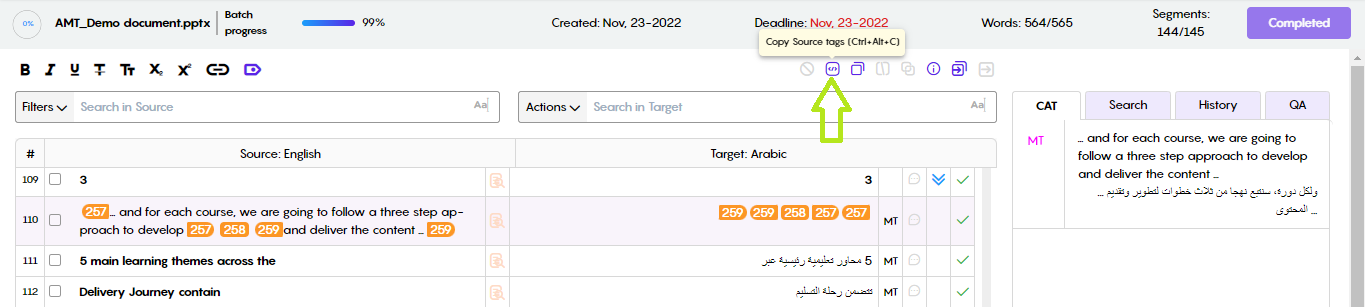
Copy Source Tags to Target
This function will copy only the source tags to the target segment:
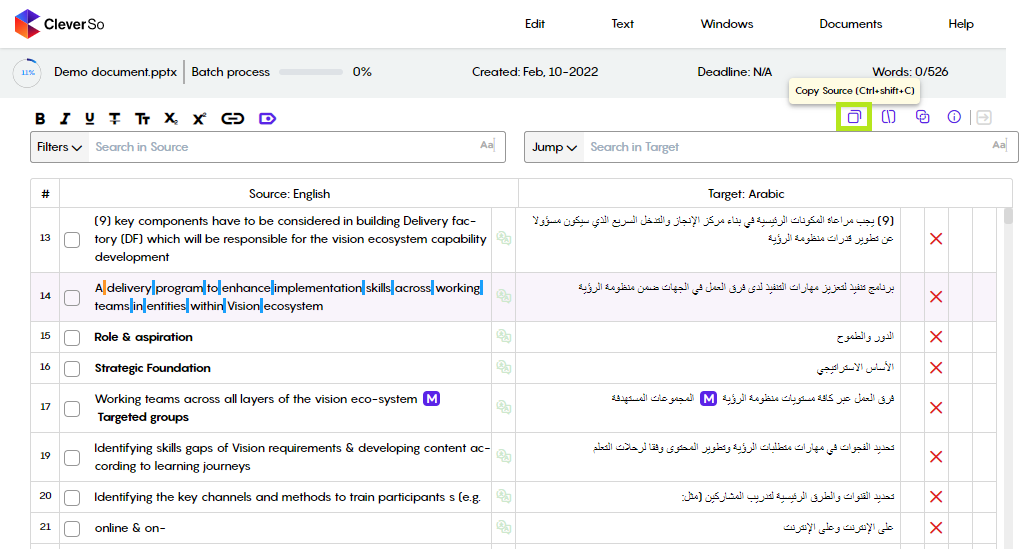
Copy Source to Target
This function will copy the source text, and tags, to the target segment:
Push Batch
Clicking the Push Batch button will open a new window where you will be able to push either all segments in a certain batch or all non-translatable segments
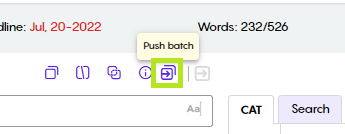
Clicking the Push Batch button, the below window will pop up:
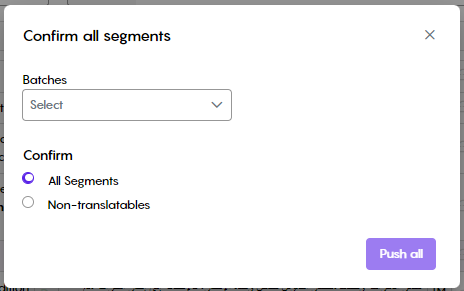
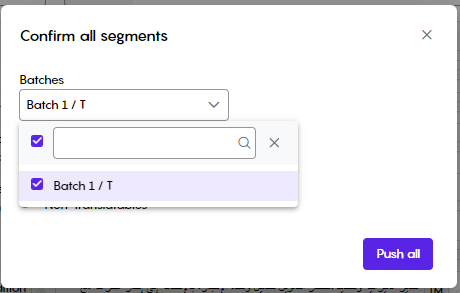
To confirm all segments or non-translatable segments, you first need to select the batch in question. This could be done by clicking on the dropdown list and selecting the batch:
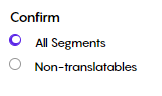
Once done with selecting the batch, you need to specify what segments you need to push
All Segments
Non-translatable
Once decided, click on the Push all button.
All empty segments will be ignored and will not be affected
Refer to the below recording:
Special Tags
Tags represent non-translatable text. Non-translatable text can represent variables, special formatting, formal names, code, etc.
Tags must be copied from source to target to ensure formatting and variables are preserved correctly in the exported target file.
To copy a tag to the target text, place the cursor where the tag should be in the target text then use the shortcut (Ctrl+K)
Alternatively, the linguist can highlight the target text and then use the shortcut (CTRL+K) or (Command+K for mac) to insert the tags and put the highlighted text in between.
Refer to the below recording:
Comments
Linguists can leave a comment on any segment for their colleagues to see. This could be done by clicking the comment button next to the segment in question:

Clicking the comment button will open a pop-up where you can leave your comment or note:

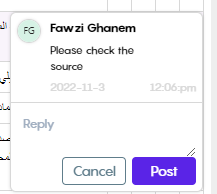
Write down your comment and click the Post button. Doing so, the comment button will turn blue, indicating there’s a comment left on this segment:

Clicking the Comment button again will display the comment and any reply made to it, along with the info of the user who left it:
Execution
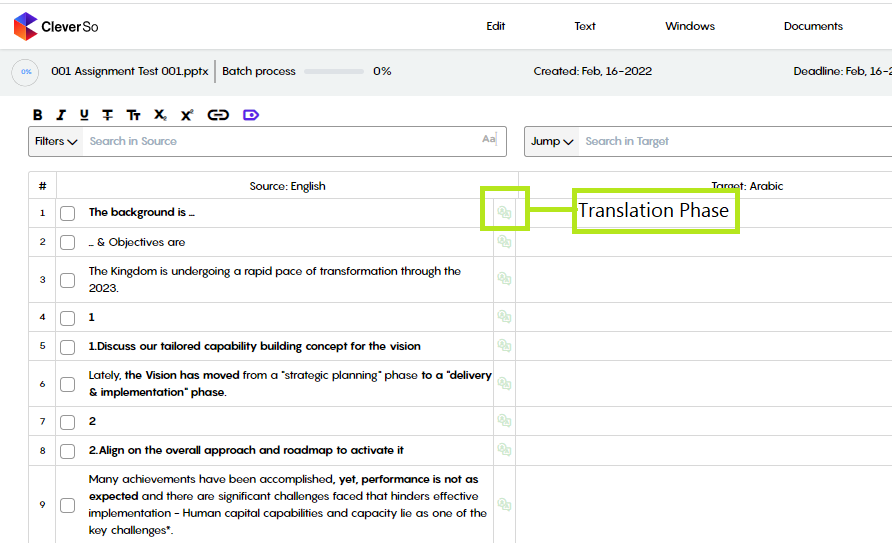
Translation
Translators will be using CleverSo to translate segments in the document. Once a segment is translated, it needs to be confirmed in order for the editor to be able to work on it. To confirm a segment, press “Ctrl+Enter”. Alternatively, you can click on the red cross “X” next to the segment.
The icon between the source and target columns denotes the segment's current workflow phase.
Translators can edit their confirmed segment as long as the editor in the editing stage (if any) did not click that segment.
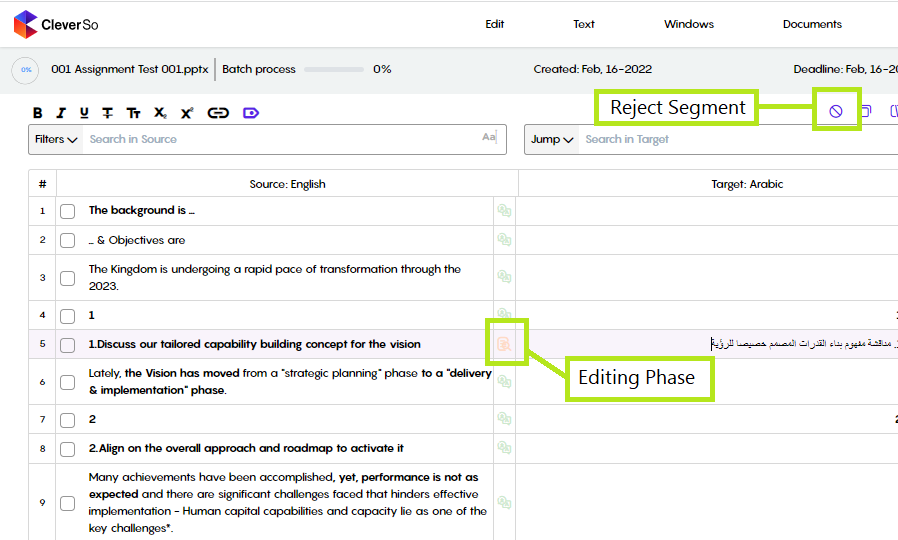
Editing
Editors can edit the confirmed translated segment simultaneously with the translators. Once a segment is confirmed by the Translator, the Editor will be able to edit the segment directly, or alternatively reject it (Ctrl+Shift+Enter) to send it back to the translator for re-translation. Once the segment is confirmed by the Editor, the proofreader will be able to work on it instantly.
Editors can edit their confirmed segment as long as the proofreader in the proofreading stage (if any) did not click that segment.
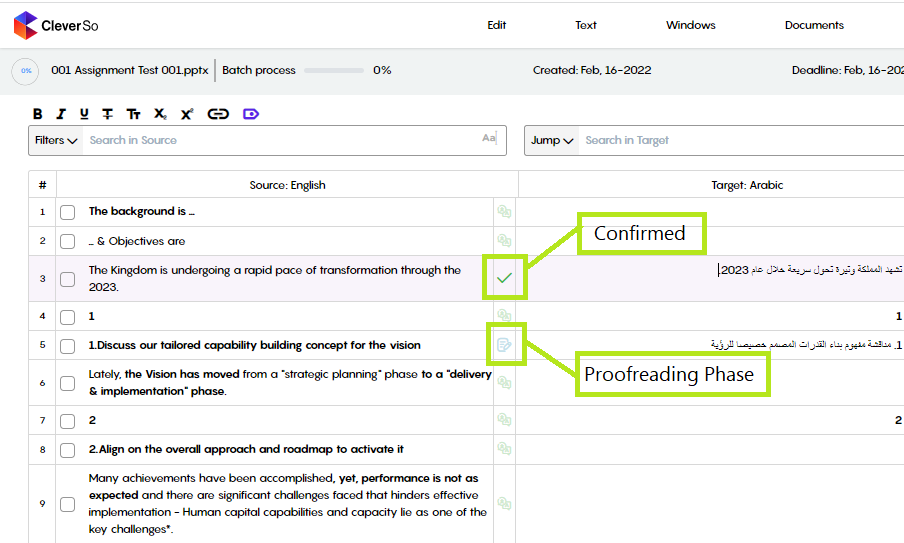
Proofreading
Once a segment is confirmed by the editor, it will be available to be proofread by the proofreader, so they may similarly review, edit, reject, or confirm each segment.
Refer to the below recording:
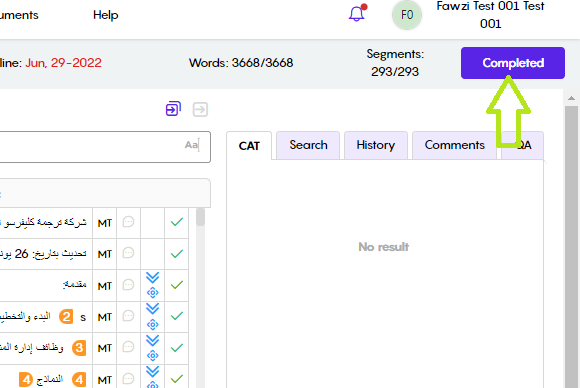
Completing Your Project
After you are done confirming/pushing all segments in the project/batch assigned to you, you will be able to mark it as Completed, and it will be moved from the Active Projects List to the Completed Projects List. To complete a project, click the Complete button in the workspace:
If the project was completed from the PM side, the associated linguist(s) will still have access to it but won't be able to make changes.
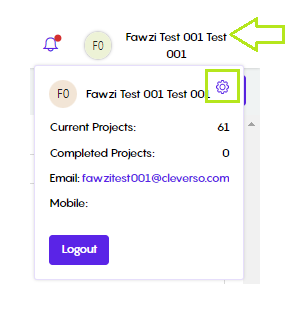
CleverSo Settings
To access CleverSo settings, click on your name on the top right, then click the little gear on the top right corner:
In the General info section, you can upload an avatar, edit your 1st and last name, email address, mobile, and time zone. You can as well set your status to “away“ for a certain period of time to let your PMs know that you are not available.
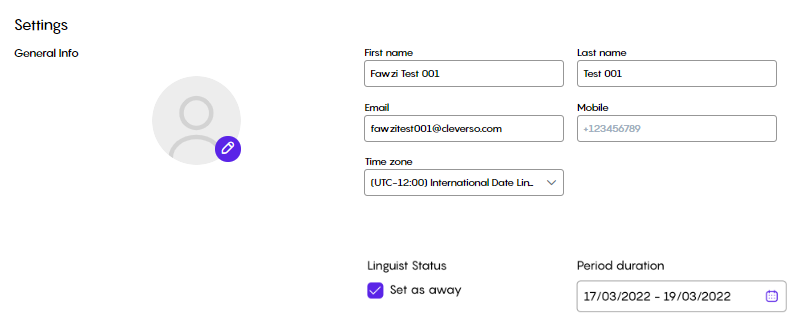
In the Calendar section, you will be able to:
Set your status as Away for a certain period of time. This could be done by selecting the from-to-date and clicking Save:
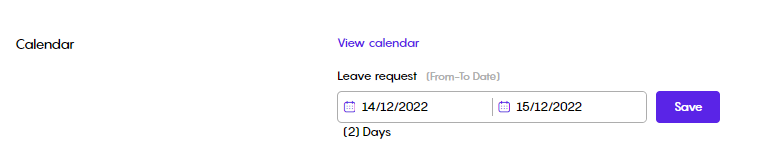
View your calendar to see the time segments when you will be Busy working on a project, Away, or Blocked by a PM. This could be viewed by clicking View Calendar located in the Calendar section:
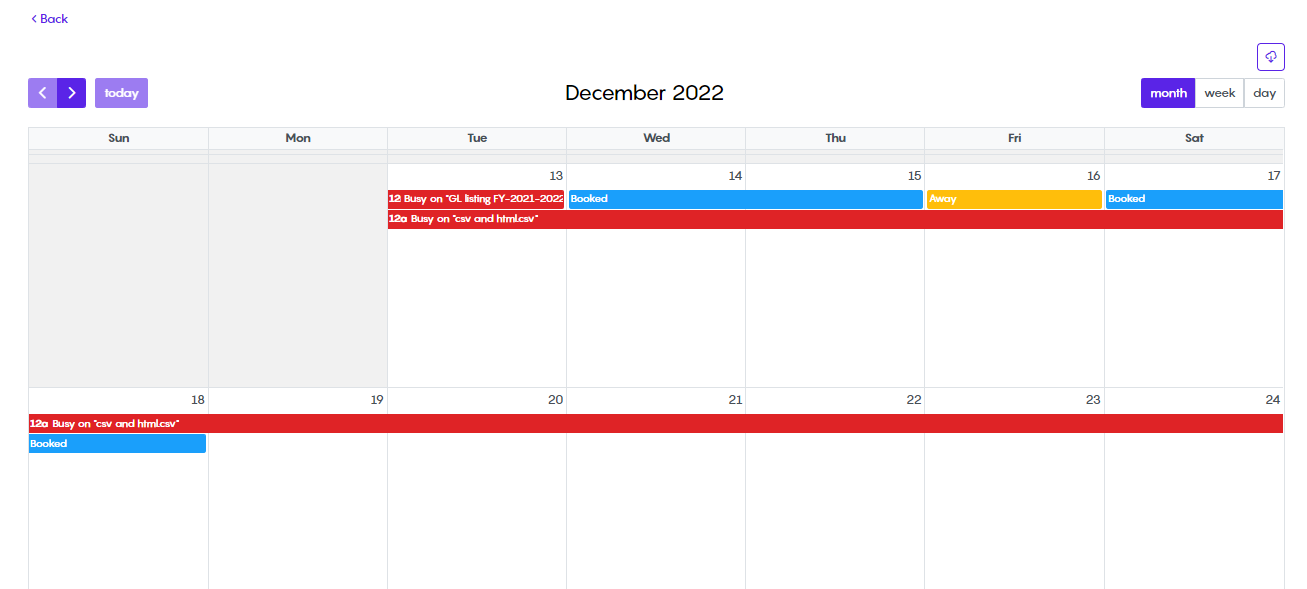
By clicking the Away time segment, you can remove it from your calendar.
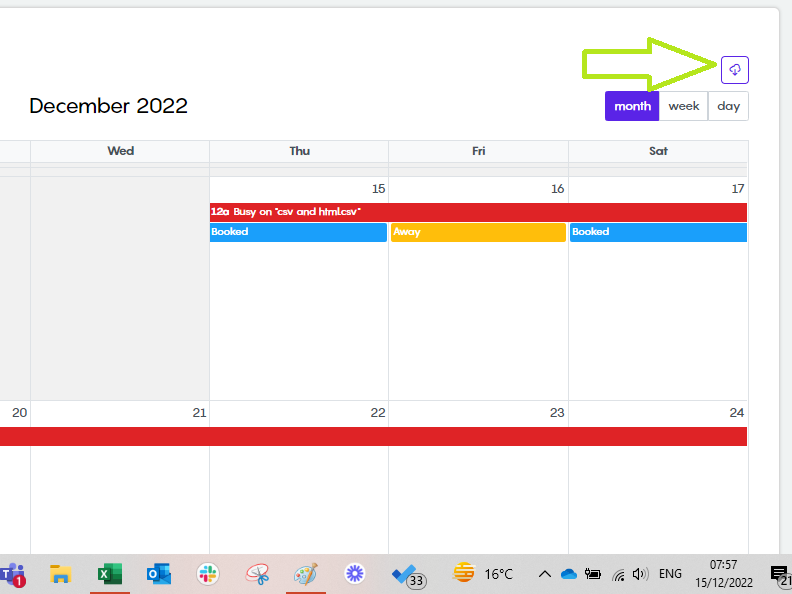
Download the calendar in (CSV) format. It could also be downloaded in (ICS) format to support adding your events to your mobile calendar. You can download the calendar of the month you are browsing using the download button:
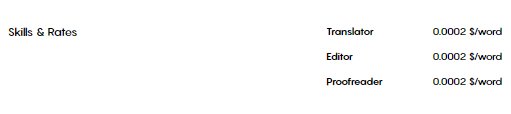
In the Skills & Rates section, you can check your linguistic skills side by side with rates per word:
In the languages section, you can check your language pairs:

In the password section, you can change your password:

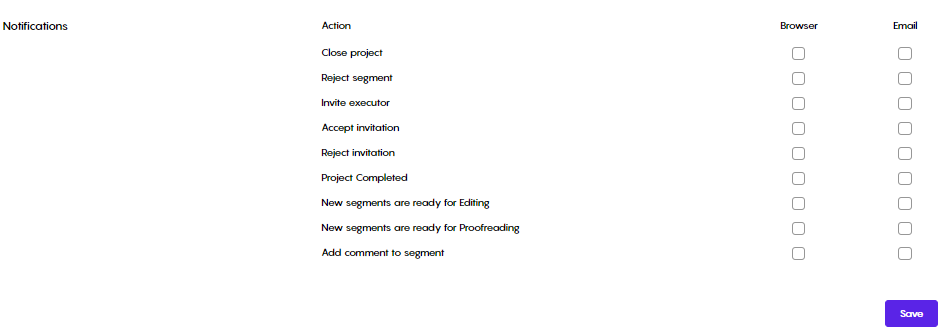
Finally, in the notifications section, you can select the actions you need to receive a notification about. Notifications can be received either on the browser, via email, or both:
Refer to the below recording:
Keyboard Shortcuts
Shortcut |
Function |
|---|---|
Shortcut |
Description |
Ctrl+Shift+F |
Switch between full screen and window mode |
Ctrl+Alt+N |
Enter split segment mode |
Right |
Select the next split point on the right |
Left |
Select the next split point on the left |
Down |
Split the segment at the selected point |
Up |
Cancel and exit segment split mode |
Ctrl+Shift+M |
Merge active segment with the next one |
Ctrl+J |
Add merge tag at the cursor position |
Ctrl+K |
Insert tag at the current position |
Ctrl+Enter |
Confirm segment |
Ctrl+Shift+Enter |
Reject segment |
Enter |
Move to the next segment |
Ctrl+Shift+Z |
Open history window of the active segment |
Ctrl+Z |
Revert to the previous segment in history |
Ctrl+G |
Open the "Jump to" menu |
Ctrl+Shift+E |
Focus on the comments panel for the active segment |
Ctrl+Shift+ > |
Select text of the active segment |
Ctrl+Shift+C |
Copy source text to target |
Ctrl+Alt+ P |
Show/hide the progress bar |
Ctrl+Alt+ T |
Show/hide the text formatting bar |
Ctrl+Alt+B |
Show/hide the "CAT" Tab |
Ctrl+Alt+C |
Show/hide the "Comments" Tab |
Ctrl+B |
Format text: Bold |
Ctrl+I |
Format text: Italic |
Ctrl+Shift+S |
Format text: Strikethrough |
Ctrl+Caps |
Format text: Capitalize |
Ctrl+; |
Format text: Subscript |
Ctrl+' |
Format text: Superscript |
Ctrl+U |
Format text: Underline |
Ctrl+Shift+A |
Add custom link |
Ctrl+Shift+L |
Show/hide tags |
Ctrl+Enter |
Add Comment |
Ctrl+` |
Insert MT suggestion |
Ctrl+Shift+Number |
Insert TM suggestion, number of the TM match (From 1 to 5) |
Ctrl+Alt+Number |
Insert TB suggestion, number of the TB match (From 1 to 5) |
Alt+M |
Search the highlighted word in the attached TM |
Alt+B |
Search the highlighted word in the attached TB |
Format commands
Shortcut |
Function |
|---|---|
Ctrl+B |
Bold |
Ctrl+I |
Italic |
Ctrl+Shift+S |
Strikethrough |
Ctrl+Capslock |
Capitalize |
Ctrl+ ; |
Subscript |
Ctrl+ ' |
Superscript |
Ctrl+Shift+L |
Show/hide tags |
Thank You
For more info, please don’t hesitate to contact your Account Manager.