Tarjama CleverSo Help for Project Managers 2025
Introduction
This document offers a comprehensive overview of CleverSo, a powerful tool designed to streamline the translation process for project managers. It provides detailed instructions on how to effectively utilize each of CleverSo's functions throughout the project lifecycle. From project initiation to completion, PMs can efficiently manage translations end-to-end within this convenient and dynamic platform.
Templates Tab
Insights
Once you log in to CleverSo as a project manager, you'll land on the templates page. The insights could be found at top, providing a snapshot of your current projects, showing you which ones are active, inactive, pending, or overdue.

Below the statistics section on the Dashboard, you'll find a list of pre-made templates that you can use in CleverSo.
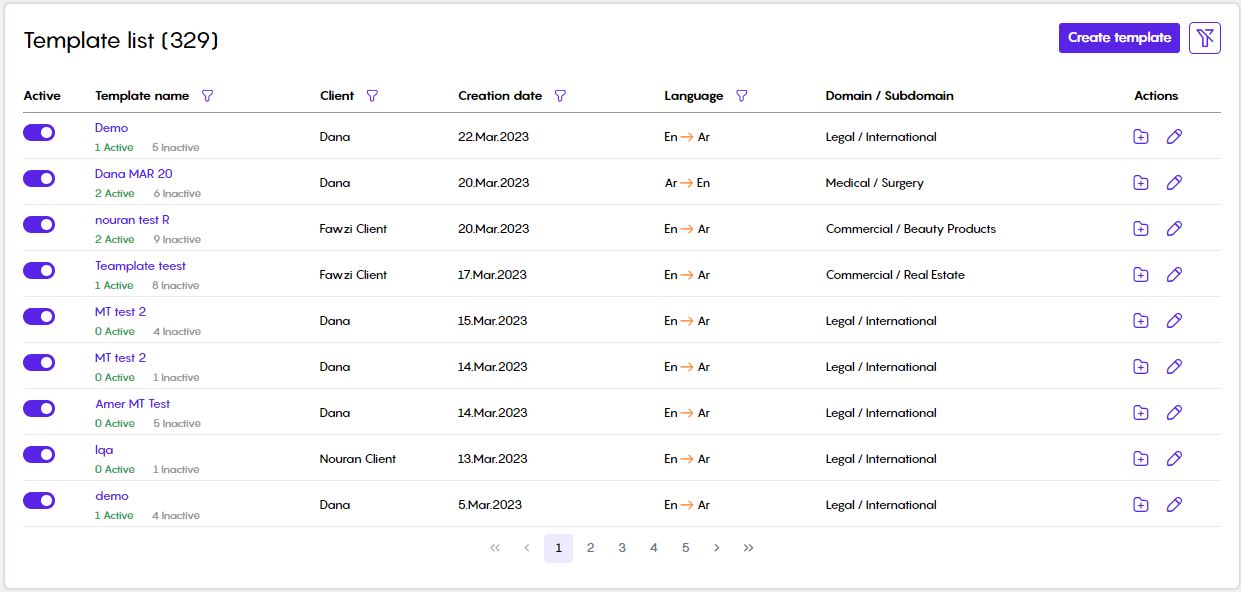
The templates page allows you to manage templates in various ways. You can activate or deactivate them, create new ones, edit existing ones, add projects to them, and filter them by name, client, creation date, or language.
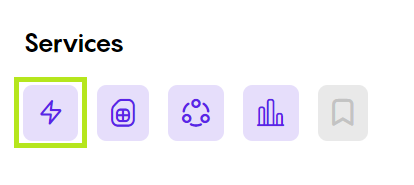
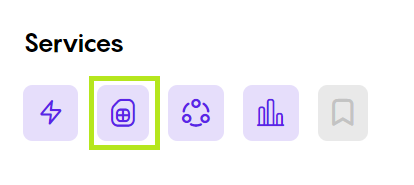
Services
The services section provides access to various services within CleverSo, including:
TM Alignment
Website Extraction
Automation
Analysis

TM Alignment Service
The translation memory alignment service allows you to compare a source file with its translated version and create a new translation memory (TM).
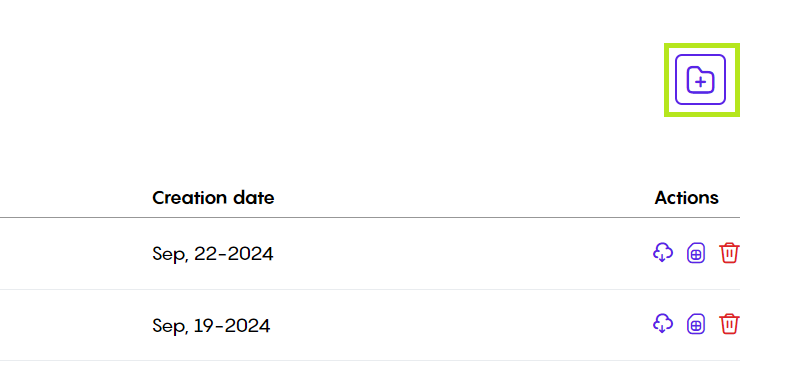
To align new documents, click "Align New Document" in the top left corner. This will open a window where you'll need to:
Provide a name for the alignment
Choose the source and target languages
Upload both the source and target files.
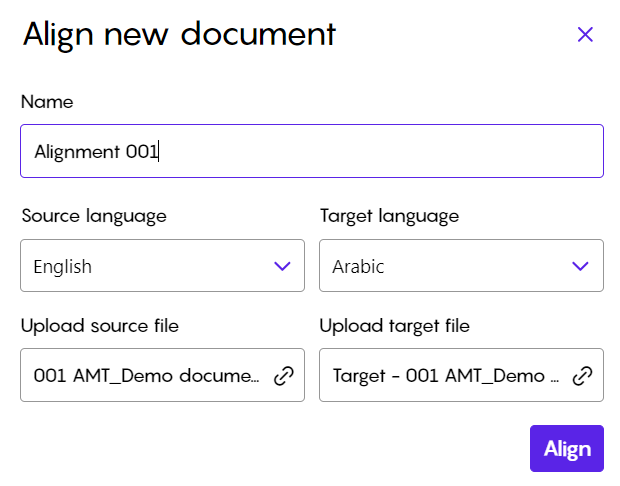
After entering all the necessary information, click "Align" to start the alignment process. You can then view the newly created alignment and access it once the process is complete.
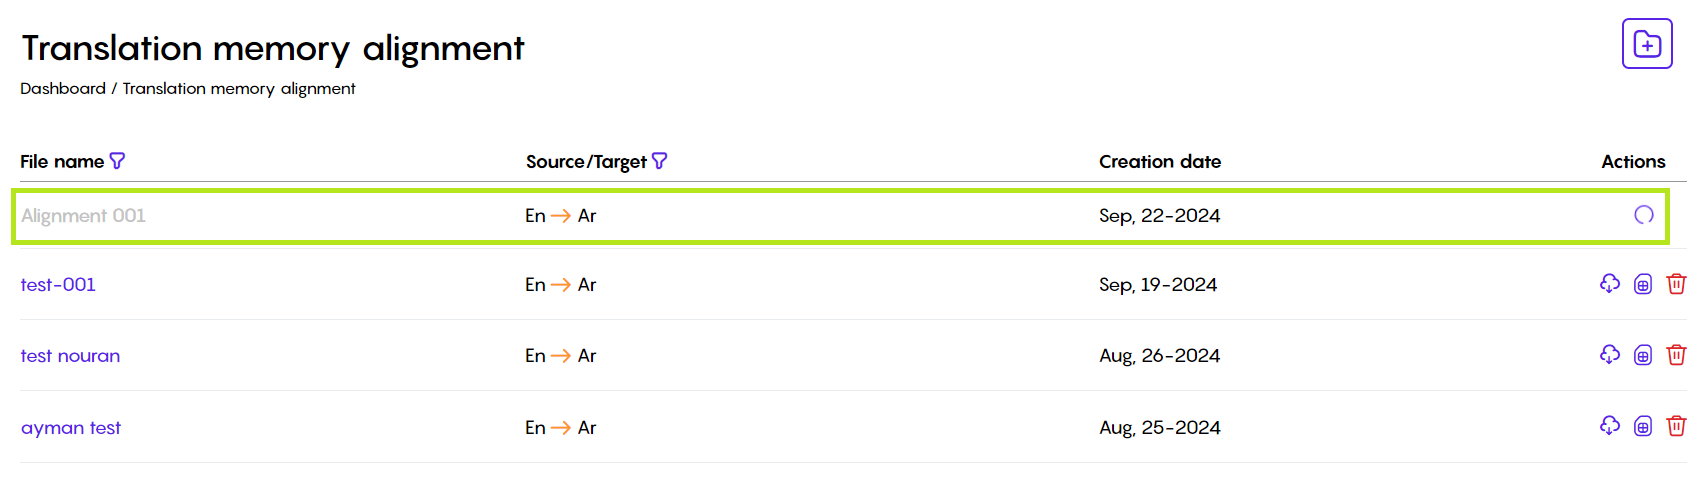
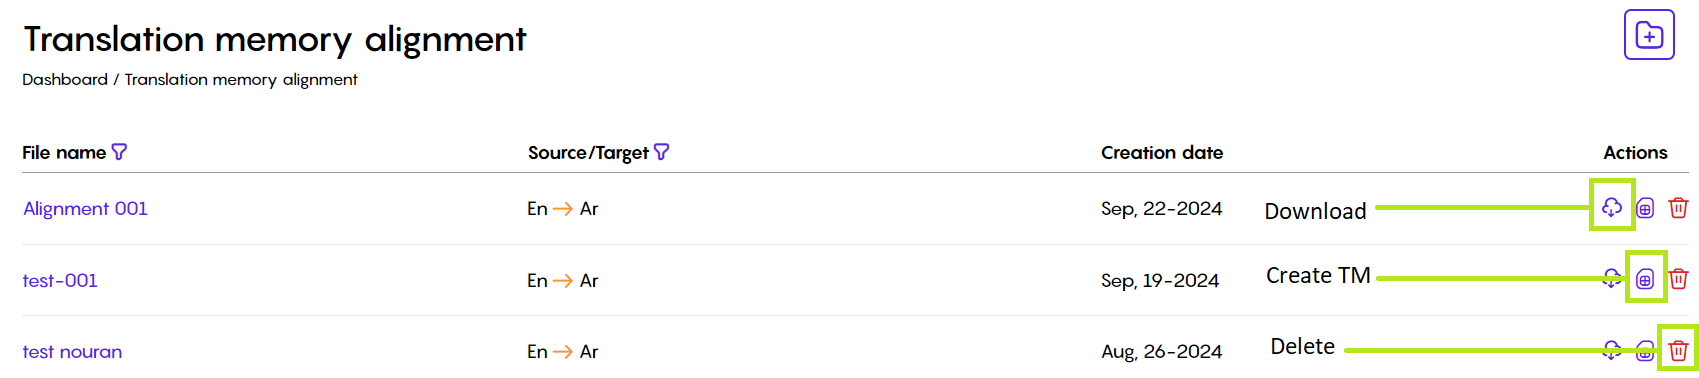
You can tell the alignment process is finished when action buttons appear. These action buttons allow you to download the alignment, delete it, create a new translation memory from it, or merge it with an existing one.
Clicking the filename will take you to the alignment workspace.
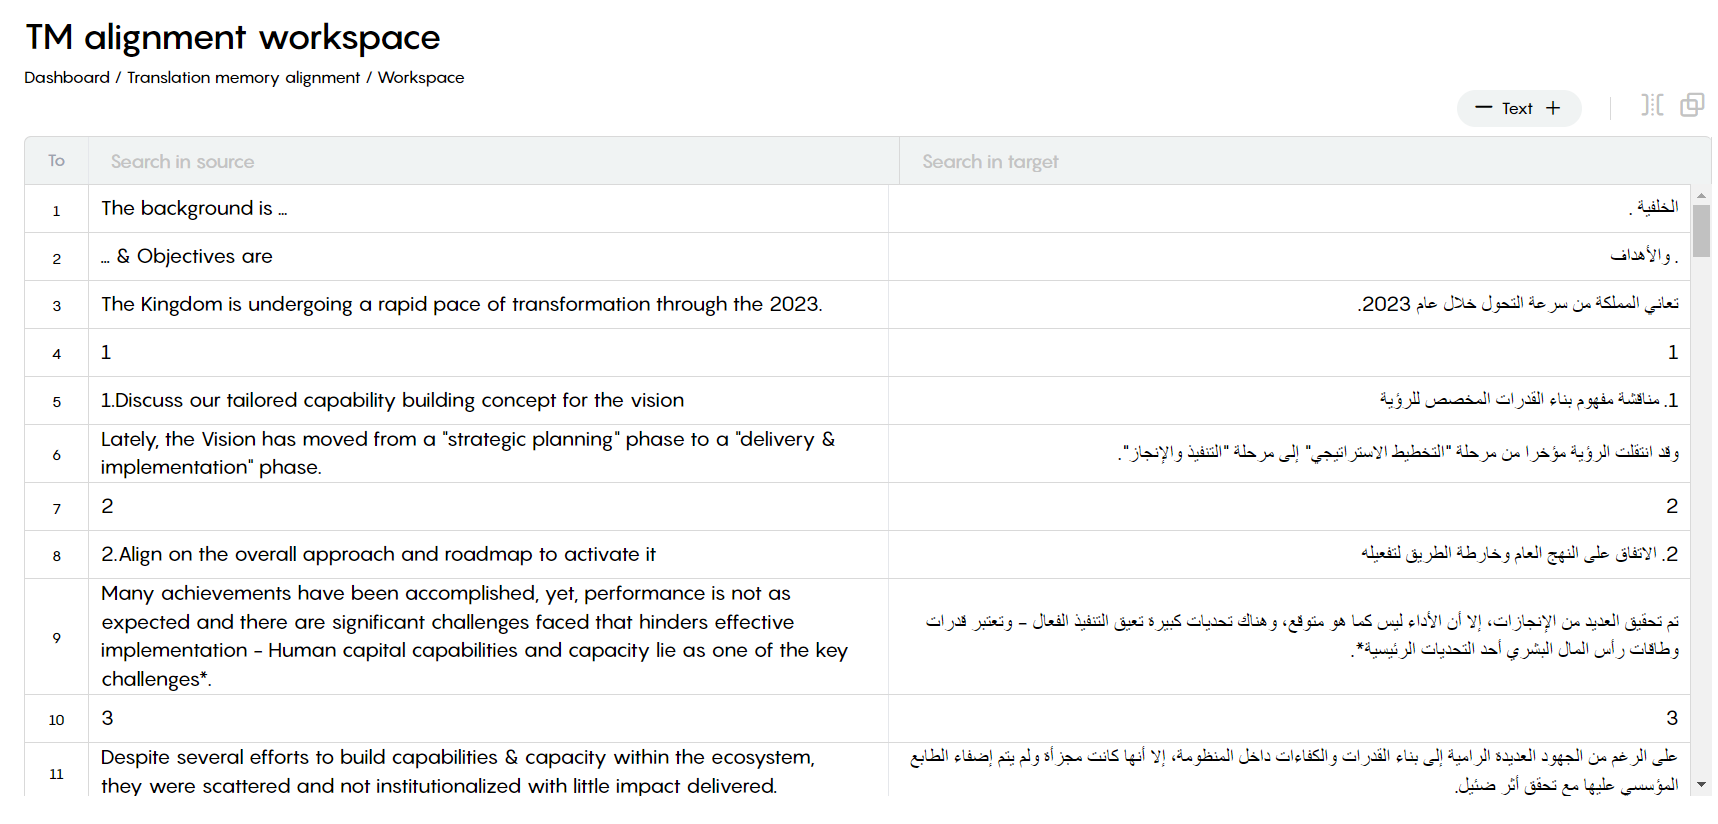
In the alignment workspace, you can make changes to the source text, target text, combine or separate segments, and adjust the font size.

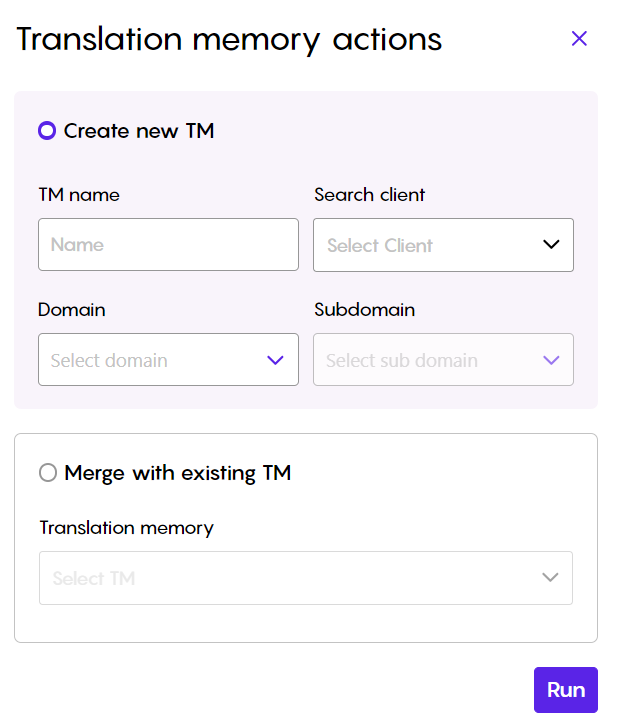
After completing the alignment, return to the alignments list and click "Create TM".

When you click "Create TM," a new window will appear. You can choose to create a new translation memory or merge the alignment with an existing one.
Website Extraction Service
The Website Extraction Service within CleverSo provides a powerful tool for extracting text from websites. This service can be invaluable for projects that require large amounts of content to be translated or analyzed.
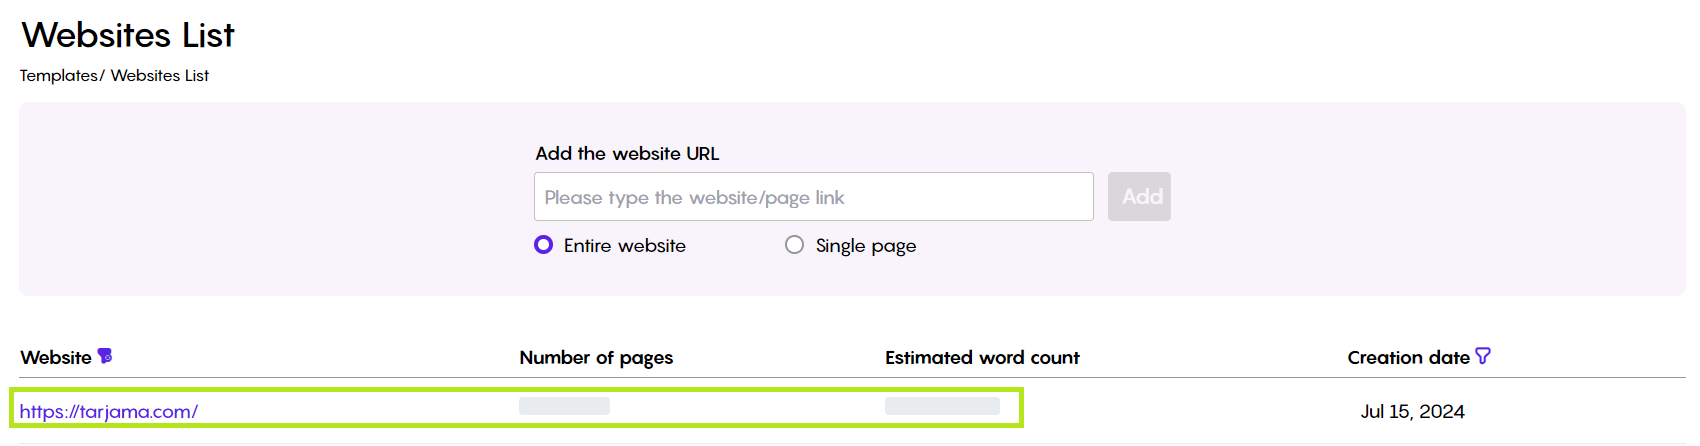
Website URL Input: PMs can insert a link of a single page or an entire website to be extracted. This flexibility allows for efficient content acquisition from various sources.

Simply insert the website URL you need to extract in the textbox, select either the Website or the Single page option, and click the Add button.
Once the add button is clicked, the extraction process will be initiated. A link to the pages list will be added under the Website column, and the Number of Pages and Estimated Word Count will be listed under their corresponding columns once the extraction process is done.
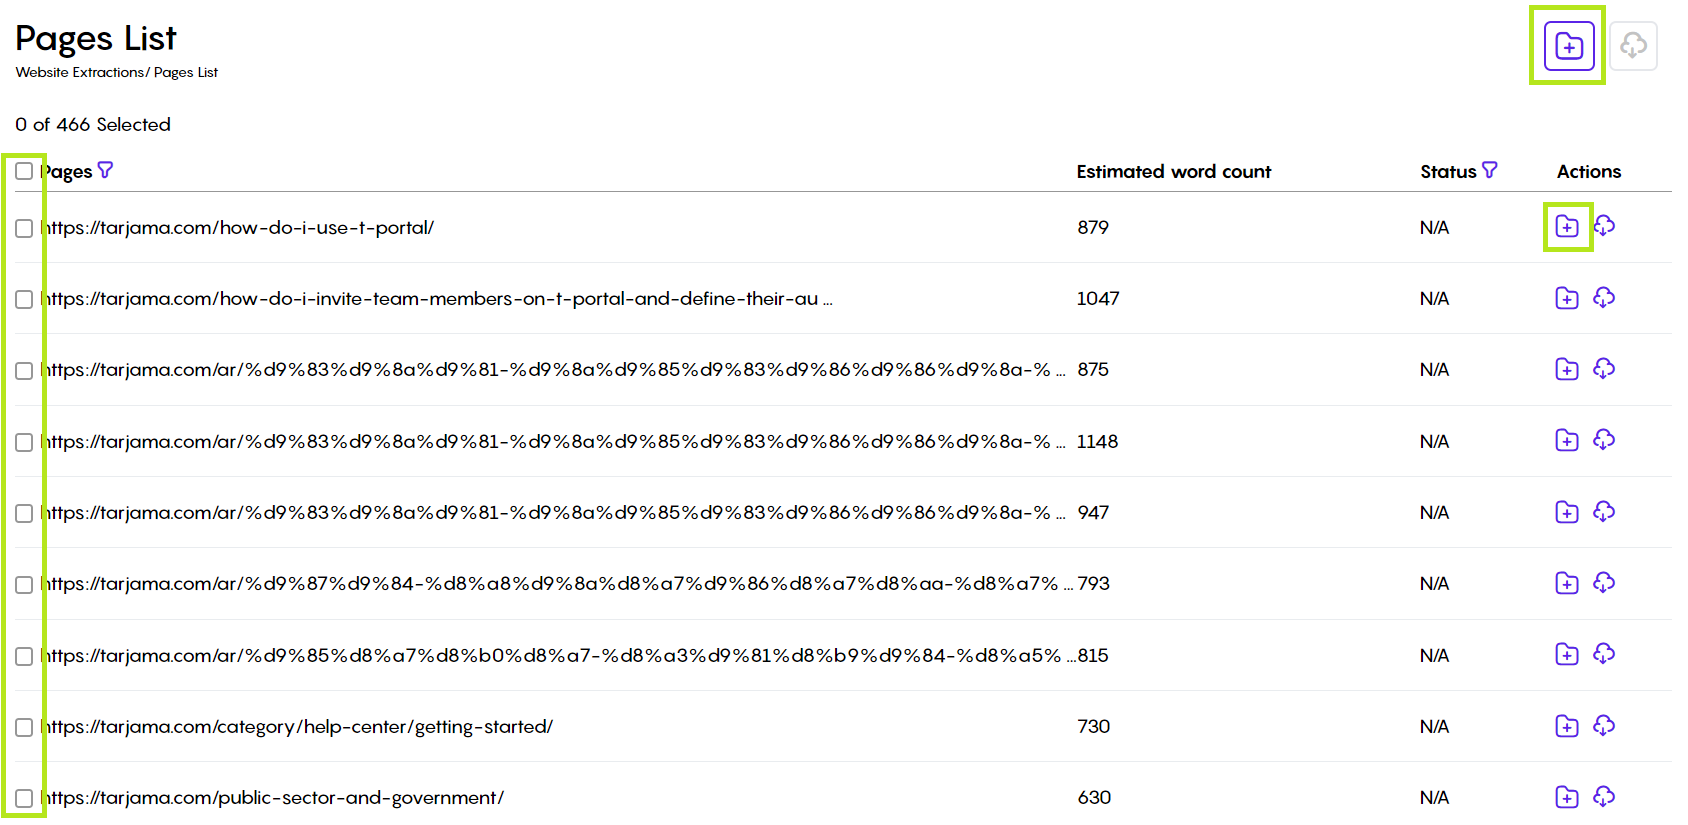
Project managers can create a new CleverSo project to translate the extracted text, making the translation process more efficient. To do this, go to the pages list and click "Create Project." PMs can also select and perform actions on multiple pages at once.
Automation Service

CleverSo's Automation is a powerful feature designed to streamline the translation management process and reduce manual effort. This service automates key functions such as project analysis and pre-translation.
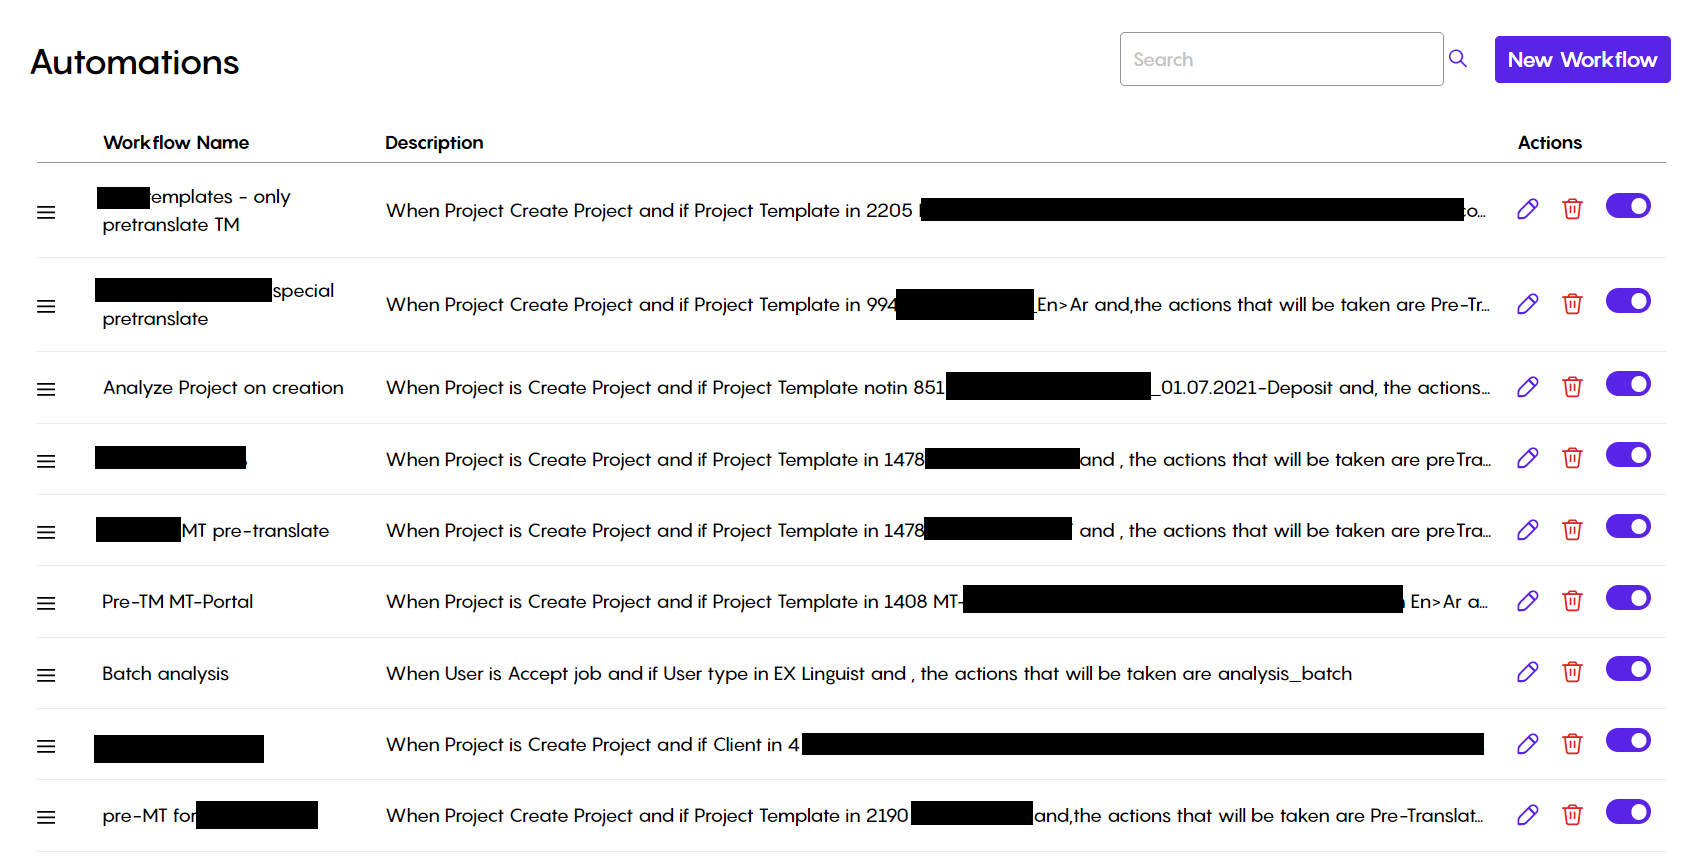
On the main page, you can create new automations, edit existing ones, delete them, and activate or deactivate them.
Pre-Translation Automation:
Machine Translation MT: CleverSo offers seamless integration with machine translation engines. This allows for the automatic generation of pre-translations, providing a solid foundation for human translators.
Translation Memory TM: The service can automatically leverage existing translation memories to pre-translate repeated content. This significantly speeds up the translation process and improves accuracy.
Statistical Project Analysis Automation: Can be useful for estimating translation costs or assessing document length.
Character Count: Provides the total number of characters in your project.
Word Count: Calculates the total number of words in your project.
Segment Count: Determines the number of segments within your project.
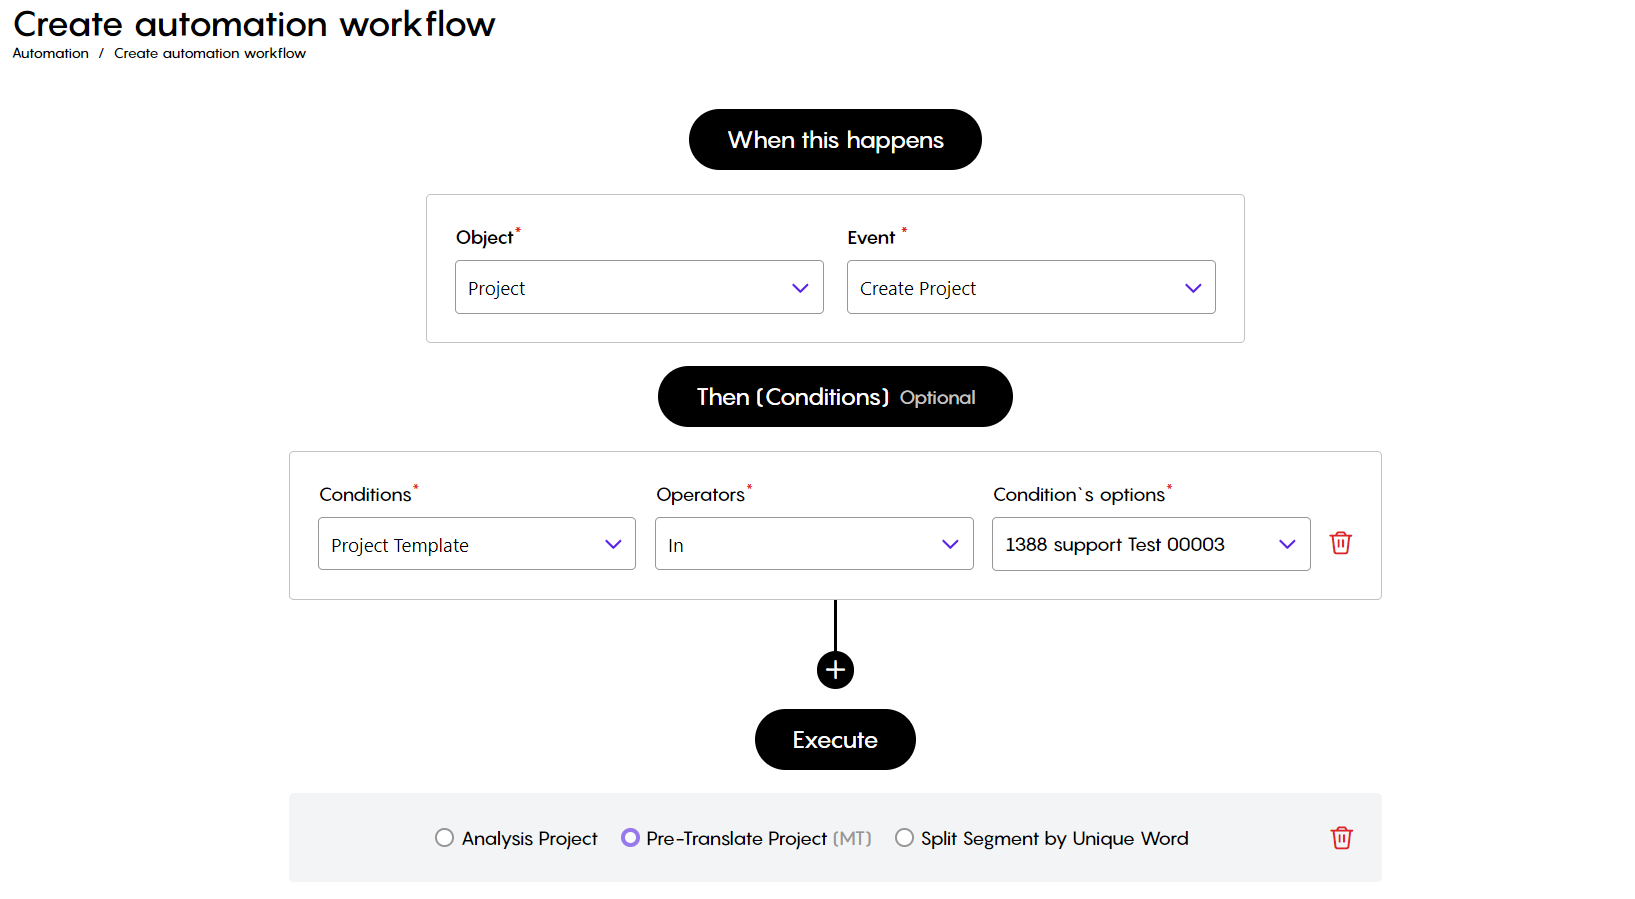
To create an automation, click "New Workflow." This will take you to a page where you can set up rules and actions. For example, you can create an automation that automatically MT pre-translates any project created under the template "Support test 00003."
Analysis Service
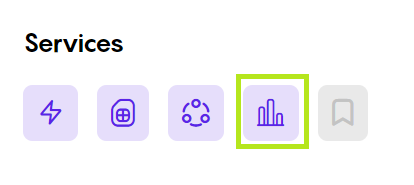
CleverSo's Analysis Service is a versatile tool that empowers project managers to gain valuable insights into their files without the need to create a full-fledged project. This flexibility makes it a valuable asset for various project management tasks.
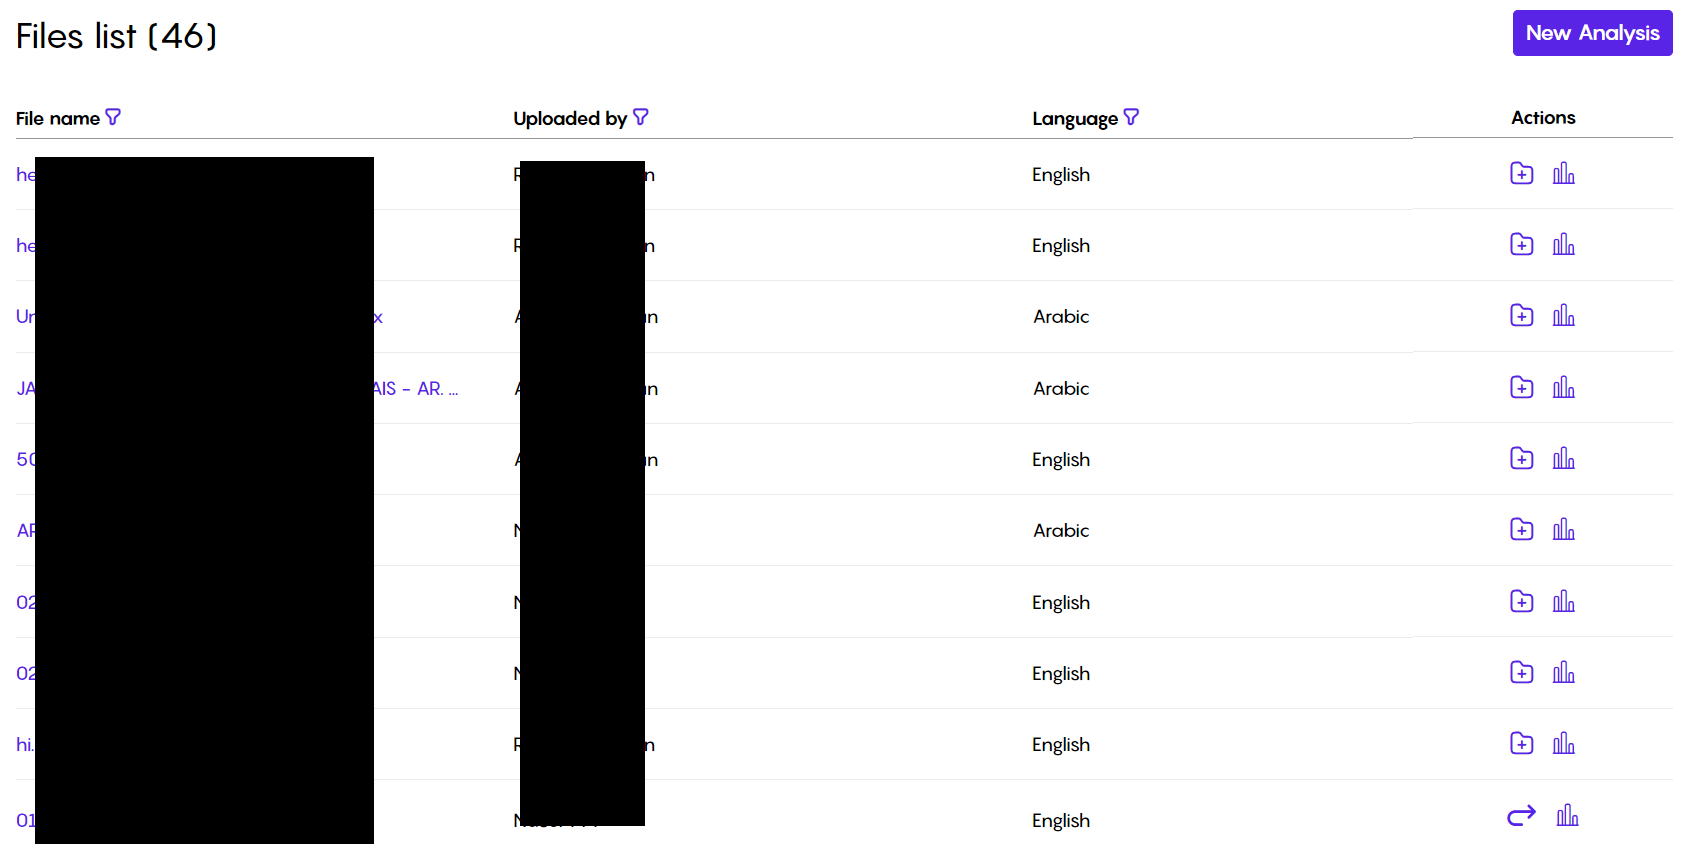
Standalone Analysis: You can analyze files directly using the Analysis Service, with no need to create a CleverSo project. This provides flexibility and allows for quick assessments.
Customizable Analysis: You can tailor the analysis to your specific needs by customizing the metrics and criteria.
Comprehensive Metrics: The Analysis Service provides detailed word, character, segment, and number counts, offering a comprehensive understanding of your files.
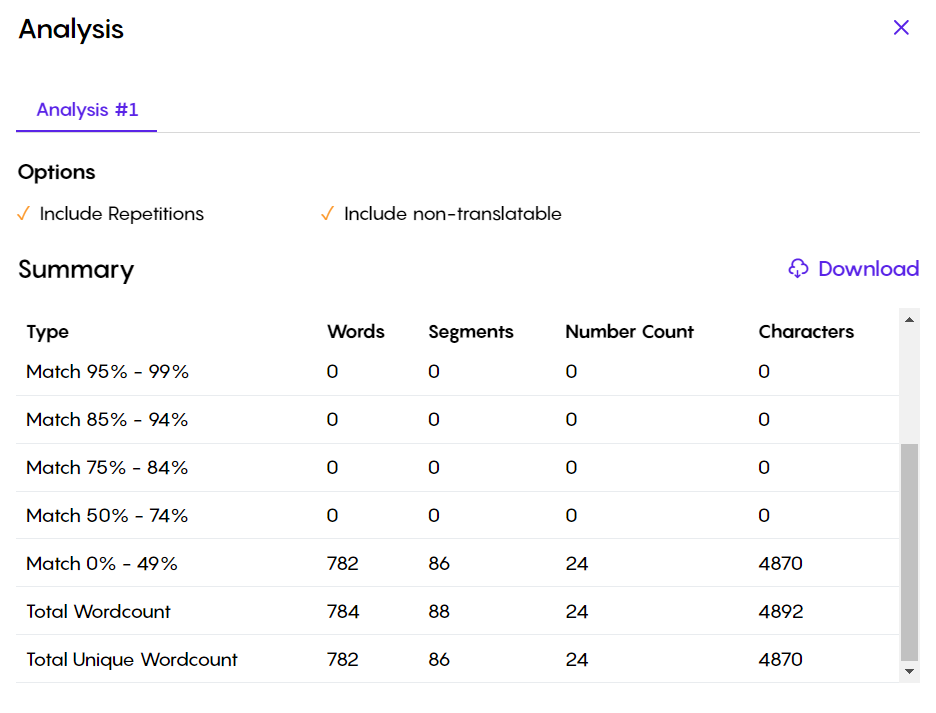
After uploading a file and choosing your analysis options, click "Analyze." The results will be displayed as follows:
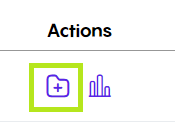
Creating Projects: If you decide to create a translation project after analyzing a file, you can easily add the file to an existing template by clicking "Add to Template" under the Actions column. This will automatically create a new project within the chosen template.
Side Panel
In the side Panel, you can access the following at any time:
Templates
Insights
Terminology
Translation Memories
Term Bases
Suggested Terms
LQA
Report
Earning
Payment
DTP
Users
Clients
Linguists
Designers
Project Managers
Initiation and Planning
As a Project Manager (PM), you have exclusive access to set up the whole project, including setting the number of linguists, editors, and/or proofreaders required, inviting them to the platform, selecting the translation memories, term bases required, and setting the payment details.
PM Functions
Templates
Purpose of Templates
Templates in CleverSo serve as pre-configured project structures, streamlining the creation and management of translation projects. By providing default settings, templates reduce manual configuration and ensure consistency across projects.
Key Features and Benefits
Multiple Projects: Templates can contain multiple projects created under them, allowing for efficient organization and management of related projects.
Default Values: Templates are populated with predefined values for various project settings, including:
Source and Target Languages: Automatically set the languages involved in the translation.
Domains: Specify the subject matter or industry of the project.
Translation Memories and Term Bases: Link relevant resources to ensure consistency and efficiency.
Workflow Steps: Define the translation process, including steps like translation, editing, and proofreading.
Uploading Options: Specify file type-specific upload options (e.g., XLSX, PPTX).
Assignment Options: Determine how translators or editors will be assigned to tasks.
MT and MT Models: Enable machine translation and select specific models.
AI Assessment: Configure AI-based quality assessment settings.
Customizability: While templates provide default values, project managers can still customize these settings to meet specific project requirements. This flexibility ensures adaptability to different translation scenarios.
Efficiency: Templates save time and effort by eliminating the need to manually configure project settings for each new project.
Creating and Using Templates
Template Creation: Project managers can create new templates by defining the desired default values for each setting.
Project Creation: A project created under a specific template will automatically inherit the template's default values. This project can be found and accessed within the template.
Customization: The template's default values could be adjusted to suit the project during the project creation process.
Project Management: Templates provide a foundation for project management, ensuring that all necessary settings are configured and consistent.
Creating a New Template
To create a new template, follow these steps:
On the main page, you'll find a "Create Template" button in the top right corner. Click it to start creating a new template:

Clicking the "Create Template" button will take you to the template creation page.
The first step is to provide information about your template, including...

Template name
Client
Source language
Target language
Domain
Subdomain
In the Terminology section, project managers can choose which translation memory (TM) and term base (TB) to use with the template.
To be included in the list, TMs and TBs must have the same language pairs as the template.
After choosing a TM, you can enable or disable the "Write" permission to control whether translators can edit the TM.
In the Workflow section, you can choose which stages (translation, editing, and/or proofreading) are required for your projects. You can also set the rates for each stage and the percentage of payment based on how much of the text is found in the translation memory.
The default linguists' rates (Price/word) are predefined in the linguist’s Skills section.
While the template is being created, PMs can override these default linguist rates by defining the rate for each stage (Translation, Editing, and Proofreading). As a consequence, when PMs create a project later, the assigned linguists' rates will be inherited from the rates defined while creating the Template.
Furthermore, even these rates could be overridden while PMs are manually assigning linguists to a project under the template in question.
In the Advanced section, you will be able to do the following:
Select the upload options (of the Supported File Extensions):
File types supported by CleverSo:
Word Documents
PowerPoint
Excel Spreadsheets
XLIFF
YAML
JSON
XML
HTML
CSV
XLSM
Select automatic assignment options:
Unavailable, or Away users, will not be receiving automatic invitations.
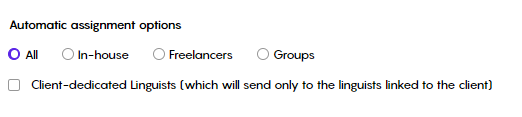
When choosing Groups, project managers can select the desired groups from the dropdown list.
Select Machine Translation options:
You can select one of the models listed:
After filling in all the necessary details, click the "Create" button to finish creating the template.
After clicking "Create," you'll return to the homepage where your new template will be listed at the top.
Editing Existing Templates
To edit an existing template:
Click the pencil-shaped button next to the template you want to modify.
Clicking that button will redirect you to the Update Template page, where you can edit the template:
PMs can change the preselected options and click the Update button to save:

Filtering Existing Templates
PMs can filter templates as per the following:
Template Name:
To find a specific template, use the Template Name filter. Type the template's name there and select Apply:
Project Name:
To find a specific template, including a specific project, use the Project Name filter. Type the project name there and select Apply
Additionally, the project name filter in the template allows you to find the project you are looking for:
Client:
You can search for projects related to a certain client by clicking the filter icon on the client column
You can either type in the client name or use the dropdown list to search for it
Creation Date:
You can restrict your search to filter templates created on a specific day by using the Creation Date filter:

Language:
You can select this filter to search for templates with a specific language direction:
Projects
Creating new projects
PMs can create new projects under a given template by clicking the “Add Project” button next to the template. Refer to the below screenshot:
Another method is to access the template by clicking the template name, and clicking the "Add Project" button under that template. Please refer to the below screen recording:
Upload your files
In the first step, you need to upload your file(s), either by dragging and dropping them into the upload field, or browsing from your device:
Project Details & Assignments
Setup Project Initial Details
On the project details page, you can set up the initial project details, including:
Source Language
Target Language
Project Deadline
Domain and Subdomain
Client
Instructions for the assignees to abide (Optional)
If added, the linguist will not be able to accept the task unless they have accepted these instructions. And they can always view them whenever they need to via the Document tab inside the workspace.
Additionally, you can upload term bases and translation memories for linguists to abide by when working on the specific project at hand.
Projects created under a template will inherit its preset settings such as the domain, the language pairs, TMs, TBs, etc.
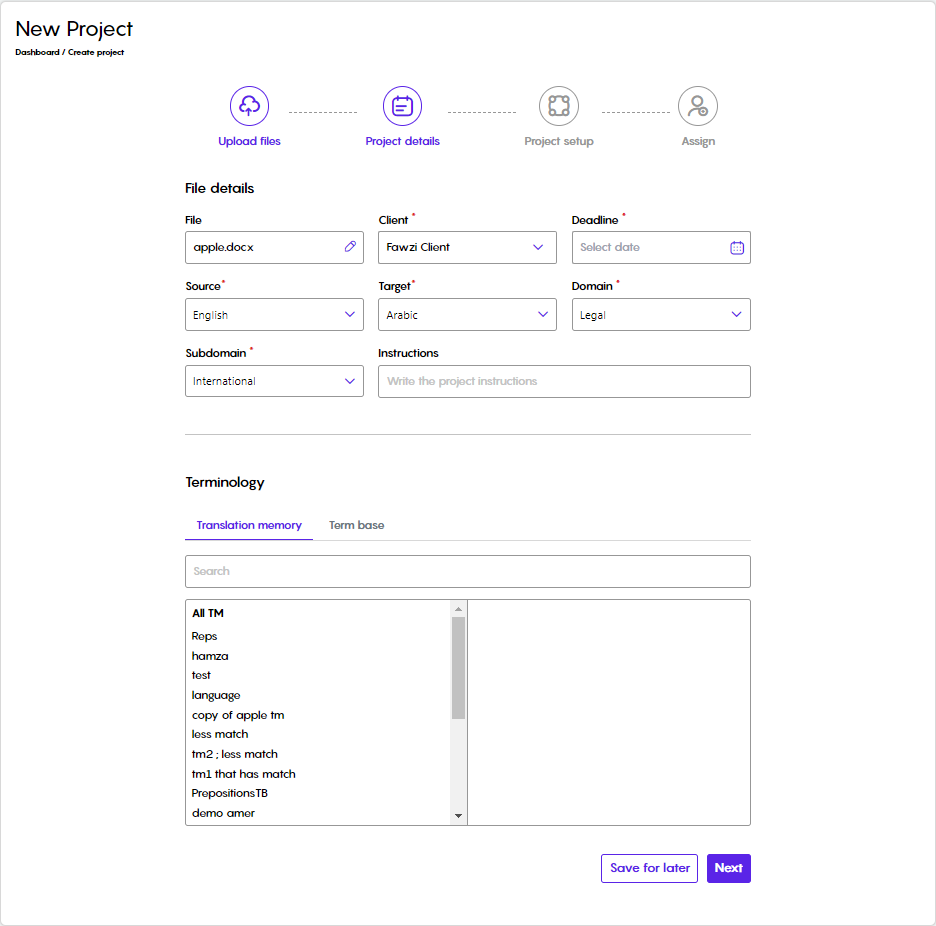
Insert/edit the info you need, then click Next to move to the next step. Or you can save the project for later.
Project Setup
Clicking the Next button on the previous page will redirect you to the Project Setup step:
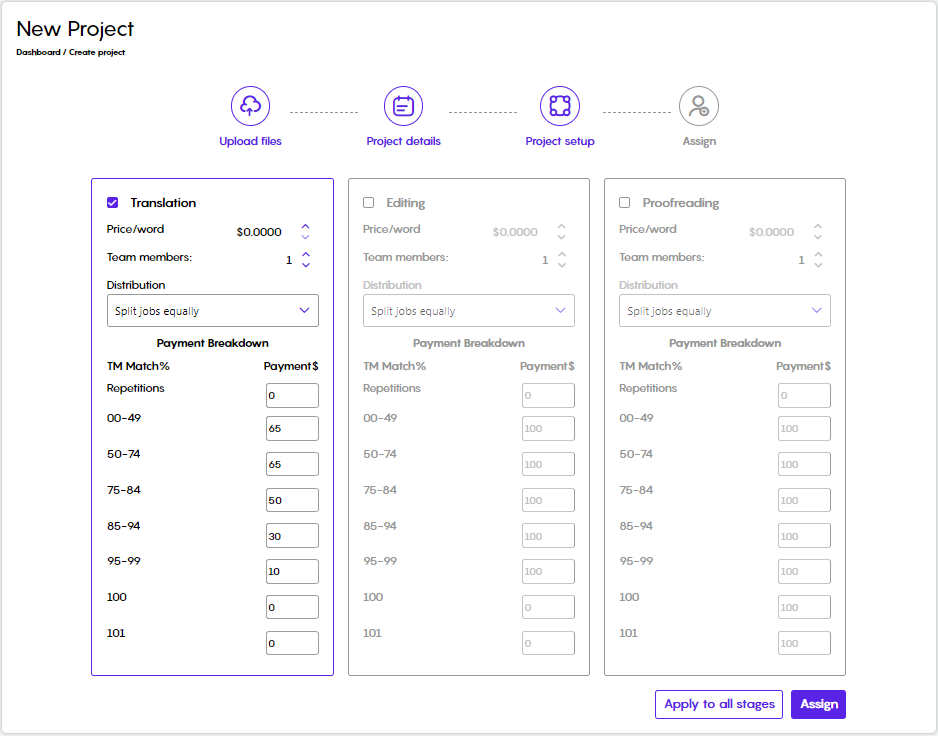
Here, you can customize your workflow by setting the following:
Selecting the steps needed, translation, editing, and/or proofreading.
How many linguists are involved at each step
How would you prefer to split the work between them? You can split the project as per the following:
Equally
Percentage
Words
Fixed number of words
The unique number of words
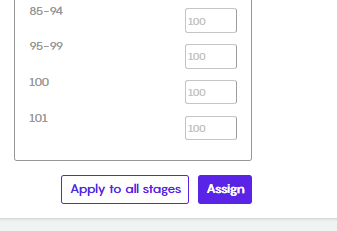
The price-per-word and how much to pay against each TM match percentage:
Once you are done editing the above, click the Assign button to move to the next step:
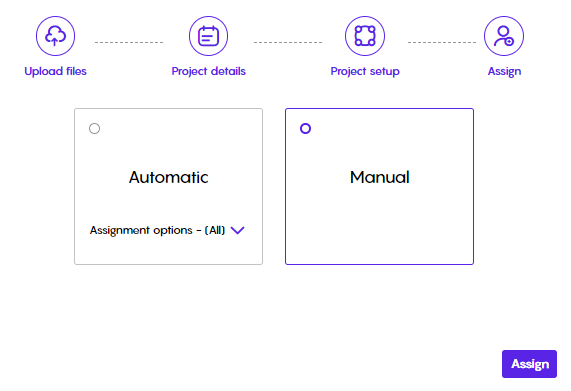
Assigning Preferences
In the Assign step, you can choose whether to assign the workload to linguists manually or automatically:
Manual Assignment
In order to assign a project to a linguist, you need to make sure that the linguist has the relevant project’s skill. If the linguist doesn’t have the project’s skill, he/she will not appear in the list.
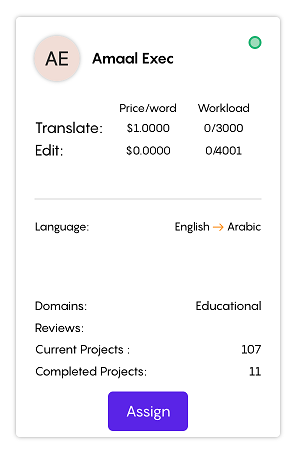
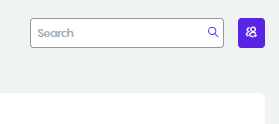
If you select the manual assignment option, you will be redirected to the Assign page, where you can choose linguists and assign them to each step. To filter linguists, you can choose from multiple filters. You can as well search for a linguist by inserting their name in the search box:
You can check the linguists' availability by hovering the mouse over their availability icon:
To assign a linguist, click the Assign button under their record:
Upon assigning, you will be able to select the batch and the role needed for the linguist (if available). In our example below, there is only one batch (Batch 1), so there are no other options.
Clicking Next, you will be able to define a deadline for the assigned batch, not the whole project
You can also set the linguist rate that will override the default rates.
Clicking the Assign button, you can view your assigned linguists on the right side of the screen
Once you are done assigning linguists, you can click the project name to return to the project details page:
Going back to the project details, at the bottom of the screen, you will be able to:
View the assigned team member(s)
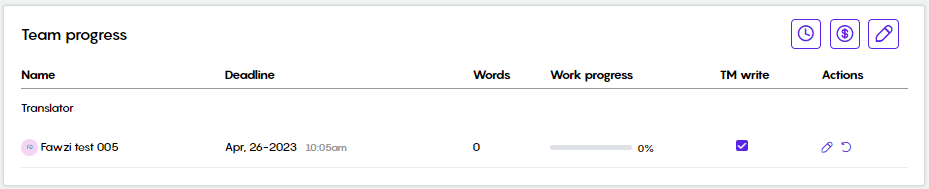
Grant/revoke the write-on-TM permission
Edit the linguist’s rate and deadline

Replace the linguist
Select the new linguist
Select whether to keep the previous linguist's work (if any) or to set the new linguist to start anew
Define a batch deadline
Set the rate
Write down any notes or feedback
Edit team members
Clicking the Edit Team Member button will reset the project batching and all assignees. After confirming, you will be redirected to the Project Setup page so you can customize the project starting from the project setup step and forward.
“Editing Team members” button will re-batch the project and reset all its settings (removing previous linguist/s and any related progress).
Linguists can only be unassigned before they accept the assigned task. If the linguist has already accepted the task, all you can do is replace them.
When a project is re-batched, by changing the batch distribution, each pushed segment will remain on the stage that it was pushed to. So there will be no need for the newly assigned linguists to re-push the already pushed segments by the previously assigned linguists.
Automatic Assignment
Automatic Assignment will send an invitation to a pool of linguists based on the specified criteria, and the workload will be assigned to the linguists who accept the invitation the fastest.
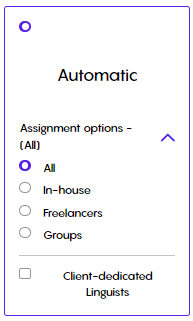
You can select between assigning In-house, Freelancers, Groups, or All linguists
You can also choose to automatically assign linguists dedicated to the client associated with the project.
Unavailable or Away users will not be receiving invitations.
Assigning Multiple Projects
PMs can also assign linguists to multiple projects under a certain template. This could be done by doing the following:
Access a certain template
Filter inactive projects
Select the multiple projects in question
Select the linguistic steps needed
Select the linguist in question
Define a new deadline, if needed
Click the Assign button
Pre-translate a Project
Pre-translation feature results in a faster translation. It also allows saving funds as part of translations can be automated.
CleverSo supports two types of pre-translation:
Pre-translation using the Translation Memory
Pre-translation using Machine Translation
The pre-translation feature could be accessed by clicking the options dropdown list on the project details page and selecting Pre-translate. Clicking the Pre-translate option will open a new window where you can select either to pre-translate using TM or Pre-translate using MT:
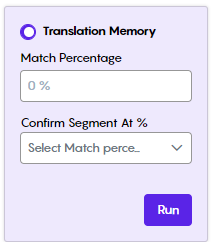
TM Pre-translation
Pre-translation using TM is a feature that compares the source text against the contents of the TM database and automatically inserts any target-language matches directly into the target text fields (Segments).
You can control the quality of the matches to be retrieved by inserting the percentage of the matches. For example, segments with a match above 90% will have target segments populated with TM matches above 90%. Where the percentage represents the extent of a match.
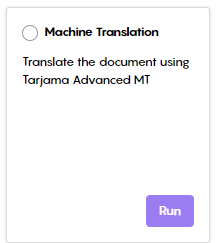
MT Pre-translation:
Pre-translation using MT uses our advanced machine translation engine to populate the target segments with the machine translation.
To apply the TM/MT pre-translation on a certain number of batches, select the Per Batch option:
Clicking the Target Batch dropdown list will list all available batches to select from:
In our example, there is only one batch, as the project was not batched in the first place.
Moving a project across templates
PMs can move projects from one template to another by clicking the Change Template button found on the project details page:
Analyzing Projects (Within Templates)
Analysis helps PMs estimate how much work will linguists need to get the job done.
Typically, the project analysis identifies what text has already been translated and what text requires translation. The translated data will be expressed as the following:
100% TM Matches
101% TM Matches (Context Matches)
Internal Fuzzy Matches
The more 100%, 101%, and Fuzzy Matches there are, the less translation work there will be to do.
Project Analysis
To analyze a project:
Navigate to the project you want to analyze.
In the “Project Analysis” section, click the Analyze Project button
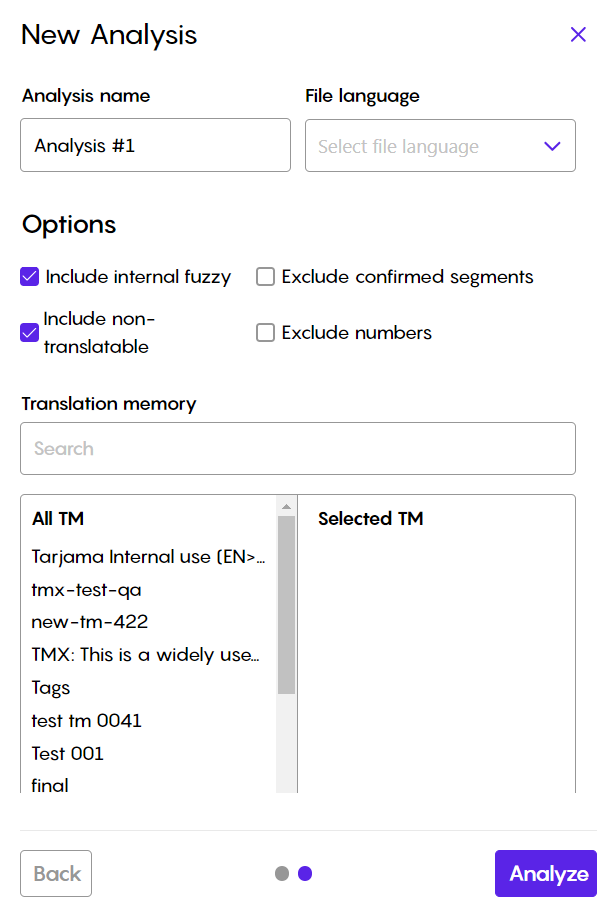
A new window will pop up, where you can rename the analysis record
Select the options you need and click Analyze.
Wait until the analysis is complete, the bigger the file the longer it will take.
Once the analysis is done, click on Analysis Result, and a window will pop up displaying the analysis results
You can download the result as a CSV file by clicking on Download:
CleverSo can detect a bunch of Non-Translatables such as Numbers, Codes, URLs, Dates, Symbols, Punctuation marks, Abbreviations, Time, Foreign language (different from the source), and Emails. These can be included/excluded from the analysis.
There should be an assigned TM to the project while the file is being parsed to show results for this record, not after parsing.
If the TM was updated or replaced by the PM, the total unique word count on the project analysis would be updated as well.
Analyzing Multiple Projects
To analyze more than one project:
Select the template you need for its projects to be analyzed
Check the checkboxes of the projects you need to be analyzed and click Analyze Project
Wait until the analysis is complete, the bigger the file the longer it will take.
Once the analysis is done, click on Analysis Result, and a window will pop up displaying the analysis results
You can download the result as a CSV file by clicking on Download:
Analyzing Multiple Batches
To analyze multiple batches:
Go to the project you need its batches analyzed.
On the file details page, click Batch under Analysis, then click the Analyze Project button:
Check the checkboxes of the batches you need to be analyzed and click Analyze Project
Wait until the analysis is complete, the bigger the file the longer it will take.
Once the analysis is done, click on Analysis Result, and a window will pop up displaying the analysis results
You can download the result as a CSV file by clicking on Download:
For Chinese source files, the letters are counted based on the count of the characters, not words. This will be reflected in the wordcount for the whole project as well as the analysis.
Analyzing Projects (Standalone)
Using this functionality, project managers can conduct analysis on a file without the requirement of configuring it as a project using a particular template.
To perform file analysis, project managers can easily choose the "Analysis" option from the left-hand side panel. You can observe the process of file analysis by watching the screen recording provided below:
AnalysisDoc.mp4
After analyzing the file, PMs have the ability to create a project and add it to an existing template. PMs can explore the list of templates through searching or browsing, or alternatively, create a new template and insert the project into it:
AnalysisCreateDoc.mp4
Terminology
In the Terminology tab, PMs/QAs will be able to create new Translation Memories and Termbases, or even update existing ones. Moreover, they will be able to either accept or reject the Terms Suggested by linguists and add them to a certain termbase.

Translation Memory
Adding Translation Memories (TM)
CleverSo translation memory could be defined as a database within CleverSo that enables linguists to reuse existing translations. When a linguist comes across a sentence that is exactly the same, or similar to a sentence stored in the TM, this is called a “TM match”. Matches can be exact, where whole phrases had the same exact wording, or fuzzy, where the past and current phrases vary by a word or two. The extent of a match is usually represented by a percentage, which can vary between 50% and 101%.
CleverSo supports TM files with TMX, XLSX, and CSV formats.
There are two different methods to add Translation Memories. Adding TMs is only available for Project Managers and QAs.
Method 1
For the first method, from the side panel, click Translation Memory under Terminology
This will redirect you to the Translation Memory page
From the Translation Memory page, click the New TM button
A new window where you can either create a new empty TM or upload an existing one:
To create a new TM:
Click Create a New TM
Insert the needed info
Click Create:
To upload a TM:
Click Upload a TM
Select a TM file to be uploaded
Fill in the needed info
In the File Information section:
Select ID under ID
Select Source under Source
Select Target under Target:
Method 2
Another method to create a TM file is from within a specific project.
Click on any active or completed project.
Once you’re at a specific Project Details page, click the options menu and a drop-down menu will appear, click on the TM Actions button.
Choose whether you want to ‘Create new TM’ or ‘merge with existing TM’.
To create a translation memory, give your TM a name and click ‘Create’.
Choose the existing TM from the dropdown menu to merge the current project with an existing TM.
You will now be able to view and search through your new TM under Translation Memories.
Termbase
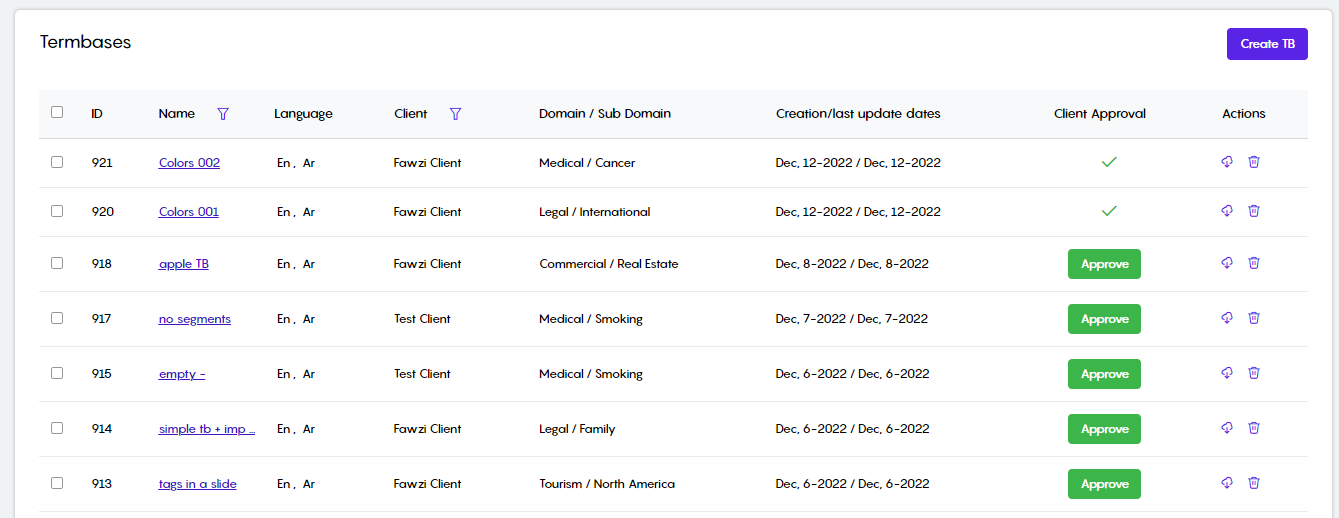
All available termbases will be listed in the Termbases subtab.
Each termbase has its unique ID, name, language, and more
New Termbases could be created by clicking the New TB button
You can either create a new TB or upload it from your device
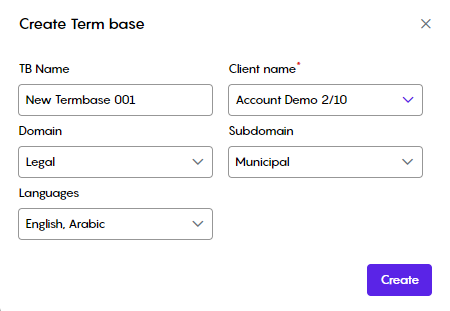
To create a new TB:
Click the New TB button
Select Create New TB
Fill in the needed info
Select the languages to be supported by the termbase
Click Create
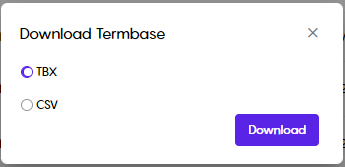
A Termbase could be downloaded, either in TBX or CSV format, using the download button in the Actions column:

Clicking the download button next to a certain termbase will prompt you to select the needed format:
A termbase could be deleted by clicking the Delete button in the action tab:

Creating New Termbase
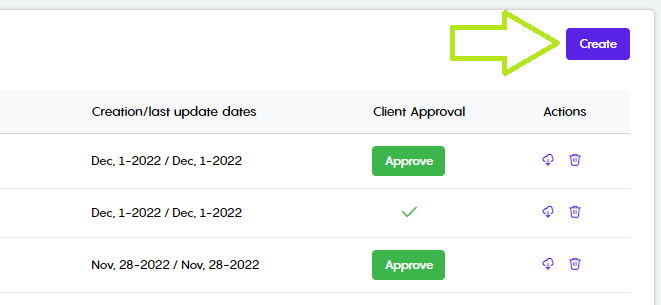
A new termbase could be created by clicking the Create button on the top right:

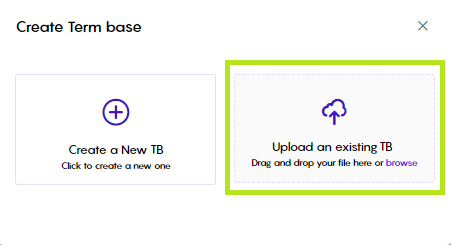
Clicking the Create button will prompt you to select the method you need to create your new termbase, where you can either create a new termbase or upload an existing one:

Clicking the Create a New TB button, you will prompt to fill in a bunch of fields:

Clicking the Create button, your new termbase will be listed in the termbases list:

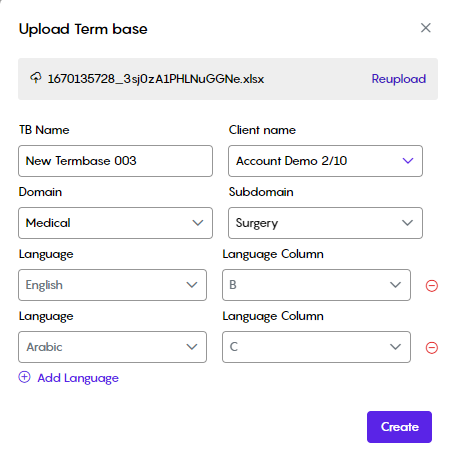
Clicking the Upload an Existing TB, you will be prompted to select a file (xlsx) to upload:

The excel file needs to include the following columns:
A: ID
B: The source language
C: The 1st target language
D: The 2nd target language… etc.
After the excel file is uploaded, you will be prompted to fill in the below fields:

Clicking the Create button, your new termbase will be listed in the termbases list:

Newly created Termbases need to be approved. This could be done by clicking the Approve button:

To associate a Termbase with a project, the Termbases' languages need to match the project’s:
Meaning, you cannot associate a Termbase with (English, French) language pair to a project with an (English to Arabic) language direction.
Editing an existing Termbase
To edit an existing termbase, click its name:
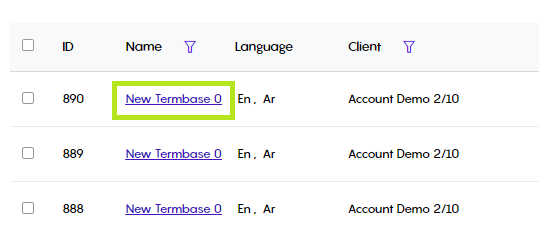
Clicking the TB name will redirect you to where the TB info is displayed:
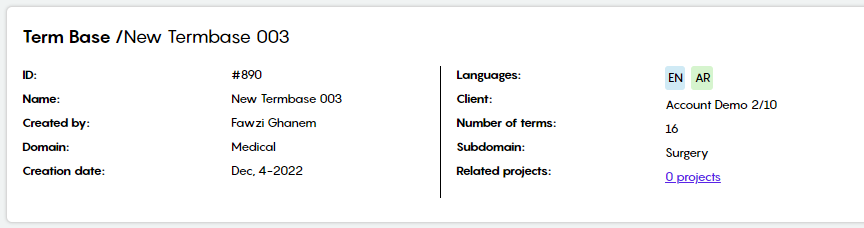
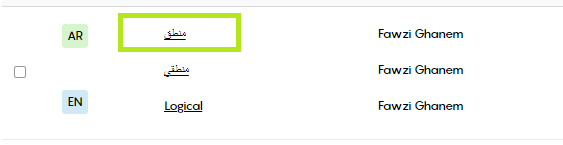
All terms will be listed below the TB info:

You can use the Search bar to find a certain term. You can as well select the language of the term you are looking for:
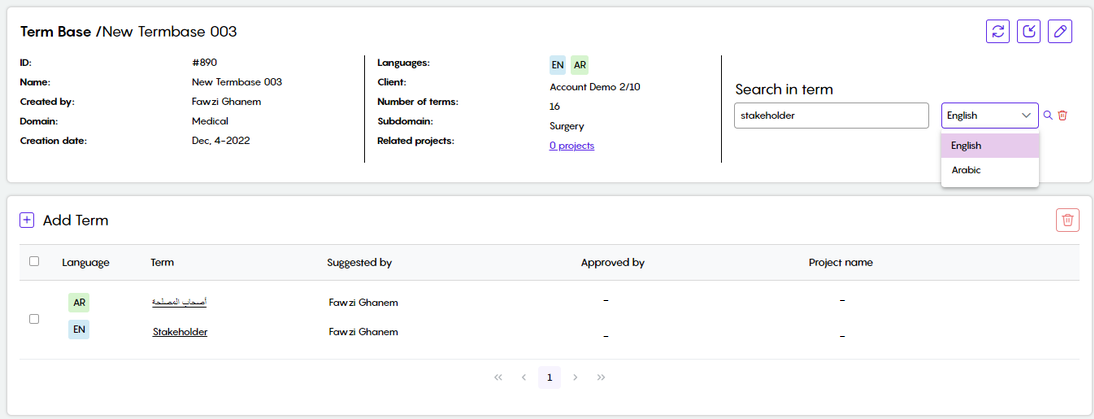
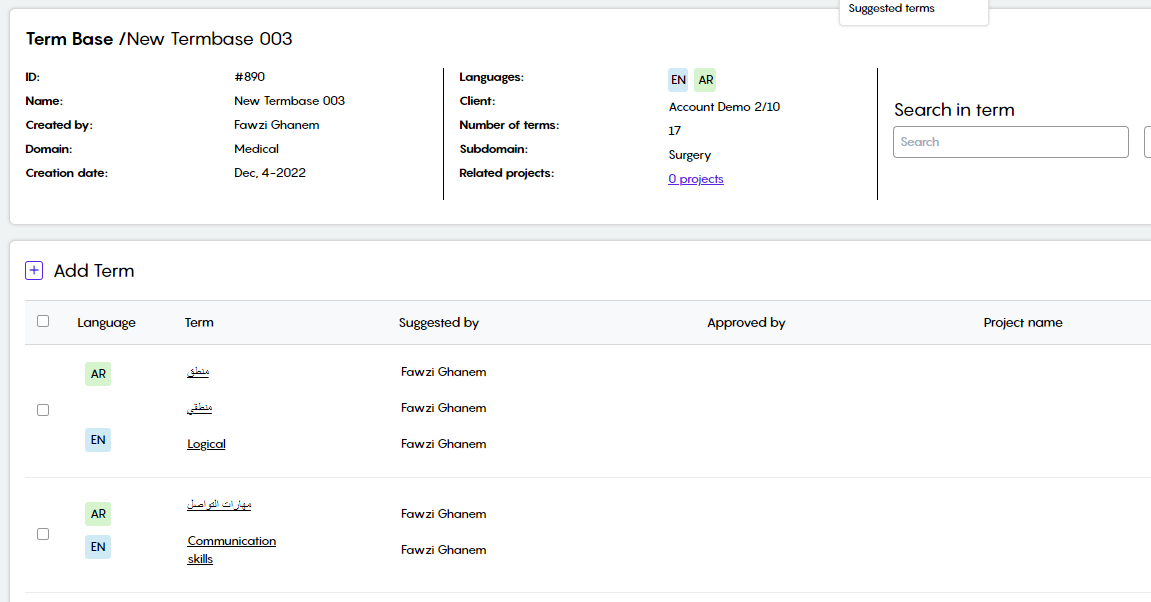
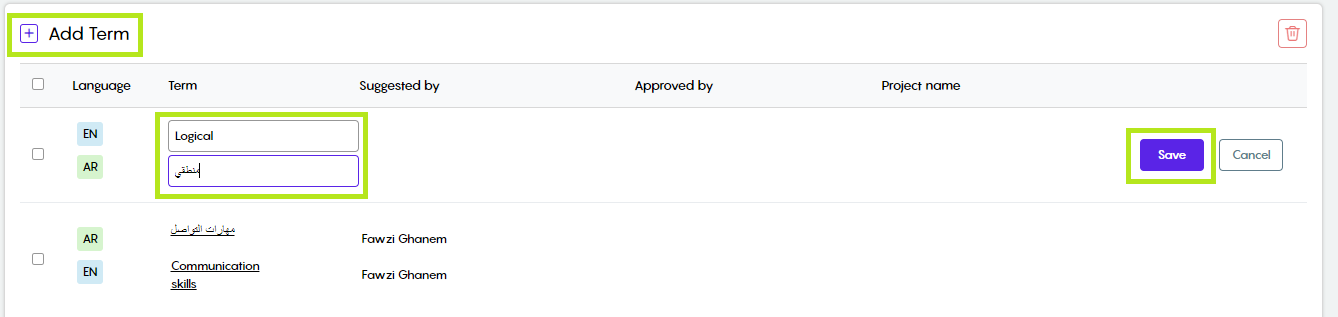
Clicking the Add Term button, you will be prompted to insert the term and its translation. Click Save to insert the term:

Moreover, you can add another suggestion either to the source or the target term. This could be done by hovering the mouse over the term, clicking the + button, filling in the term, and clicking ✓:

Editing Terms in a Certain Termbase
To edit a term in a certain termbase, go to the termbase where the terms are listed:
Click the term you need to edit, for example:
Clicking the term will open the Edit Term window where you can:
Edit the term
Mark it as Preferred
Mark it as Forbidden
Mark it as Case Sensitive
Mark it as a fuzzy or exact match
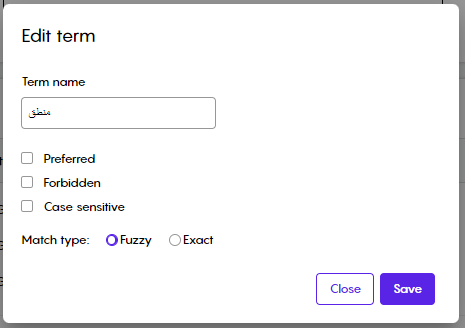
Click save to save your choices
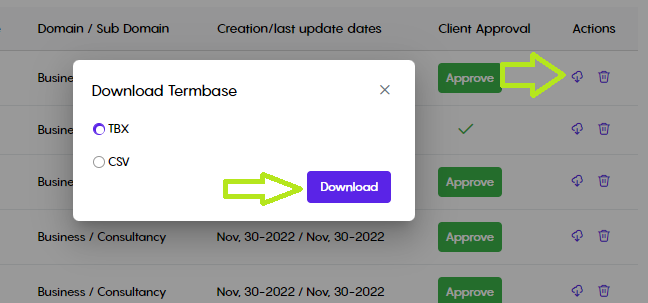
Download Termbase
To download a termbase, go to the termbases screen, search for the termbase in question, and click the download button.
You will be able to download the termbase either in TBX or CSV format:
Suggested Terms
In the suggested Terms subtab, you will find projects at which associated linguists have suggested terms to be added to the Termbase:
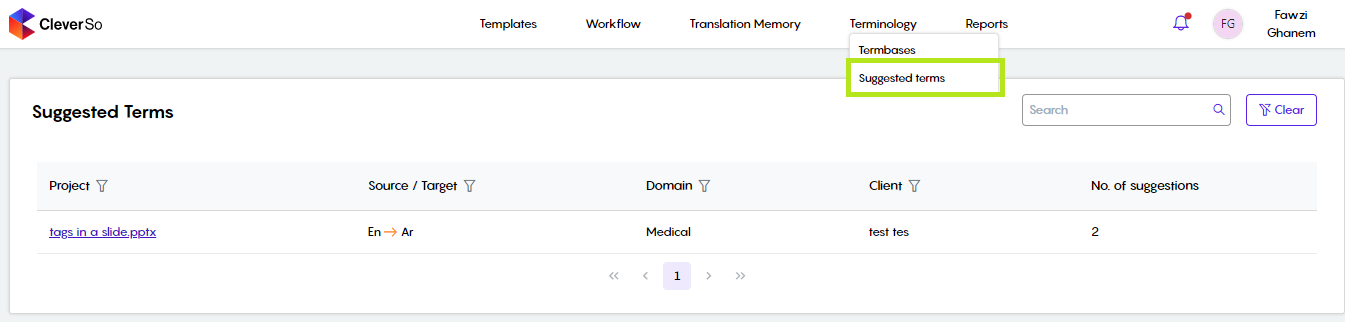
Clicking the project name (if any) will list all terms that have been suggested by the linguists assigned to that project while they are working on it:
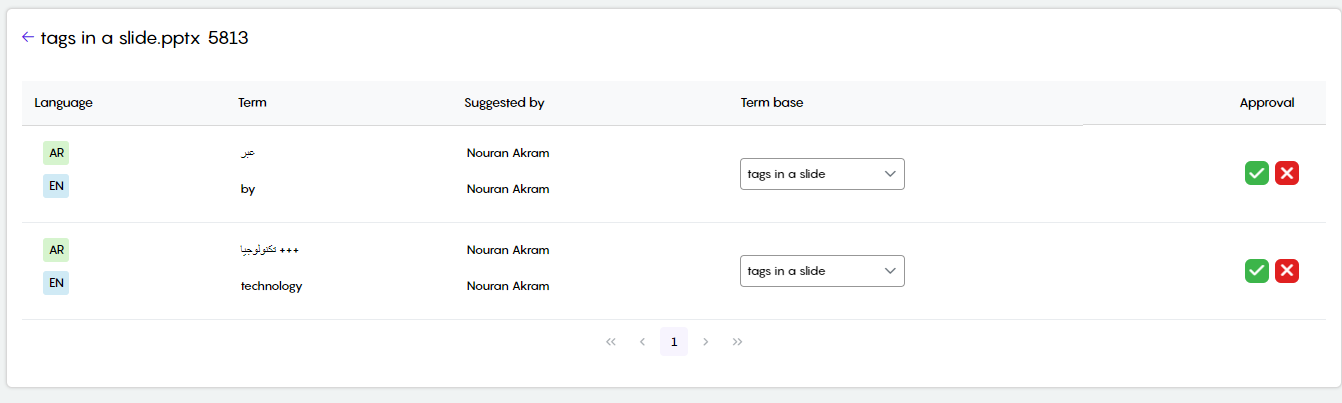
Here, you can either accept ✓ or reject X the term.
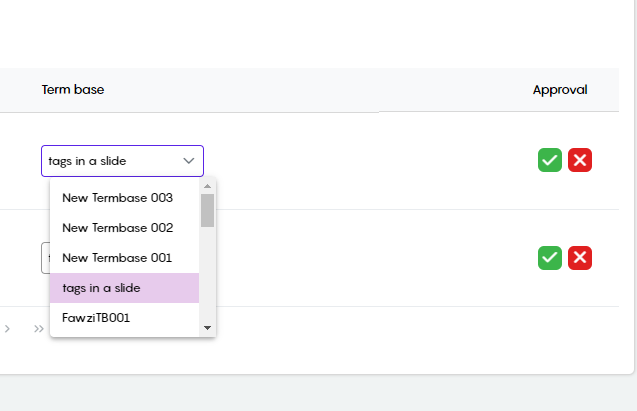
In case of accepting, you have the option to choose the termbase to add the term you are going to accept:

Terms Extraction
The Terms Extraction feature helps in extracting a termbase out of a project. It could be accessed via the actions button in the File Details screen of a project:
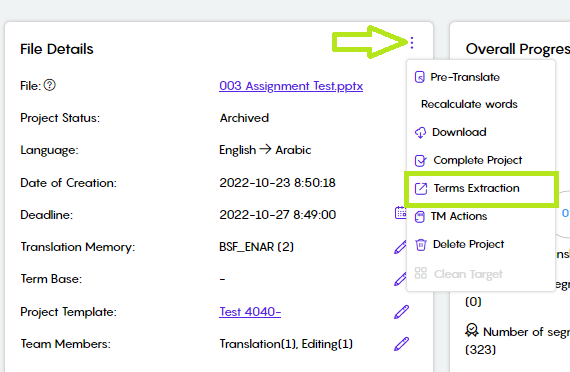
Click the actions button in the File Details screen
Click Terms Extraction from the list
Clicking the Term Extraction option will open a new window:
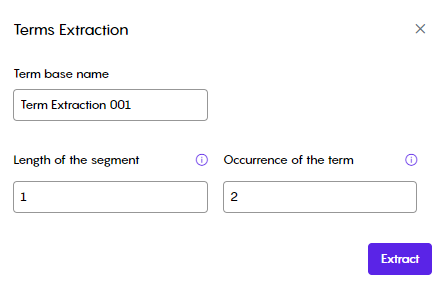
Fill in the desired Termbase name in which the extracted terms will be saved
Fill in the length of the segment, the number of words in the segment
Fill in the occurrence of the term, how many times does the segment gets repeated
Click Extract
The extracted termbase could be found in the Termbase subtab under Terminology
Project Preview
Alternatively, you can view the whole project and see each segment along with its translation by simply clicking on the project name under “File Details”.
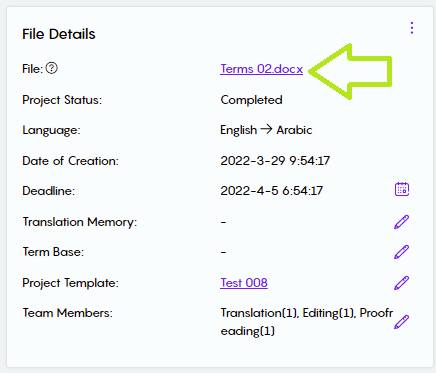
Clicking the project name will redirect you to the linguists' workspace:

From within the workspace, clicking the project name returns you to the project details page:
For more details about the linguist’s workspace, check the Workspace section in the CleverSo Help for Linguists user manual. Click here for an alternative link.
Downloading Target Files
PMs can download the target file upon the completion of a certain stage (Translation, Editing, Proofreading). The target file will be downloaded in the same Source file (Original) format.
Furthermore, the target file could be partially downloaded at any time.
To download the target file, click on the Actions button (three dots) next to “File Details”, then select Download from the dropdown list
Clicking Download will open a new window, where you can download the source file (Original), the target file (Translated), or a bilingual file that includes the source segments against the target segments as an Excel sheet
To download the translated file:
Select (Translated file)
Select the needed stage (Depending on how many stages were assigned to the project)
Click Download
The file will be automatically generated for the 1st download attempt
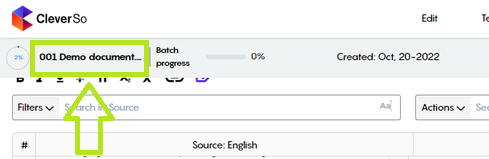
For later downloading attempts, a Generate button will be seen next to the download button
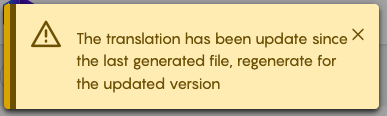
Generating a project is needed to update the project with the latest edits
If the PM tried to download an updated target file without generating it, a warning message will show up, notifying the PM of that:
PMs can download a certain stage (Translation, Editing, Proofreading) of the translated file. Note that this can only be done after completing the project.
PMs will also be able to download a certain batch. This could be done by selecting the translated file option, selecting the batch in question, generating the file, and downloading it. This way, the PM will be able to download the target file of each linguist separately
Evaluation and Completion
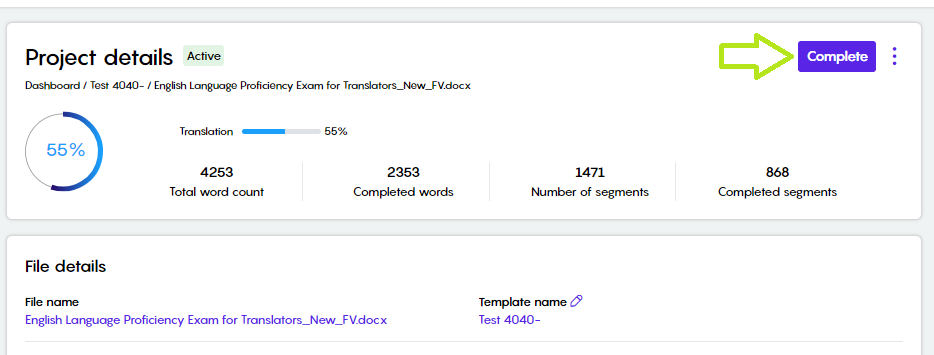
The Evaluation stage comes hand-in-hand with the Completion stage, where you get a comprehensive overview of the project, before providing feedback.
Close Project
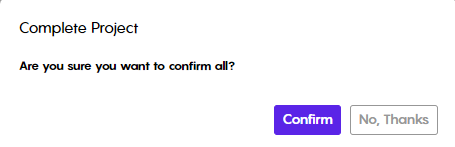
Once satisfied with the output, click on the “Complete Project” button from the drop-down menu and confirm closure. After confirming, the project will be marked as completed:
After a project is completed, the associated linguist(s) will still have access to it but won't be able to make changes.
PMs are unable to assign linguists to a project that has already been completed.
Reports
LQA Report
Visit Tarjama CleverSo Help for QAs. For an alternative link, click here.
Linguist Earnings Report
PMs will now be able to review the Linguist Earnings Report for each project and batch they have, after completing the project from the Projects Details page. The Linguist Earnings Report shows detailed payment data for each completed batch. PMs can filter based on multiple criteria:
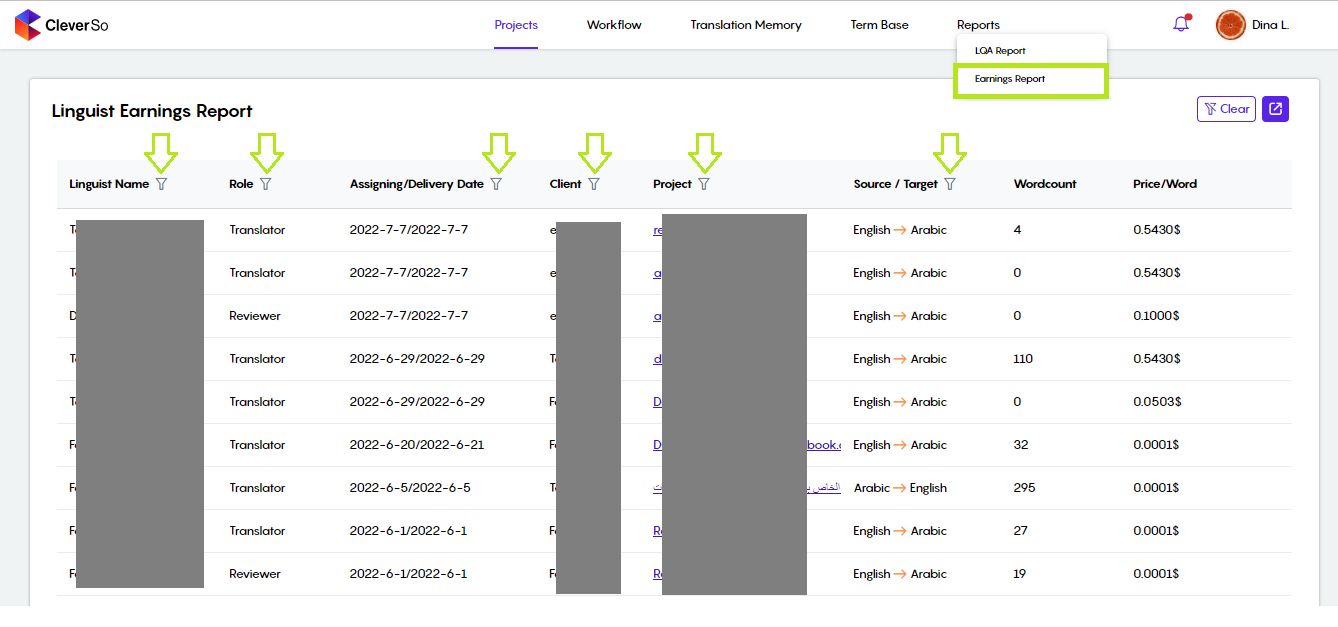
PMs can filter the results using multiple filters at the same time and can clear them all at once by clicking the clear button at the top right of the page, beside the exporting button.
Clicking the Export button will download the report as per the current chosen filters in CSV format:
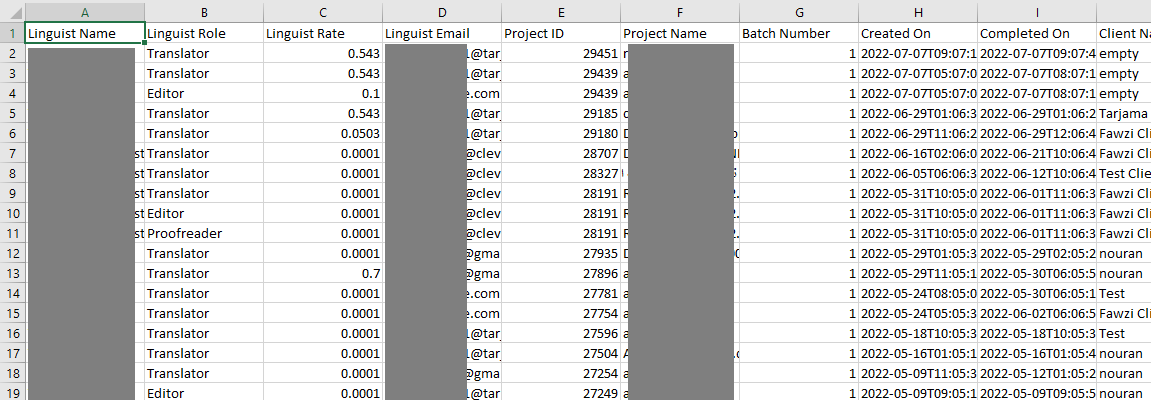
CSV Earning Report
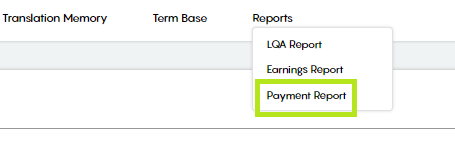
Payment Report
The Payment Report option can be found under the Reports tab in CleverSo. It is available for permitted PMs only:
To grant access to a certain PM, The admin needs to visit the admin panel and provide that permission for the PM in question. This could be achieved by editing the PM's information in the admin panel:
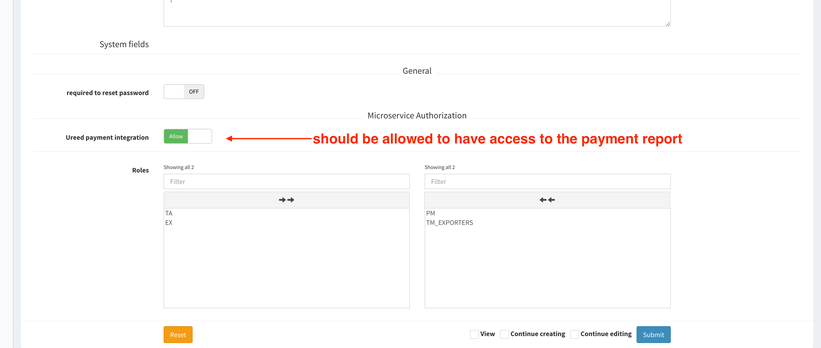
When the payment report option is toggled to Allow, the PM can pay the linguists by releasing the funds. Additionally, they will be able to view the payment status for certain linguists and projects. Furthermore, PMs will be able to identify the cause of the payment failure if it was suspended.
To access the payment report, you need to click the Payment option from the sidebar
Clicking Payment will lead you to the payment report page where the following will be displayed:
Total amount: The total amount that has been paid so far for projects
Paid amount: The amount paid so far for projects in the selected period of time
Remaining payment: The amount yet to be paid for projects in the selected period of time
From here, you will be able to define the time frame at which the project you need to pay was completed:
Clicking the calendar icon, the calendar will be displayed, so you will be able to select the From Date on your 1st click, then the To date on your 2nd click:
When a time frame is chosen, all completed tasks that fall inside that time frame will be displayed:
Moreover, when a time frame is chosen, the results could be narrowed down by inserting a linguist's name in the Linguist Searching field. Doing this, only projects/batches assigned to that linguist will be displayed:
To pay for a project/batch, you need to select the batch by clicking the Select Batch dropdown list:
Here, you could either select a certain batch or select all batches (if any).
Selecting one batch at least will activate the Pay button, so you will be able to pay for the selected batch/batches:
Clicking the Pay button, a payment confirmation box will be displayed, where you can review the financial details before confirming the payment:
Clicking the Confirm button, the payment will be released, and the Payment status will be updated as per the action taken.
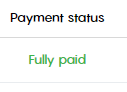
If a project has a Fully Paid status, it signifies that all of its batches have been paid for.
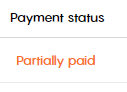
The Payment Status will read "Partially Paid" if the project has received payment for one batch at least within a multiple batches project. Refer to the below screenshot:
If the project has a plain Not Paid status, it means that there were no payments made. Refer to the below screenshot:
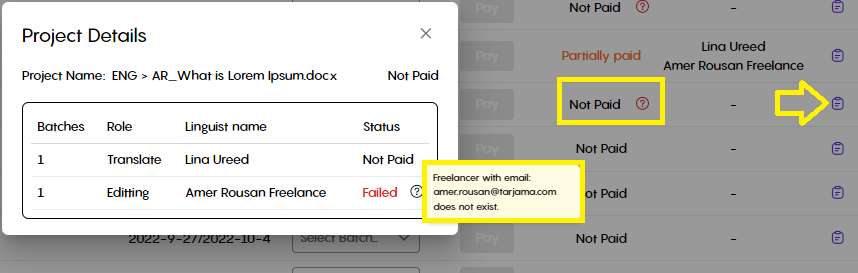
If the project has a Not Paid status with a question mark next to it, it means that an issue occurred with the payment process as a result of a certain reason that can be displayed via the Project Details button. Refer to the below screenshots:
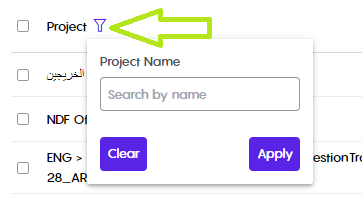
You can search for projects using the filter icon below the calendar:
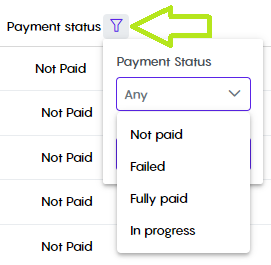
You can filter projects by payment status via the filter icon next to the Payment status:
Moreover, choosing multiple projects gives you the option to pay for them all with a single click:

Finally, you have the ability to export the payment report in CSV format via the Export button found on the top right side of the screen:
Management
Managing Linguists
Managing Existing Linguists
As a PM, you can edit and create new linguists by following the below steps:
On the project page, click the 3 dots next to Create button, then select Linguists:
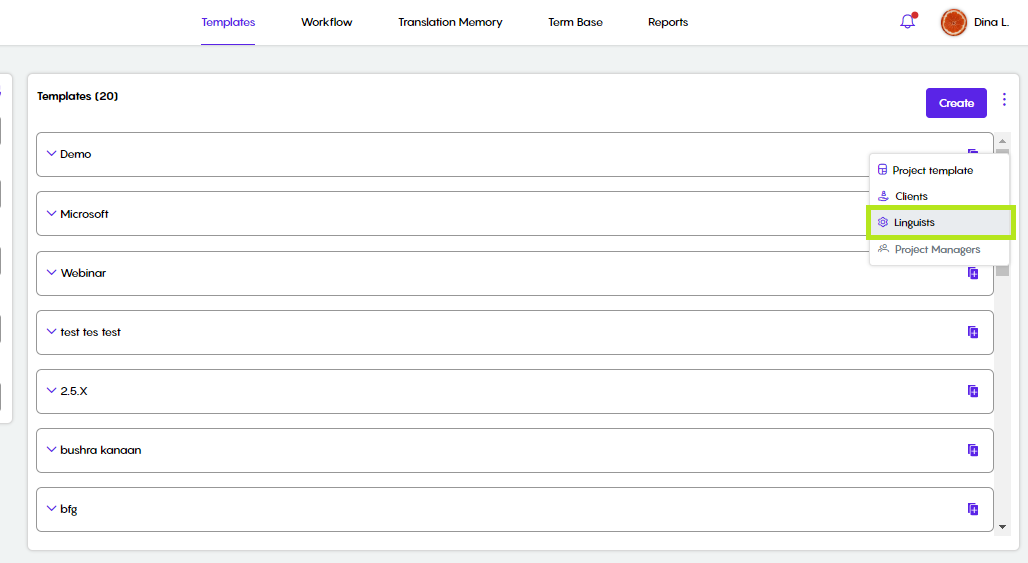
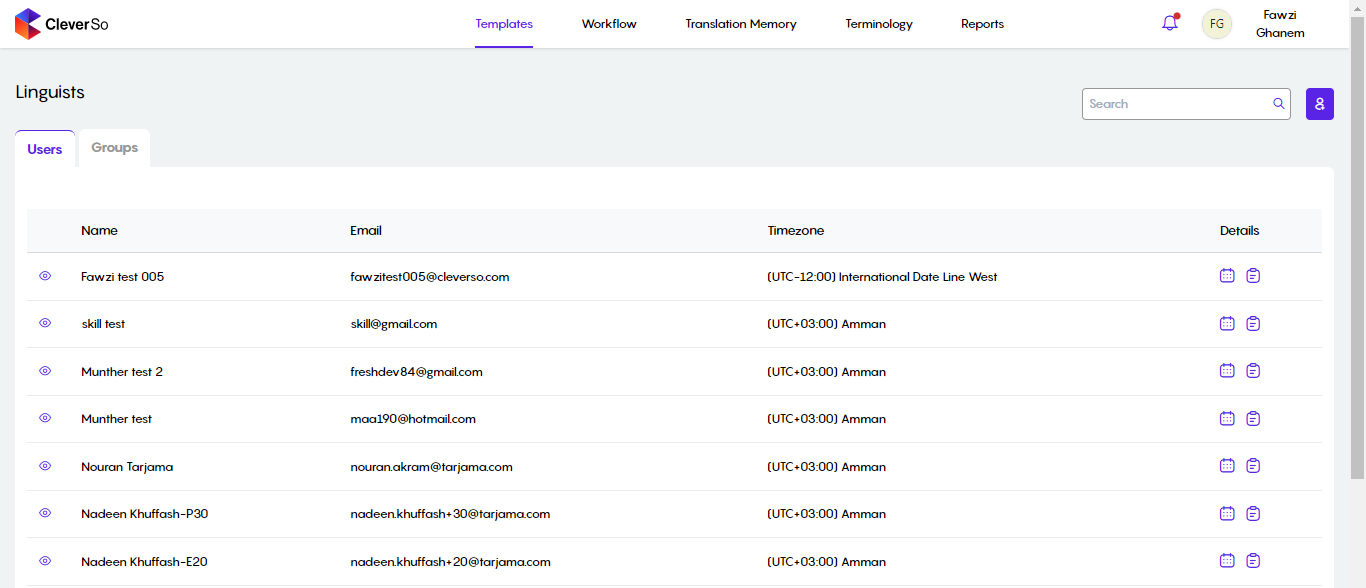
Clicking Linguists will take you to the linguists' list:
You can activate/deactivate the linguist by clicking the icon next to their name:
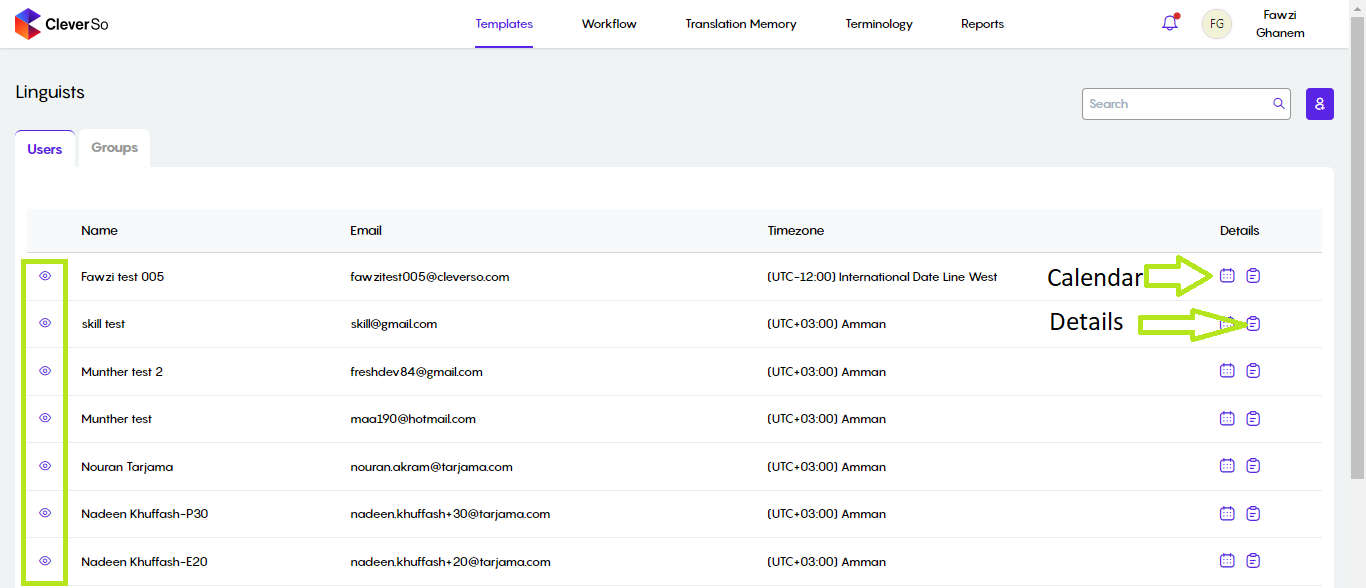
Clicking the Calendar button next to a linguist will open the Calendar page:
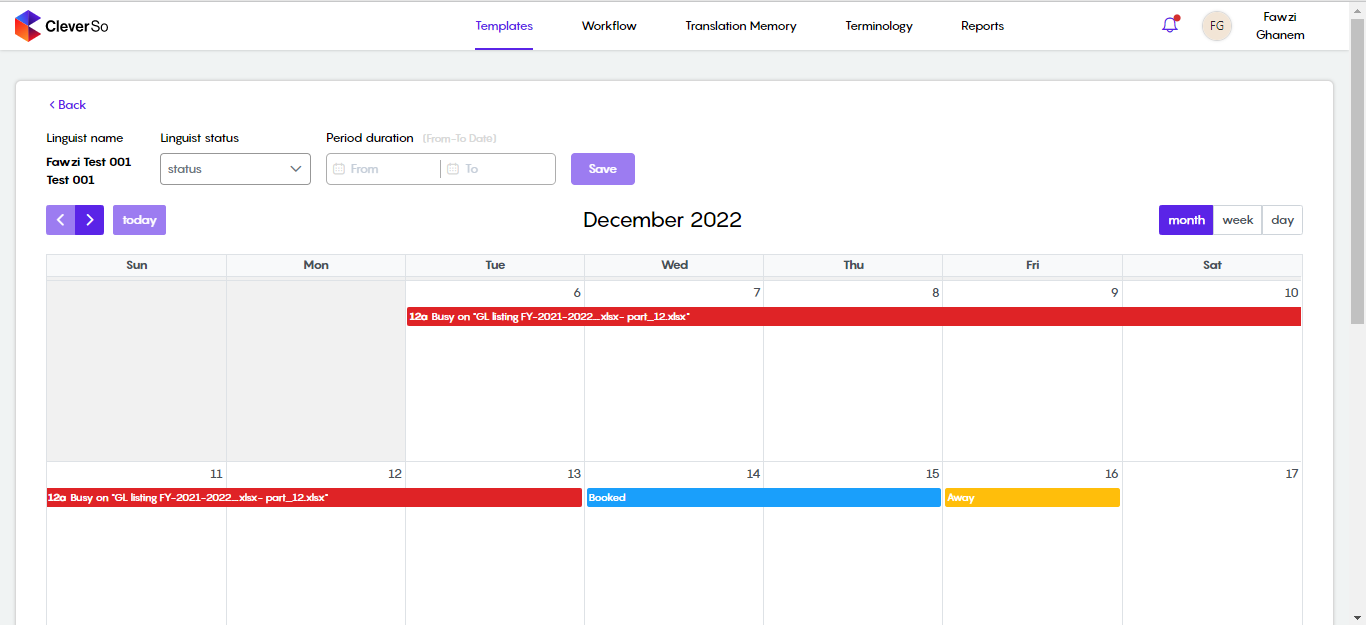
The red bar indicates that the linguist is busy working on a project
The blue bar indicates that the linguist has been booked
The orange bar indicates that the linguist will be away
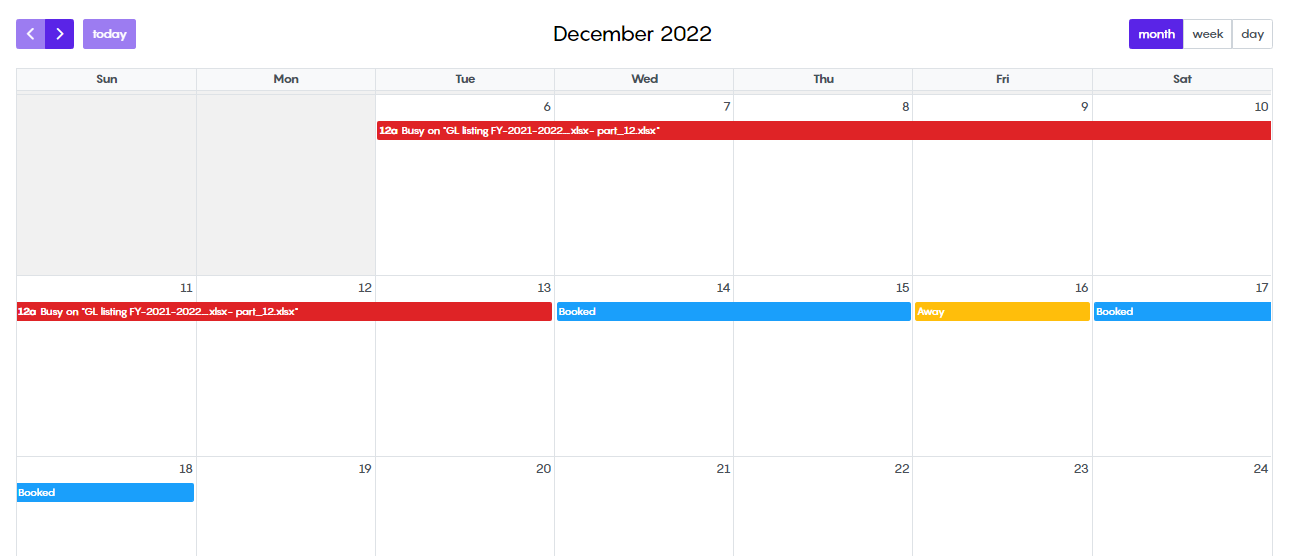
To book an executor, or set their status as away, by doing the following:
Click the Linguist Status dropdown list:

Select the needed status, say Booked
Select the Start and End date
Click Save:

The result will be displayed in the calendar as below:
Editing existing Linguists
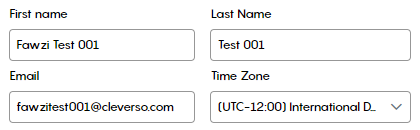
Clicking the Details button next to an executor will enable PMs to do the following:
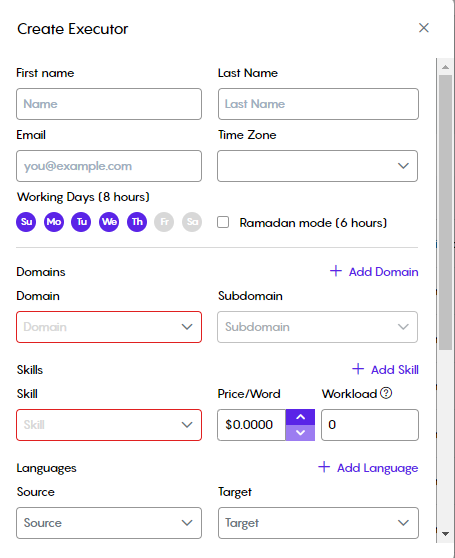
PMs can edit the executor’s first and last name, email address, and time zone:
PMs can as well define the linguist’s working days, and activate Ramadan mode where the working hours will be 6 instead of 8.

This will be reflected on the user assigning page, so the linguist whose Ramadan Mode is activated will have the unique word count reduced:
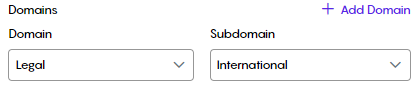
PMs could also define the domains and subdomains for the linguist. A linguist may be associated with multiple domains and subdomains:
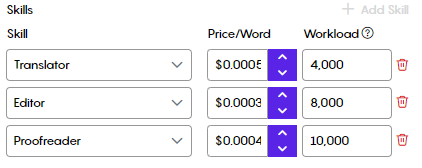
PMs can add skills to a linguist. For example. there are 3 linguistic skills (Translator, Editor, and Proofreader) PMs can select one or more of these. Next to the skill PM needs to fill the executor’s rate (price/word). In addition to that, PMs need to set the workload of the executor. By default, the workload for the translation stage is 4000 unique words, 8000 for the editing stage, and 10000 for the proofreading stage:
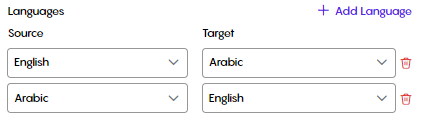
Pm can also add multiple language pairs to the linguist. When the linguist language pairs match the language pair of a project, only then they could be seen and assigned on the assignment page:
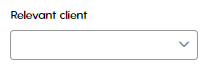
PMs can set a relevant client for the linguist:
Finally, PMs can grant linguists permission to write on TM:
Creating Linguists
Clicking the +Add Linguist button at the top right, you can add a new executor:
Fill in the executor’s info in the fields as needed. Red fields are mandatory:
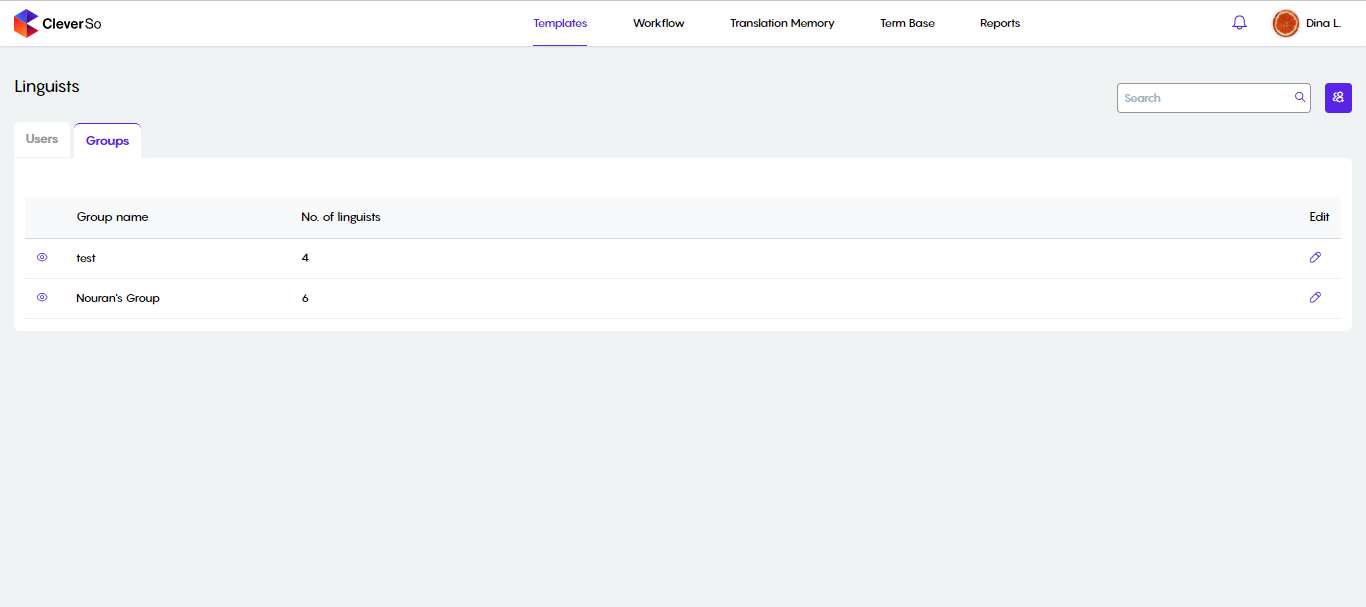
Grouping Linguists
PMs can build a group of certain linguists of their choice by selecting the Group tab. By grouping linguists, PMs can more easily allocate linguists, ensuring that the invites are only issued to the pre-selected linguists. Additionally, linguists could be added to several groups.
The group can be activated or deactivated, and PMs are free to add as many linguists as they require. Additionally, notifications sent via the automated assignment feature will reach them if the language pairs assigned to the users in the selected groups match the language pairs of the project.
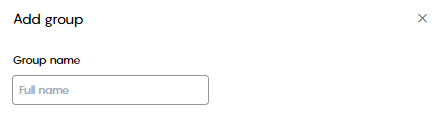
To create a new group, click the blue button found on the top left:
When that button is clicked, a new window will pop up, allowing PMs to name the group they are creating:
In the lower section, By selecting the boxes next to each linguist, PMs could choose the linguists they needed:
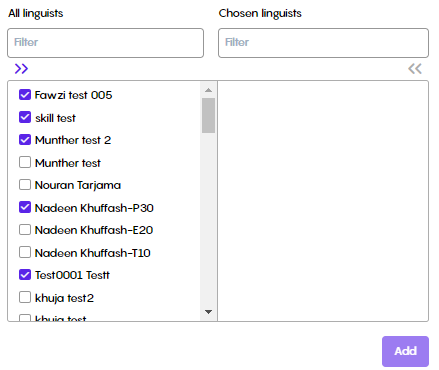
PMs must then move the linguists they've chosen to the Chosen Linguists section. this may be accomplished by clicking the >> button:
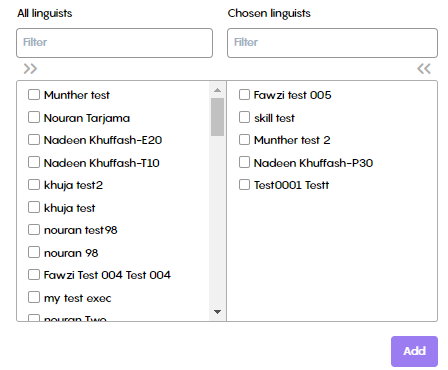
PMs must click the Add button after they have finished moving linguists. After pressing that button, the group will be created and available for use.
Managing Clients
As a PM, you can edit and create new Clients by following the below steps:
On the project page, click the 3 dots next to Create button, then select Clients:
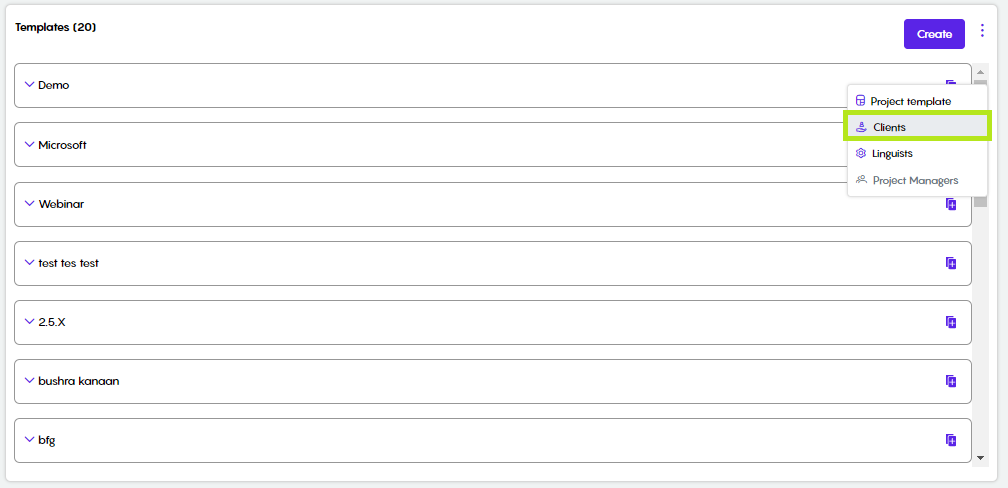
Clicking Clients will take you to the Clients list:
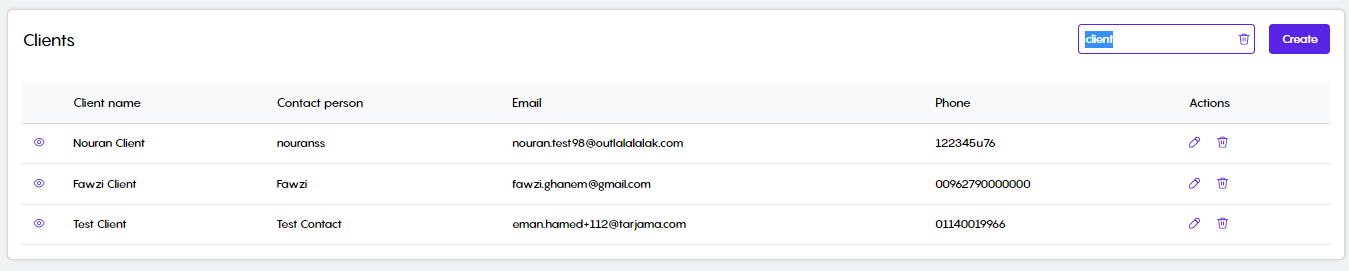
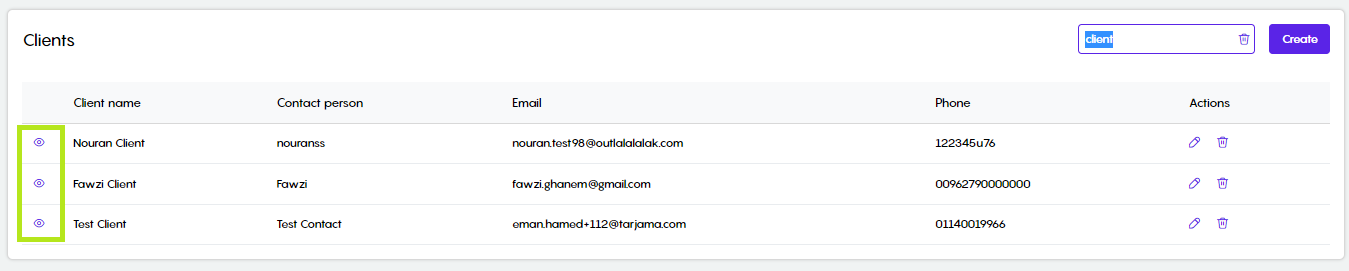
You can activate/deactivate the client by clicking the icon next to the name of the client:
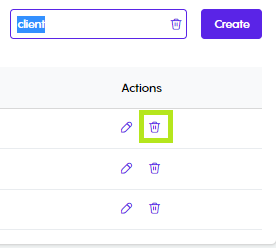
You can Delete a client by clicking the delete button next to that client:
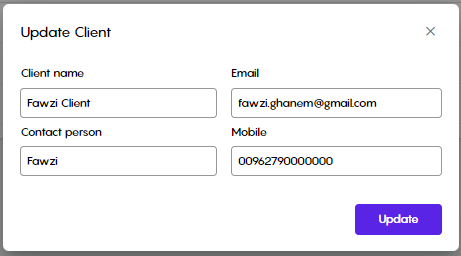
You can also edit a client by clicking on the edit button next to them:
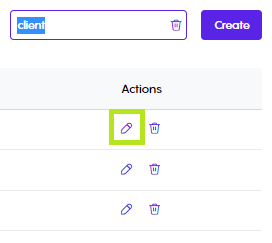
Clicking the edit button will open a new window where you can edit the client info:
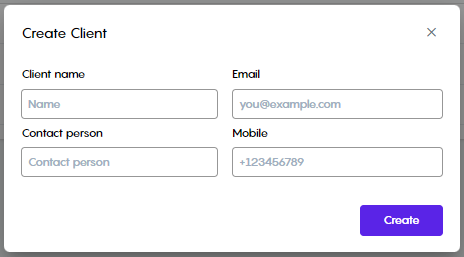
You can as well add new clients by clicking the Create button at the top right. Clicking that button will open a new window where you need to fill in client info:
Managing Workflow
In the workflow tab, you can create certain rules to be applied to templates/projects once a project is created as per your PM needs:
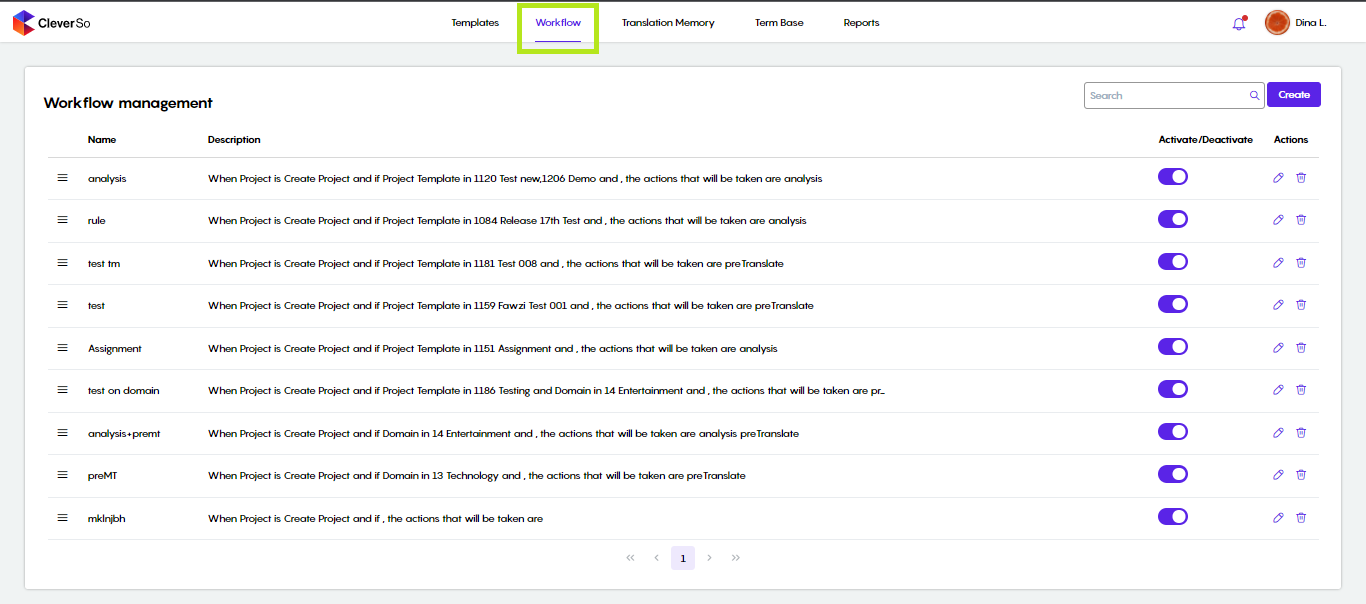
Clicking the workflow tab, you will be able to see, activate/deactivate, edit or delete the already defined rules:
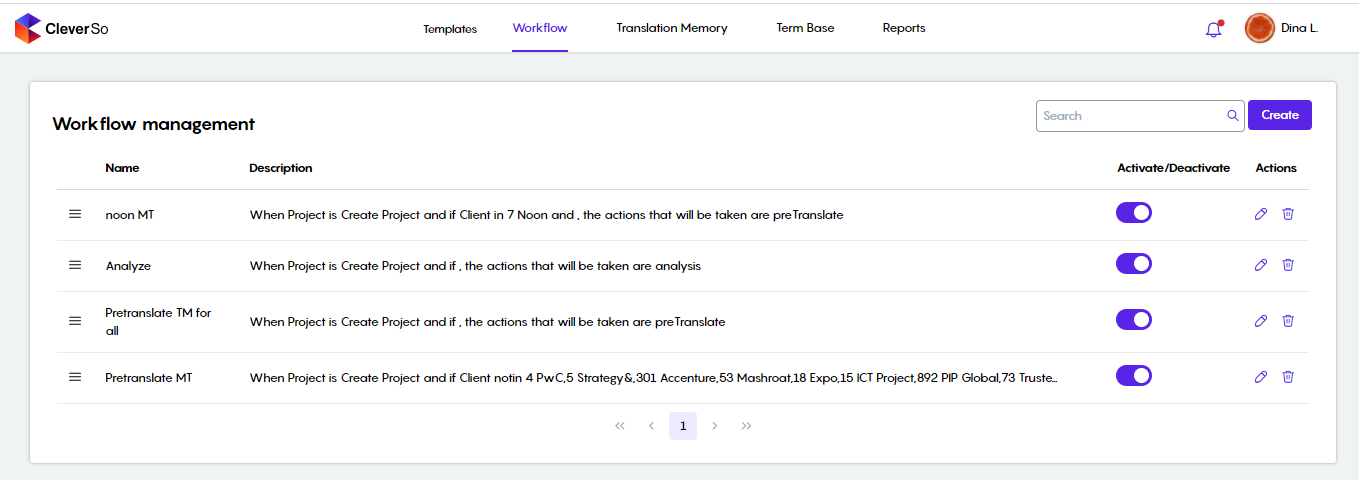
PMs can as well search for a rule by inserting the rule name in the search box on the top left. They can also create a new rule by clicking the create button on the top left:

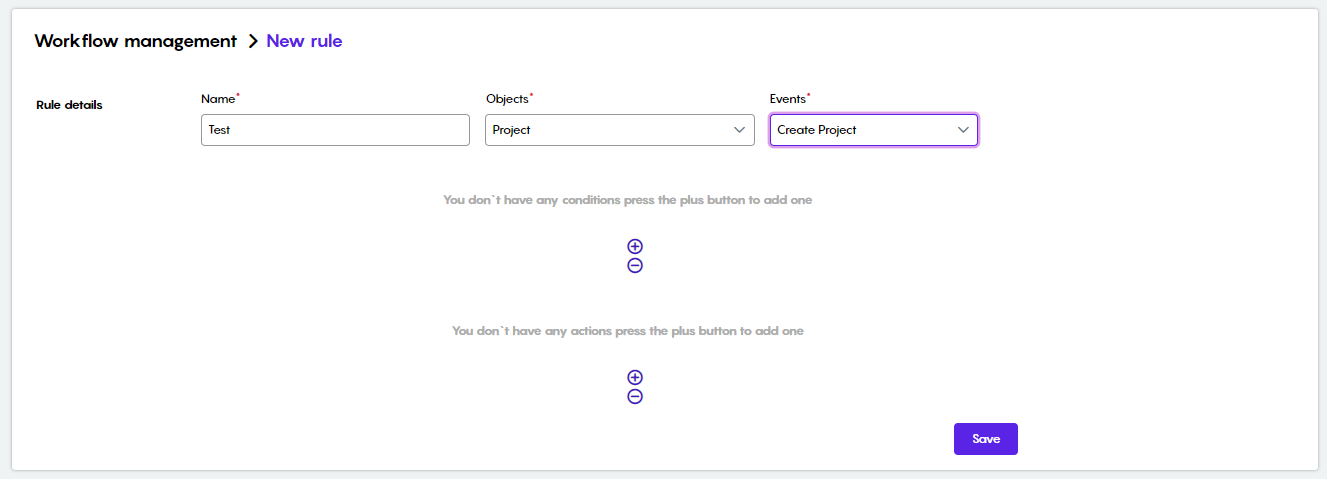
The Create button will take you to a new screen where you can set the rule criteria as per your needs.
In the rules details section, you need to fill in the rule Name and select an Object. The Object can be either a Project or a User depending on the purpose needed from the rule:

If the object selected was Project:
A new field (Event) will be shown where you will need to select Create Project.
Selecting the Create Project event, 2 new sections will be available, Conditions and Actions:
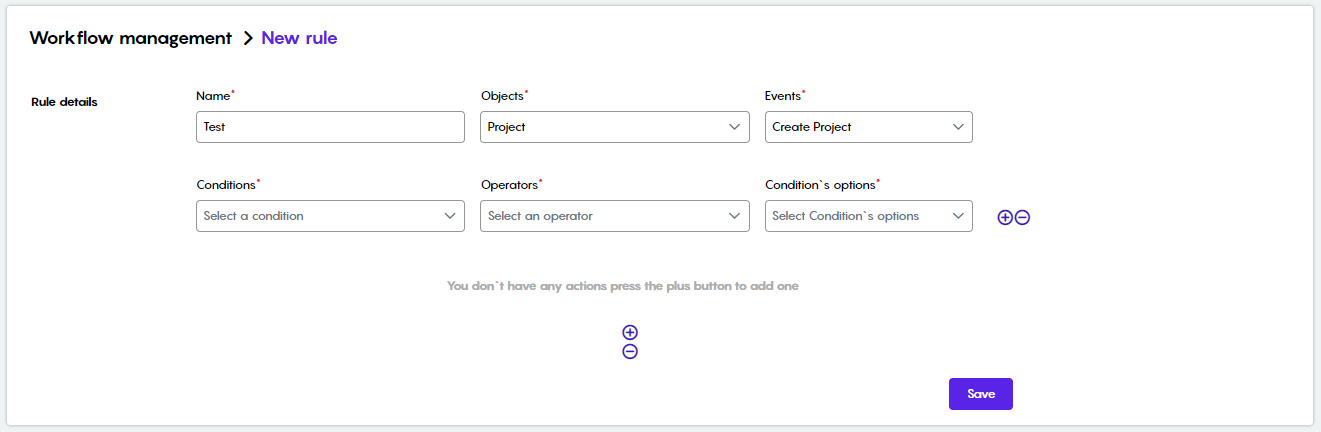
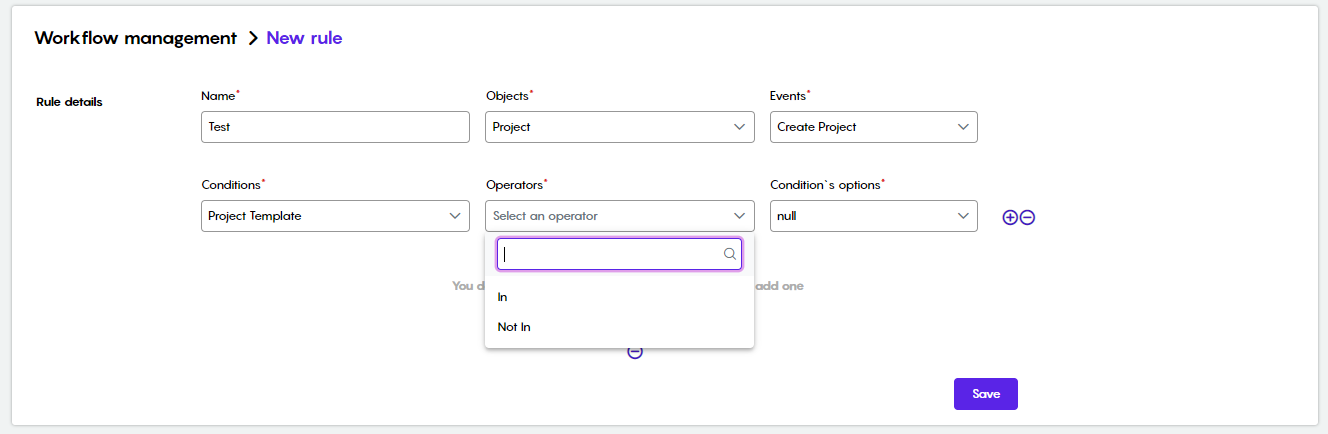
Clicking the + button in the Conditions section will show the Condition fields:
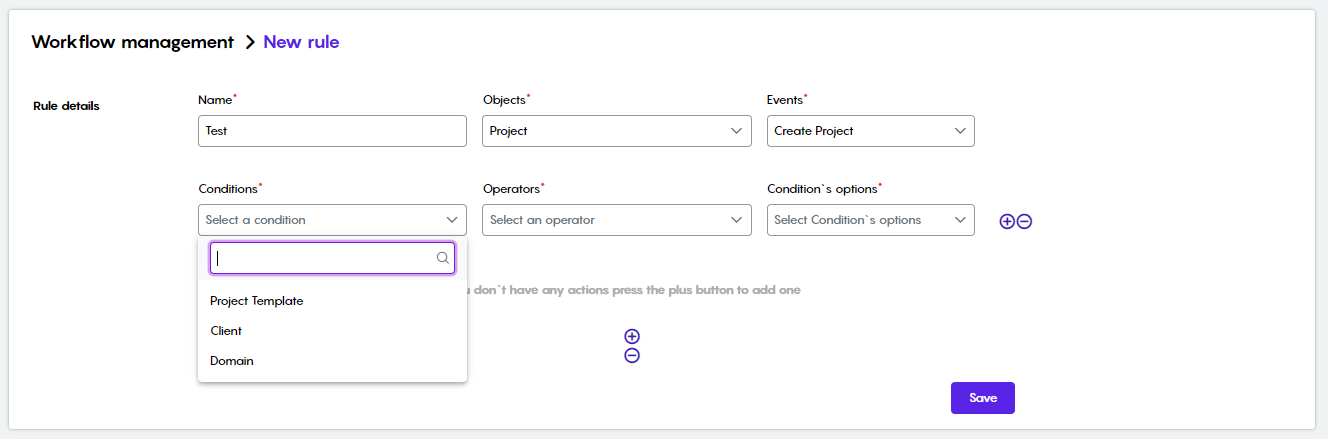
In the Conditions field, you can choose between Project Template, Client, or Domain, depending on the criteria needed. We will choose the project template for now:
In the Operator field, you can choose whether to apply the condition in a certain template or on all other templates except the selected one. Our choice will be In for now:
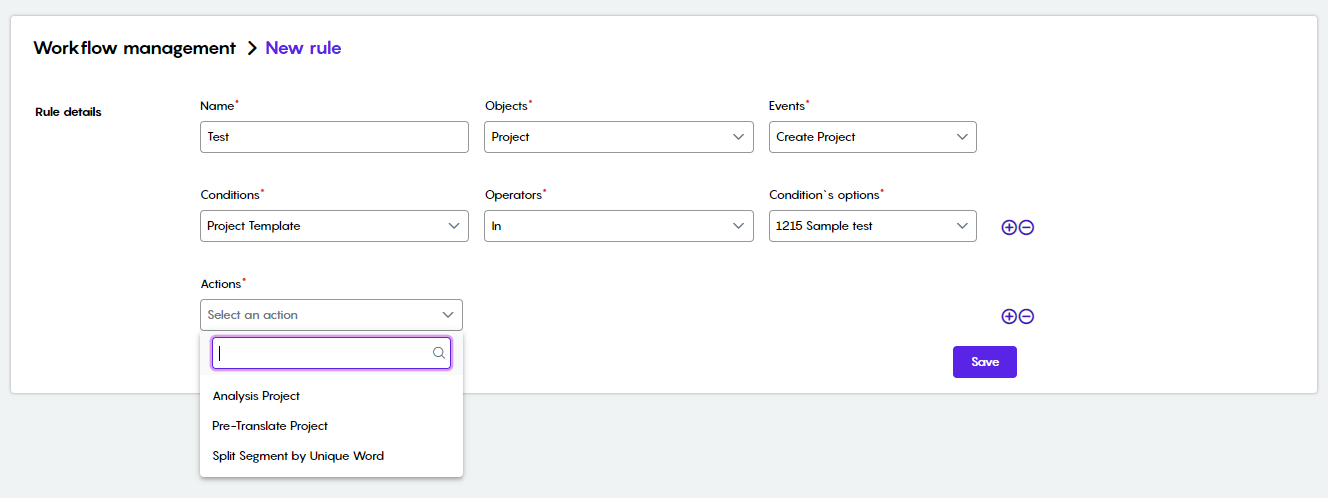
In the condition options, you will now be able to select the Template you need to apply the rule on:

You can add more than one condition by clicking on the + button.
In the Actions section, you can select between Analyzing the project that is going to be created in the selected template, Pre-translate the project using Machine Translation, or Splitting segments by a unique word:
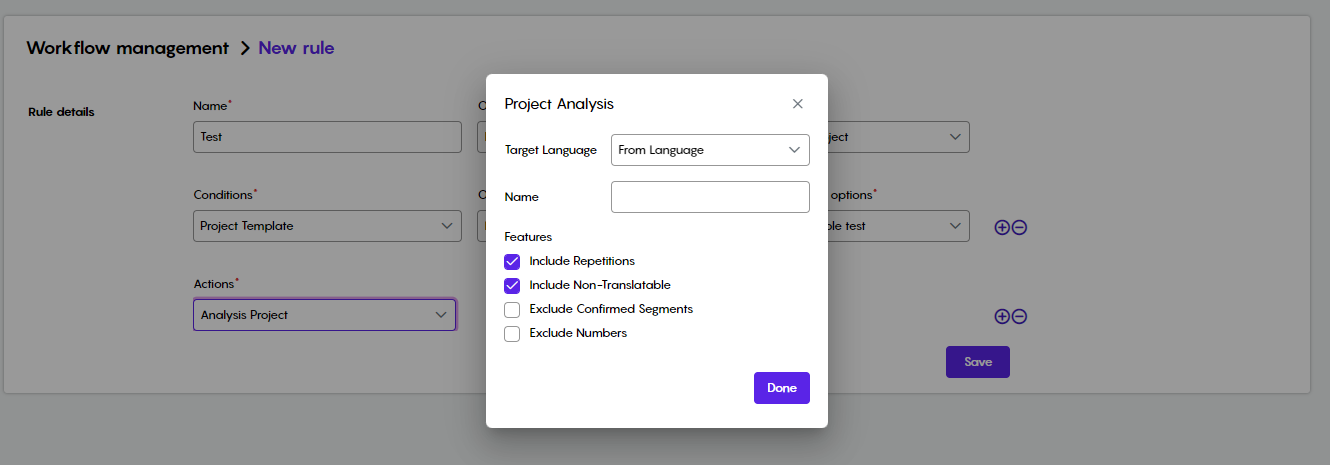
Selecting Analyze Project will open the Project Analysis, where you can set the target language, name the analysis, and select what to include and exclude:
You can as well add another Action by clicking the + button:
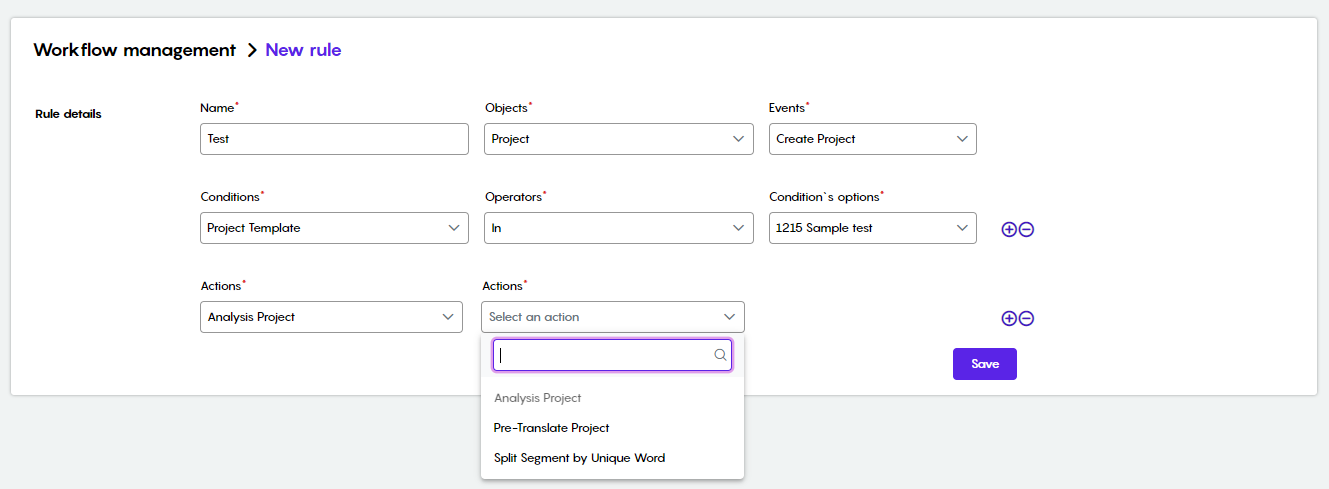
Finally, click save to save the rule.
Managing Translation Memories (TM)
Clicking the Translation Memory tab will take you to CleverSo’s TM list, where you will be able to view all available translation memories:
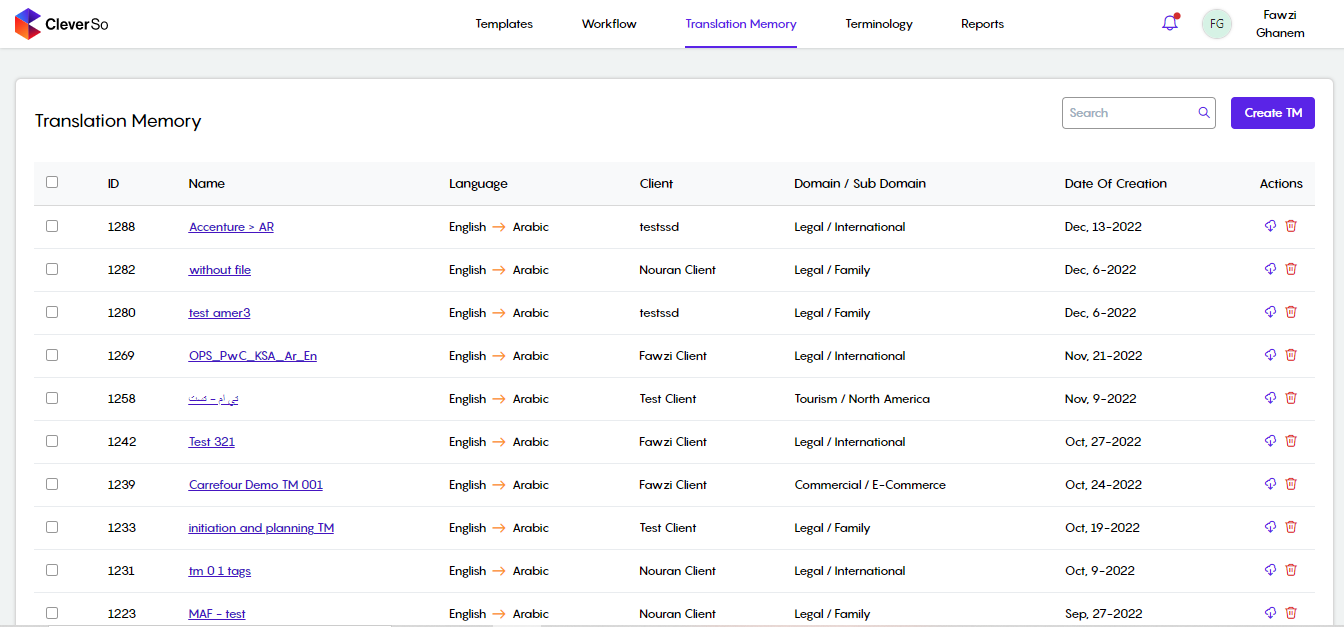
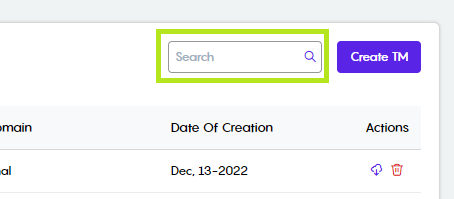
You can search for a certain TM using the search field:
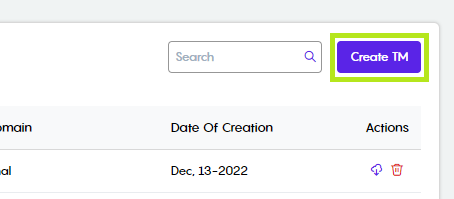
You can create a new TM by clicking the Create TM button:
Clicking a TM’s name will take you to the TM details screen, where you can view info about that TM, including the ability to check the TMs related projects:

Moreover, you can also do the following actions to a TM:
Import a TM to update/amend the current one:

Edit the TM:

Delete the TM:

Below the TM info section, you will be able to search in TM:
Fill in the text you are looking for in the search field, and the results will be listed beneath it:
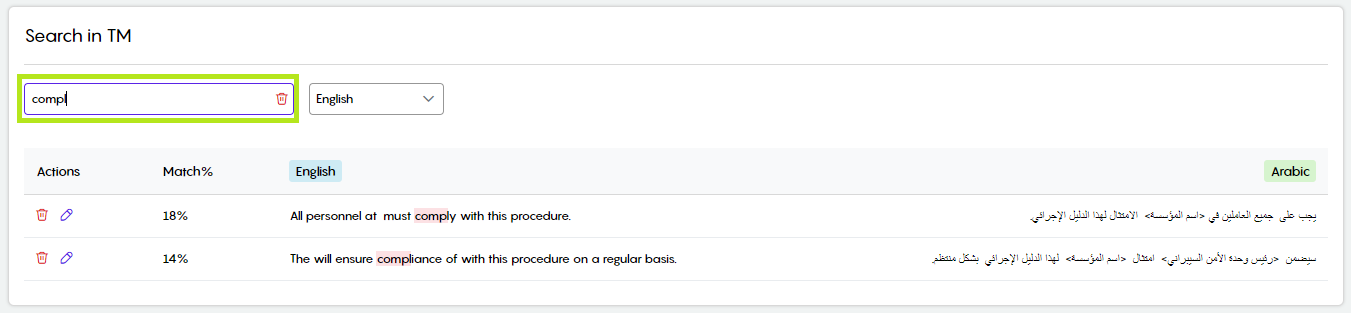
You can select the language of the text you are looking for (source or target):
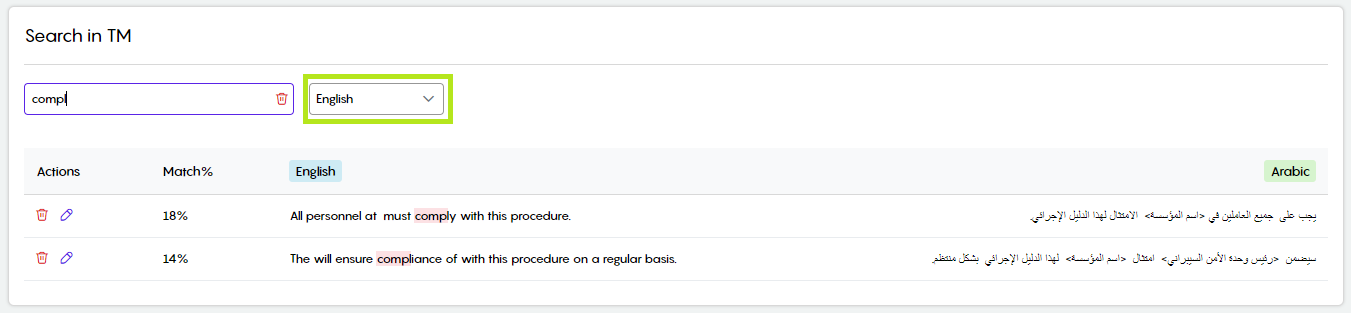
Clicking the Edit button under the actions will enable you to edit the source or the text of a TM match:

Clicking the Delete button under the actions will delete that match from the TM:

Managing Termbases (TB)
All available termbases will be listed in the Termbases subtab. Each termbase has its unique ID, name, languages, and more:
Termbases could be filtered by Name and Client.
A Termbase could be downloaded, either in TBX or CSV format, using the download button in the Actions column:

Clicking the download button next to a certain termbase will prompt you to select the needed format:

A termbase could be deleted by clicking the Delete button in the action tab:

Creating New Termbase
A new termbase could be created by clicking the Create button on the top right:
Clicking the Create button will prompt you to select the method you need to create your new termbase, where you can either create a new termbase or upload an existing one:

Clicking the Create a New TB button, you will prompt to fill in a bunch of fields:
Clicking the Create button, your new termbase will be listed in the termbases list:

Clicking the Upload an Existing TB, you will be prompted to select a file (xlsx) to upload:


The excel file needs to include the following columns:
A: ID
B: The source language
C: The 1st target language
D: The 2nd target language… etc.
After the excel file is uploaded, you will be prompted to fill the below fields:
Clicking the Create button, your new termbase will be listed in the termbases list:

Newly created Termbases need to be approved. This could be done by clicking the Approve button:

Editing an existing Termbase
To edit an existing termbase, click its name:

Clicking the TB name will redirect you to where the TB info is displayed:

All terms will be listed below the TB info:

You can use the Search bar to find a certain term. You can as well select the language of the term you are looking for:

Clicking the Add Term button, you will be prompted to insert the term and its translation. Click Save to insert the term:
Moreover, you can add another suggestion either to the source or the target term. This could be done by hovering the mouse over the term, clicking the + button, filling in the term, and clicking ✓:

Suggested Terms
In the suggested Terms subtab, you will find projects at which associated linguists have suggested terms to be added to the Termbase:

Clicking the project name (if any) will list all terms that have been suggested by the linguists assigned to that project while they are working on it:

Here, you can either accept ✓ or reject X the term.
In case of accepting, you have the option to choose the termbase to add the term you are going to accept:
Terms Extraction
The Terms Extraction feature helps in extracting a termbase out of a project. It could be accessed via the actions button in the File Details screen of a project:

Click the actions button in the File Details screen
Click Terms Extraction from the list
Clicking the Term Extraction option will open a new window:

Fill in the desired Termbase name in which the extracted terms will be saved
Fill in the length of the segment, the number of words in the segment
Fill in the occurrence of the term, how many times does the segment gets repeated
Click Extract
The extracted termbase could be found in the Termbase subtab under Terminology
The End