Groups - Making Changes
Consider two factors when making changes:
Whether the individual Student Accounts and Enrolments have been created
Whether the group has been invoiced or not
These factors influence the steps to take, outlined below.
Note it is much simpler to make changes to the Group prior to creation of Student Accounts/Enrolments and prior to invoicing.
Therefore, generally wait until the group requirements have been confirmed before creating the Student Accounts/Ernolments and invoicing.
Changes Prior to Student Account/Enrolment creation; Prior to invoicing
Adding Group Members
To add an additional Group Member, open the Group Enrolment and click on “Add New Member”
This will change the Group Size and add an additional line in the Group Members panel.
Enter any details as required and update the Bookings if necessary (if the Booking is set to apply to Students, then the booking will automatically applied to the new Group Member, if not a Group Leader)
Save any changes at the top of the screen.
Removing Group Members
To remove a student from a Group, open the Group Enrolment, and either:
Click Delete next to the Group Member you wish to remove, or
Click on the “Remove Members” button at the top of the Group Members list to remove multiple Group Members, select the Members to remove and Update Group Members:

The Group Size on the Group Enrolment and the Group Account are updated automatically as part of this process.
Changing Bookings
Use the Edit, Cancel or “New” buttons in the Group Enrolment Bookings panel to adjust any Bookings.
Follow the process outlined in this article to assign the Bookings/Finance to the correct Group Member.
Save when finished. Note any manual changes made to the unposted finance will be reset and will need to be re-entered.
Changes After to Student Account/Enrolment creation; Prior to invoicing
Adding Group Members
To add an additional Group Member, open the Group Enrolment and click on “Add New Member”
This will change the Group Size and add an additional line in the Group Members panel.
Enter any details as required and update the Bookings if necessary (if the Booking is set to apply to Students, then the booking will automatically applied to the new Group Member, if not a Group Leader)
Select “Update Students” at the top of the screen to propogate any changes across the Student Accounts and Enrolments.
Removing Group Members
To remove a student from a Group, open the Group Enrolment, click on the “Cancel Students Enrolments” button at the top of the Group Members list:

Select which student to cancel by ticking the box on the left hand side, then Update Group Members to return to the Enrolment (there will be an “Are you sure?” dialogue box):

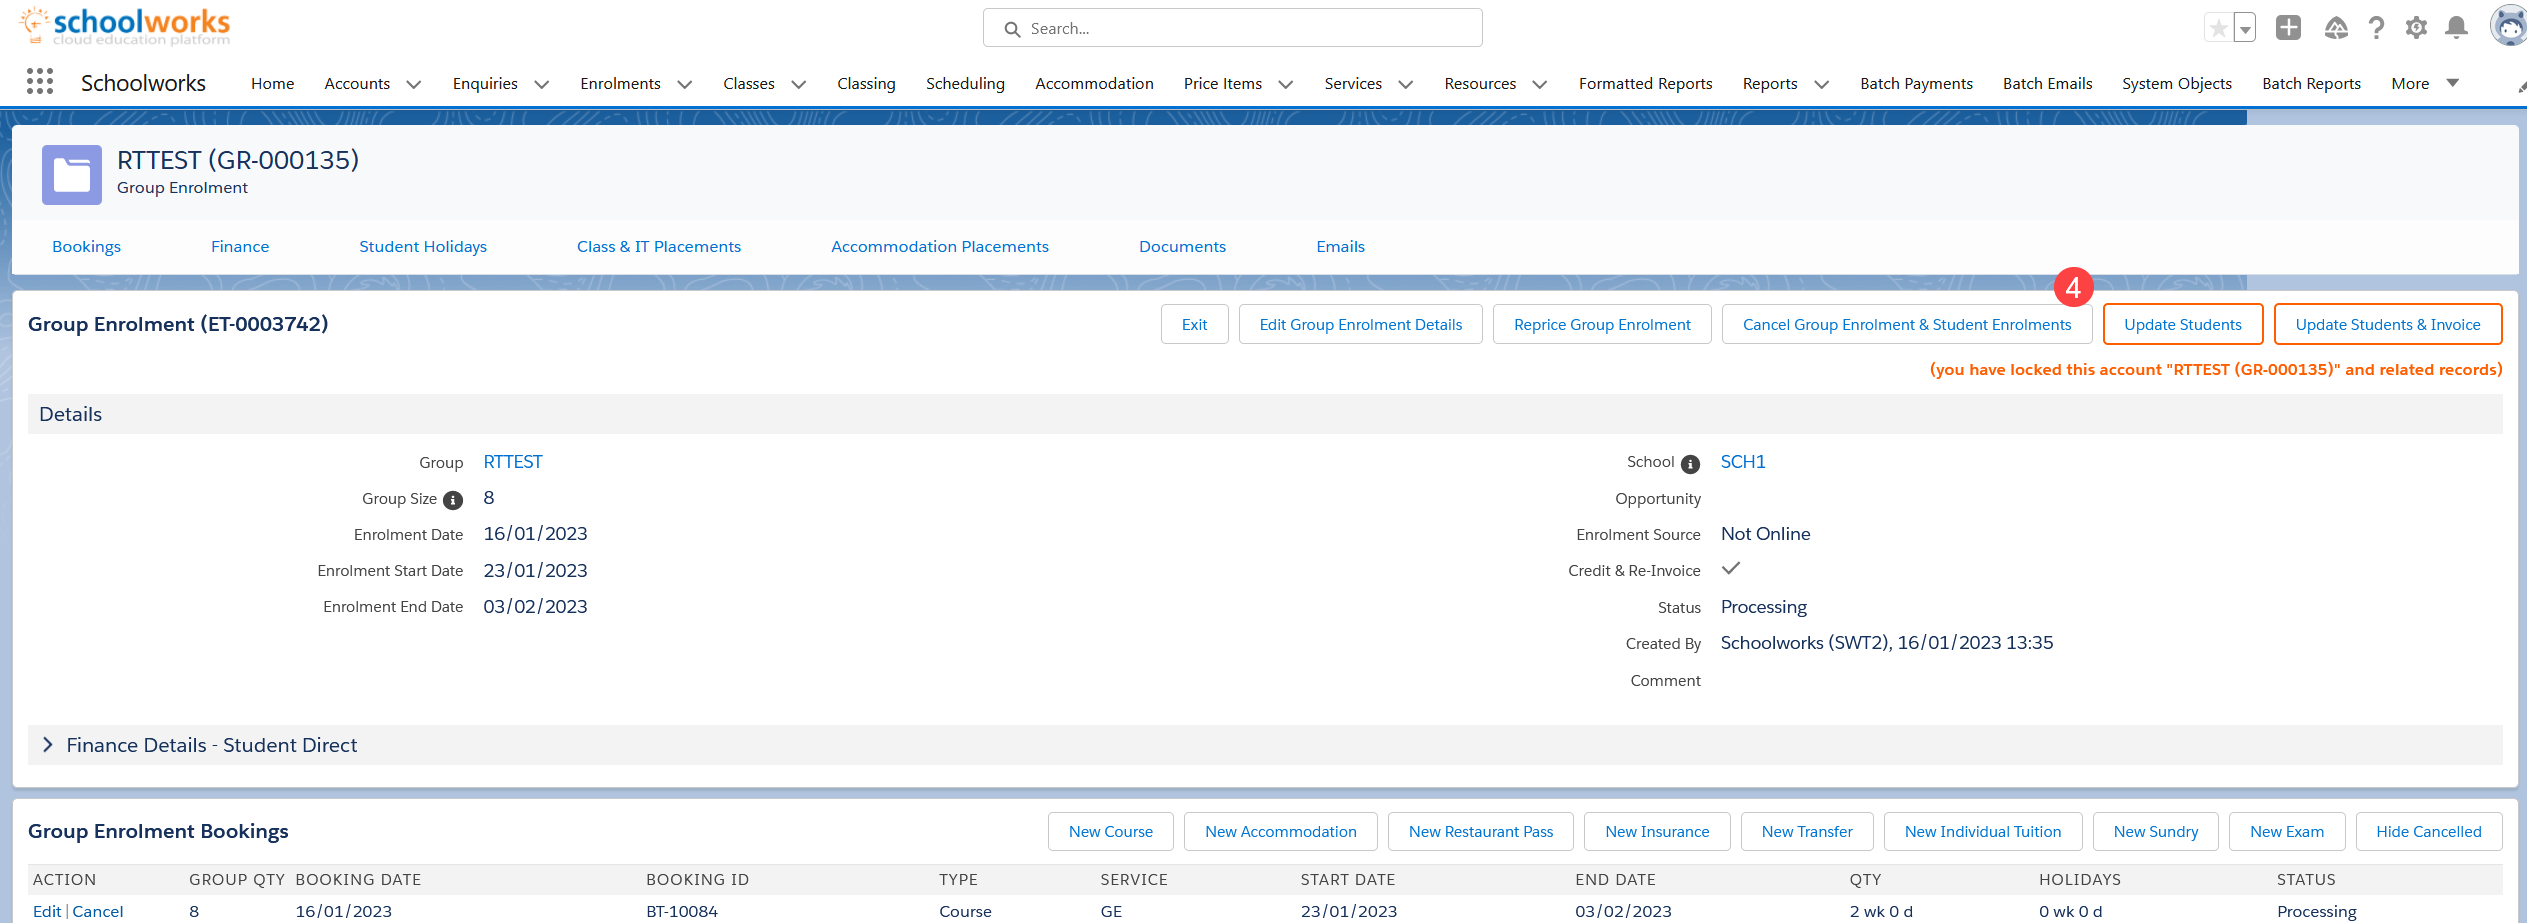
Then Update Students at the top of the Enrolment:

Then the system will go ahead and run the batch to update the students. This batch runs in the background and you will be emailed when it is complete.
The Group Size on the Group Enrolment and the Group Account are updated automatically as part of this process.
Changing Bookings
Use the Edit, Cancel or “New” buttons in the Group Enrolment Bookings panel to adjust any Bookings.
Follow the process outlined in this article to assign the Bookings/Finance to the correct Group Member.
Note any manual changes made to the unposted finance will be reset and will need to be re-entered.
Select “Update Students” at the top of the screen to propogate any changes across the Student Accounts and Enrolments.
Changes After Student Account/Enrolment creation; After invoicing
Adding Group Members
To add an additional Group Member, open the Group Enrolment and click on “Add New Member”
This will change the Group Size and add an additional line in the Group Members panel.
Enter any details as required and update the Bookings if necessary (if the Booking is set to apply to Students, then the booking will automatically applied to the new Group Member, if not a Group Leader)
Select “Update Students & Invoice” at the top of the screen to propogate any changes across the Student Accounts and Enrolments.
Removing Group Members
To remove a student from a Group, open the Group Enrolment, click on the “Cancel Students Enrolments” button at the top of the Group Members list:

Select which student to cancel by ticking the box on the left hand side, then Update Group Members to return to the Enrolment (there will be an “Are you sure?” dialogue box):

The Group Size on the Group Enrolment and the Group Account are updated automatically as part of this process.
Changing Bookings
Use the Edit, Cancel or “New” buttons in the Group Enrolment Bookings panel to adjust any Bookings.
Follow the process outlined in this article to assign the Bookings/Finance to the correct Group Member.
Note any manual changes made to the unposted finance will be reset and will need to be re-entered.
Select “Update Students & Invoice” at the top of the screen to propogate any changes across the Student Accounts and Enrolments.
Reinvoicing
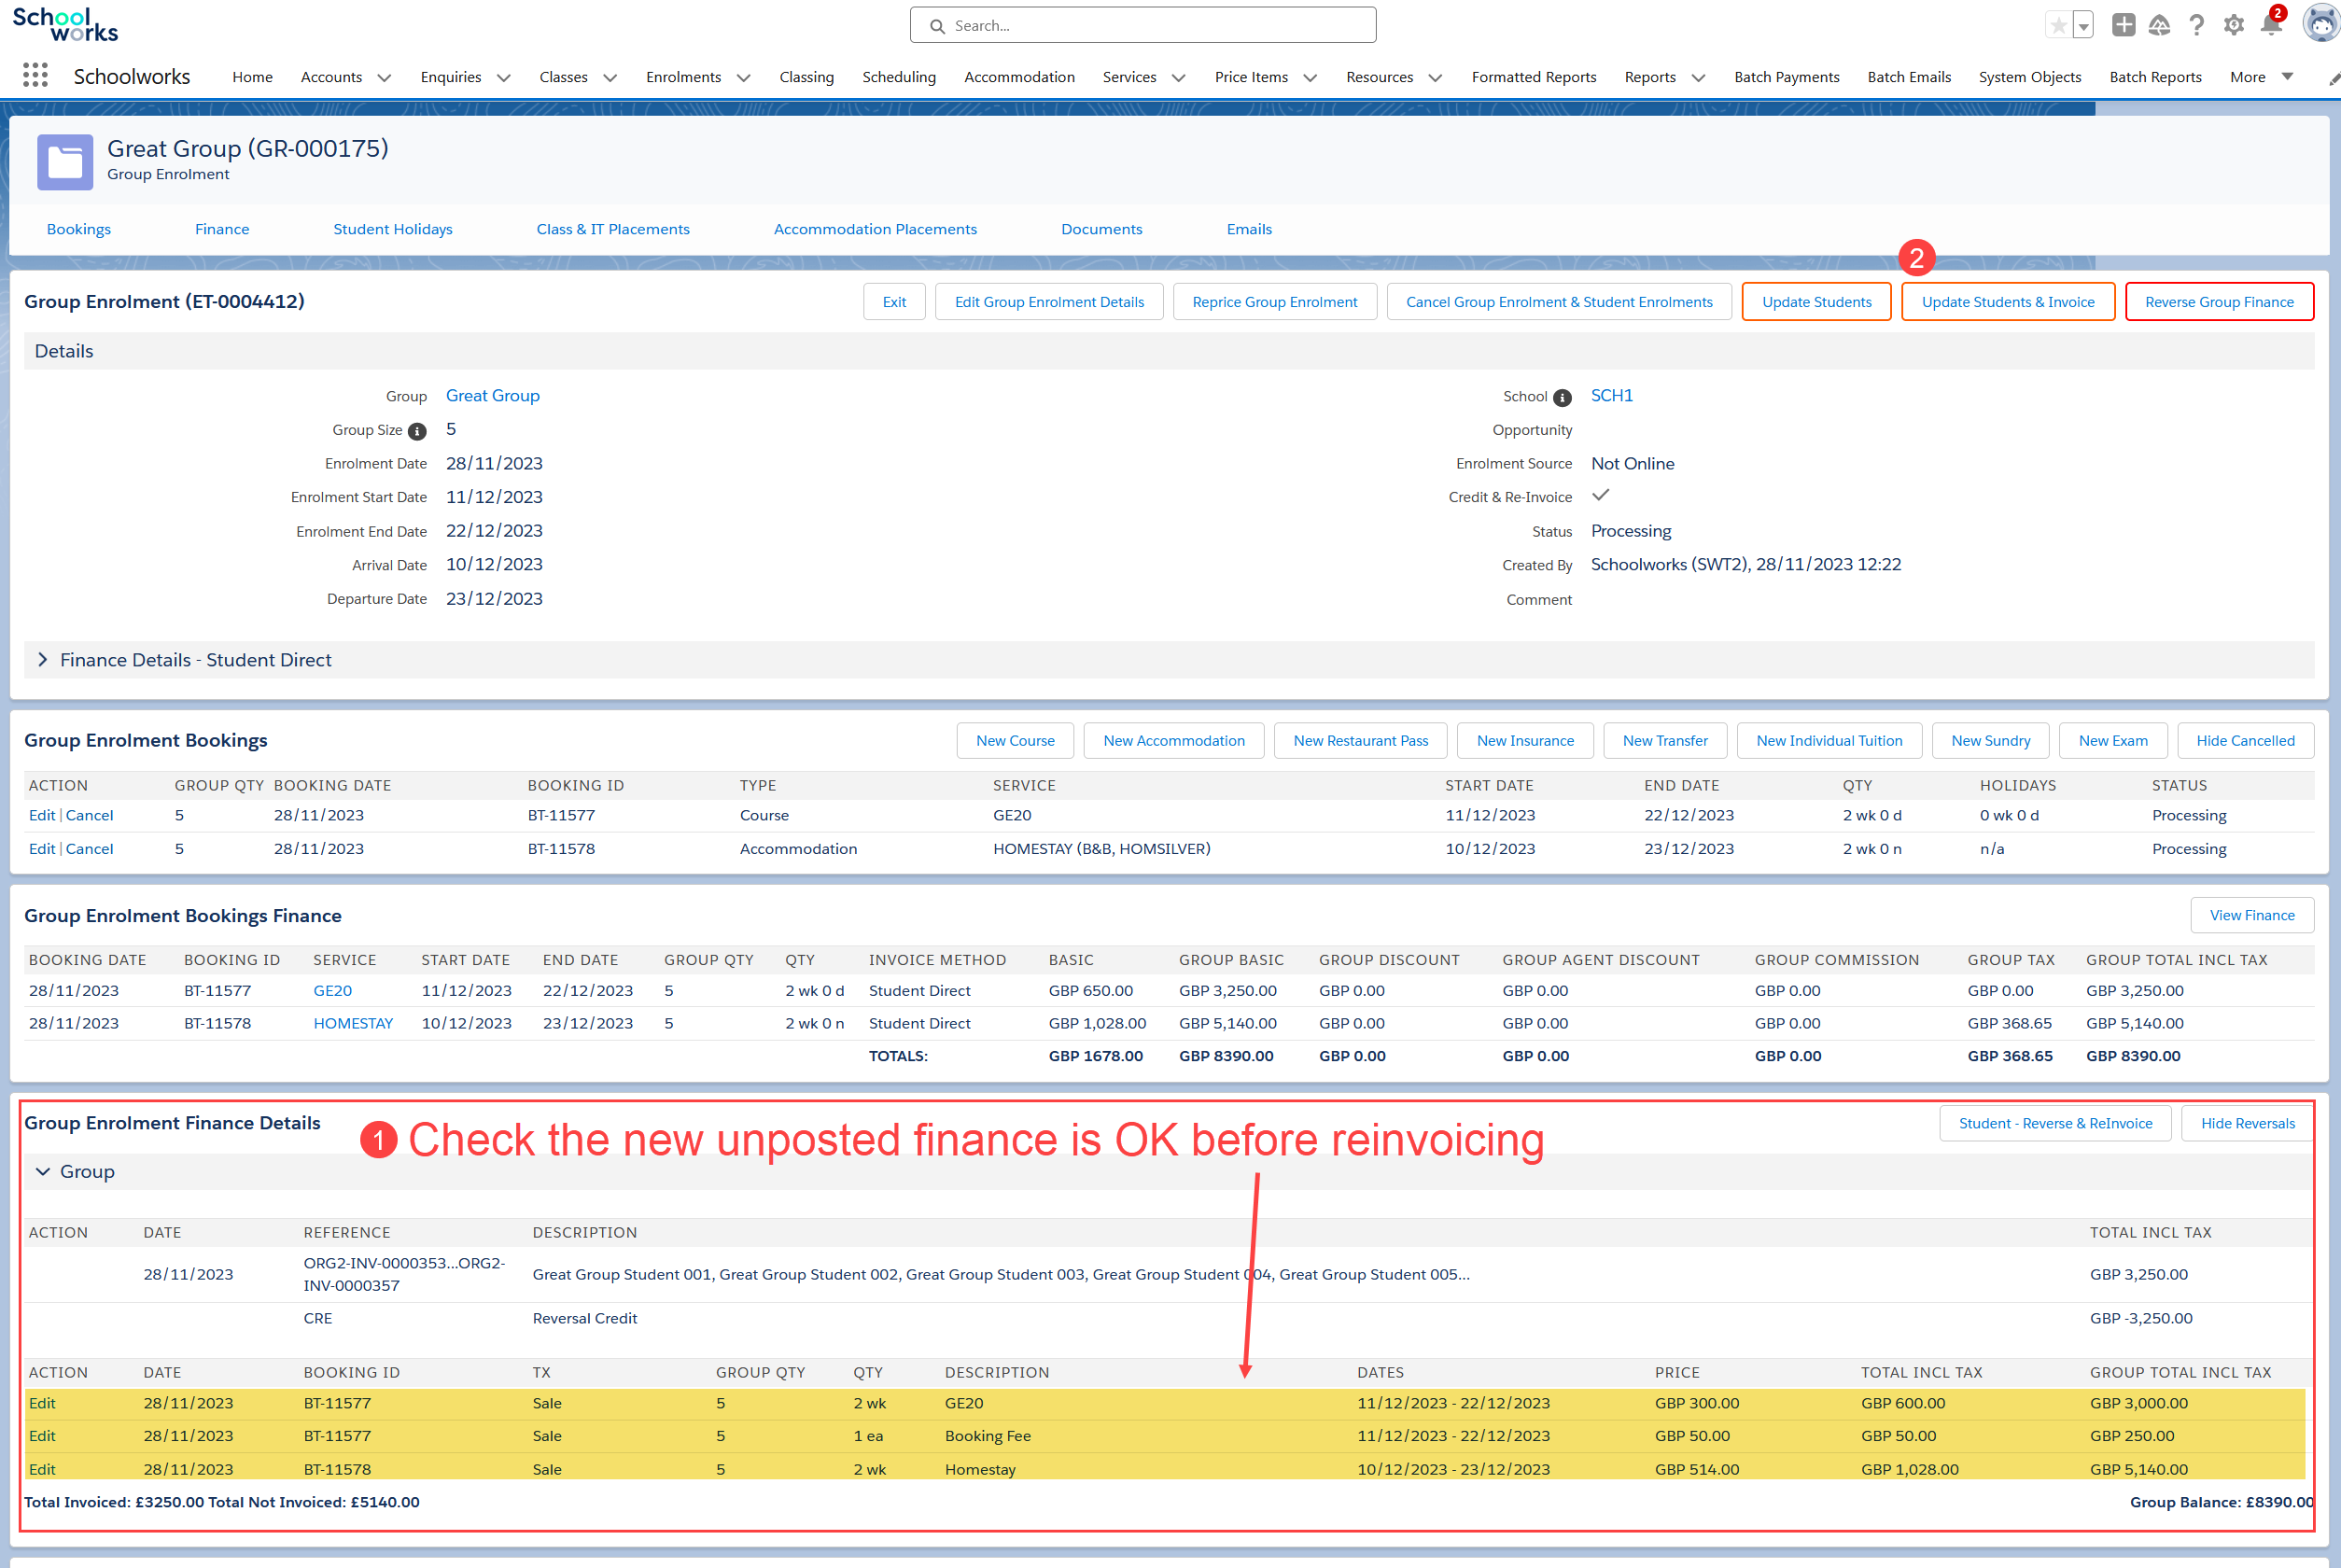
Any of the changes made above will generate a Credit for the original invoice and new unposted finance for the new invoice for the whole group.
Note it is not possible to create a “difference” invoice or credit note for a group - all changes always result in a full credit of the first invoice and the generation of a new full invoice.
Please note if any manual prices have been entered, they will need to be re-entered prior to reinvoicing.
When you are happy with the unposted finance that is displayed and are sure everything is correct, press “Update Students & Invoice” at the top of the Enrolment.
In the example below, an additional Accommodation booking has been added after the Course was invoiced. Pressing “Update Students & Invoice” will result in a Credit for the original invoice, and a new invoice for the full Enrolment:

The system will then go ahead and run the batch to update the Student Accounts and Enrolments and generate a new invoice. This batch runs in the background and you will be emailed when it is complete.
See also this article on invoicing changes to Groups.